Introduction
This step-by-step guide teaches you how to disassemble your Samsung PL200 Camera to replace the motherboard.
Replacing the motherboard can fix issues such as unresponsive controls, non-powering units, or significant battery drain. So, if your camera will not turn on, won't hold a charge, or has other internal electronic failures, the cause is likely a faulty motherboard.
Replacing the camera's motherboard is a delicate process that requires precision for the fragile, small components. The ribbon cables are extremely delicate, so handle the replacement with care.
Before beginning, ensure the camera's battery and SD card are removed to avoid damage.
What you need
-
Tool used on this step:Phillips #000 Screwdriver$5.49
-
Remove the two 3mm black external screws from the camera's right side using the #000 Phillips screwdriver.
-
Remove the five 3mm silver external screws from the bottom and left side of the camera using the #000 Phillips screwdriver.
 Ask FixBot
-
-
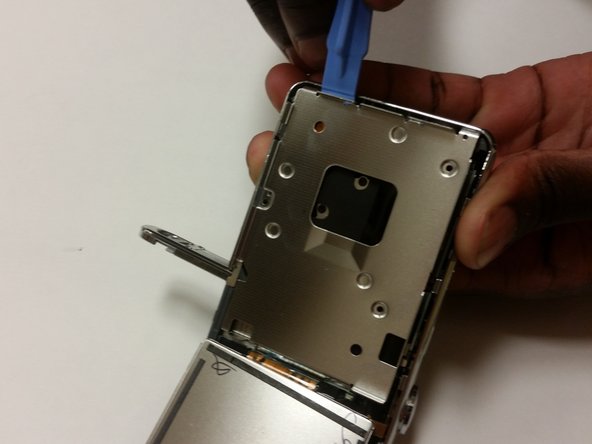
Tool used on this step:iFixit Opening Tool$1.99
-
Use the iFixit plastic opening tool to pry off the external cover and remove it.
-
-
Tool used on this step:Phillips #000 Screwdriver$5.49
-
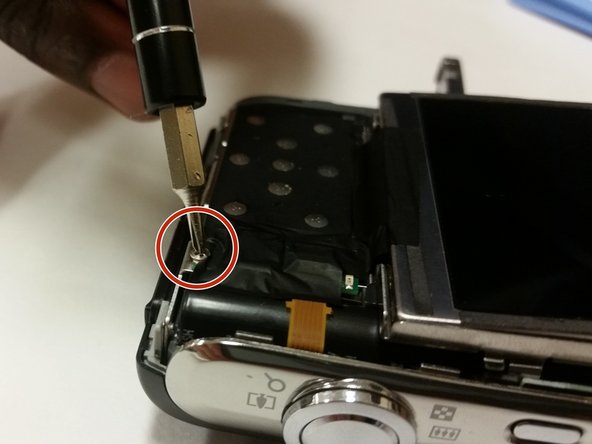
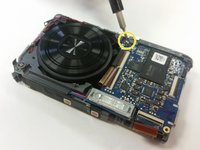
Remove the 3mm screw holding the circuit board using the Phillips #000 screwdriver.
-
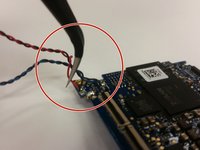
Using tweezers, unplug the wires from the circuit board and remove the circuit board.
-
-
Tool used on this step:Phillips #000 Screwdriver$5.49
-
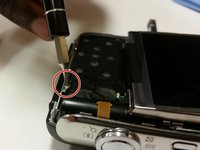
Flip the display screen forward. Remove the two silver 3mm screws beneath it using the Phillips #000 screwdriver.
-
Use the plastic opening tool to remove the metal brace.
-
-
-
Tool used on this step:Tweezers$4.99
-
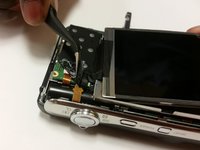
Use tweezers to lift the black latch that connects the screen and motherboard. Gently pull the cord to disconnect the screen.
-
Separate the screen and the metal brace from the camera's body.
-
-
Tool used on this step:iFixit Opening Tool$1.99
-
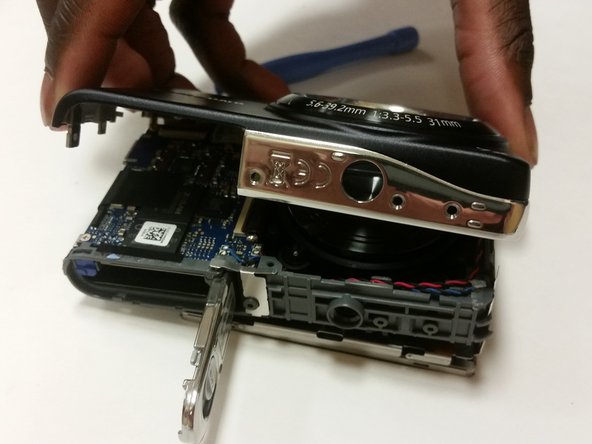
Use the plastic opening tool to remove the front cover of the camera.
-
-
Tool used on this step:Phillips #000 Screwdriver$5.49
-
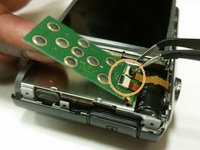
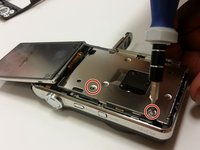
Use the Phillips #000 screwdriver to remove the two silver 3mm screws. These hold the motherboard in place.
-
If the motherboard has black tape on it, remove it with the tweezers.
-
-
Tool used on this step:Tweezers$4.99
-
Continue using the tweezers to remove any black tape present.
-
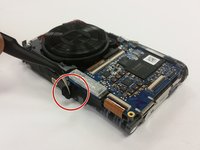
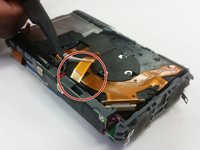
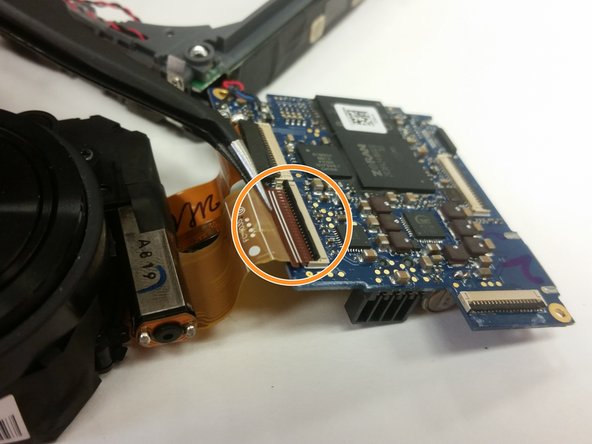
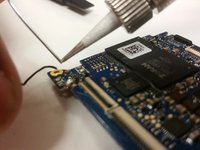
Use the tweezers to disconnect the lens unit cord that is at the bottom of the camera below the motherboard.
-
Use the Phillips #000 screwdriver to remove the final silver 3mm screw that holds the motherboard in place.
-
-
Tool used on this step:Tweezers$4.99
-
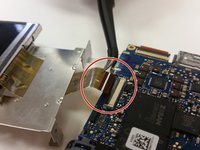
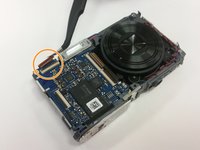
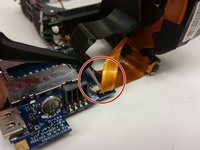
Use the tweezers to unplug the small lens unit cord from the back side of the camera's frame.
-
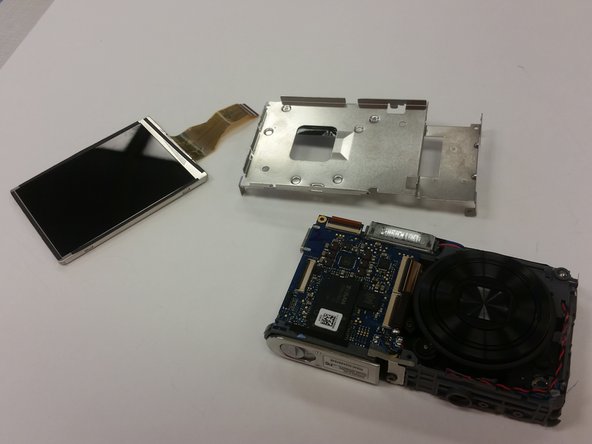
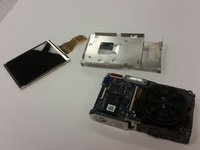
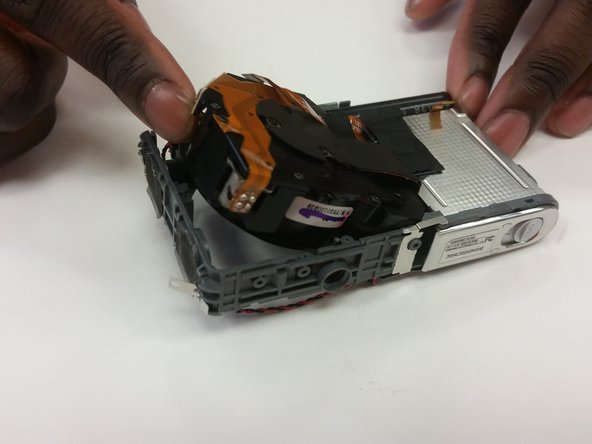
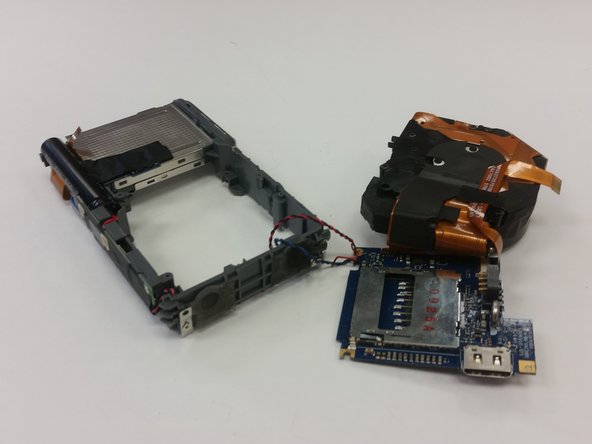
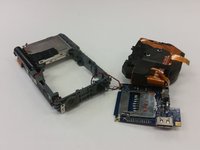
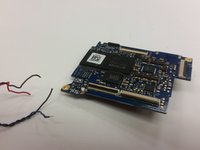
Separate the lens unit, motherboard, and camera.
-
-
Tool used on this step:FixHub Portable Soldering Station$249.95
-
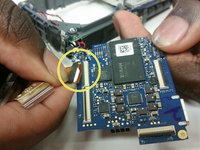
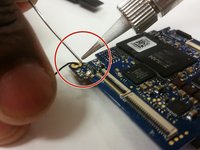
Using the soldering iron, desolder the four wires from the old motherboard.
-
-
Tool used on this step:FixHub Portable Soldering Station$249.95
-
Using the soldering iron, solder on a functional motherboard.
-


To reassemble your device, follow these instructions in reverse order. Take your e-waste to an R2 or e-Stewards-certified recycler.

Team

Clemson, Team 15-7, Shirley Winter 2015 Member of Clemson, Team 15-7, Shirley Winter 2015
CLEM-SHIRLEY-W15S15G7
5 Members
10 Guides authored