Samsung PL20 LCD Replacement

oldturkey03 and 4 other contributors
Last updated on Aug 24, 2016
Views: 5K
View statistics:
- Past 24 Hours:
- 2
- Past 7 Days:
- 50
- Past 30 Days:
- 157
- All Time:
- 5,017
Comments: 1
1 guide comment.
Go to guide commentsCompleted: 7 8
7 people have marked this guide "completed." Will you be next?
8 people have marked this guide "completed." Including you — great job!
Favorites: 3 4
3 people have favorited (and subscribed to) this guide. Will you be next?
4 people have favorited (and subscribed to) this guide — including you!
Action Shots
Be an action hero! This guide needs images that better demonstrate how to perform specific actions.
Slice and Dice
The steps in this guide should be split up and made into a series of prerequisite guides.
Community-Contributed Guide
An awesome member of our community made this guide. It was not created by iFixit staff.
Introduction
Go to step 1 ↓Here is a PL20 that has a broken LCD, as well as some other issues. The repair is straight forward. The only tools used were a Phillips screwdriver and a plastic opening tool, which is optional. This camera was actually fun to work on; it was easy and took no time at all.
What you need


-
-
-
Here is the broken LCD. The spider crack in the glass, as well as the discoloration of the screen, is clearly visible.
-
Remove the battery and the memory card from the device, if so equipped.
-
Remove the two screws on the left side.
 Ask FixBot
-
-
-
Remove one screw from the bottom
-
Remove the two screws on the right side.
-
Use a plastic opening tool, or your fingernails, to split the casing apart. Start from the battery compartment and work your way around the case. The case should split easily.
-
-
-
-
Once the back of the case is removed, the LCD becomes immediately visible.
-
Remove the LCD from its holder to gain access to the connector.
-
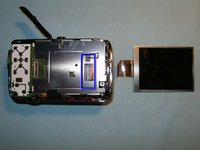
Open the connector, and flip the black clip upwards, freeing the LCD. It can now be removed and the new one installed.
-
-


To reassemble your device, follow these instructions in reverse order.
Cancel: I did not complete this guide.
7 other people completed this guide.