Free Shipping on Domestic Orders $75+

Samsung NX1 Viewfinder Replacement

What you need

  1. Samsung NX1 Viewfinder Replacement, Viewfinder Focus Dial: step 1, image 1 of 2 Samsung NX1 Viewfinder Replacement, Viewfinder Focus Dial: step 1, image 2 of 2
    • Push the rubber viewfinder grip upward.

    Ask FixBot

    Add Comment

  2. Samsung NX1 Viewfinder Replacement: step 2, image 1 of 2 Samsung NX1 Viewfinder Replacement: step 2, image 2 of 2
    • Use the Phillips #00 screwdriver to remove one 6.4 mm screw in the center of the dial.

    • Remove the dial by lifting upward with your fingers.

    Ask FixBot

    Add Comment

  3. Samsung NX1 Viewfinder Replacement, Back Cover: step 3, image 1 of 3 Samsung NX1 Viewfinder Replacement, Back Cover: step 3, image 2 of 3 Samsung NX1 Viewfinder Replacement, Back Cover: step 3, image 3 of 3
    • Use the Phillips #00 screwdriver to remove the four 5.5 mm screws surrounding the viewfinder.

    • Use your fingers to lift the plastic viewfinder cover upward.

    Ask FixBot
    Add Comment

  4. Samsung NX1 Viewfinder Replacement: step 4, image 1 of 2 Samsung NX1 Viewfinder Replacement: step 4, image 2 of 2
    • Use the Phillips #00 screwdriver to remove the two 5.5 mm screws from the right side of the camera above the SD card port.

    Ask FixBot
    Add Comment

  5. Samsung NX1 Viewfinder Replacement: step 5, image 1 of 1
    • Use the Phillips #00 screwdriver to remove one 5.5 mm screw on the left, above the HDMI port.

    Ask FixBot
    Add Comment

  6. Samsung NX1 Viewfinder Replacement: step 6, image 1 of 1
    • Use the Phillips #00 screwdriver to remove the five 5.5 mm screws from the bottom, near the battery compartment.

    • Use the Phillips #00 screwdriver to remove one 3.8 mm screw from the bottom of the hand grip, below the battery compartmen.

    Ask FixBot

    Add Comment

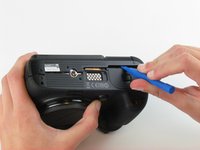
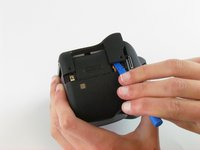
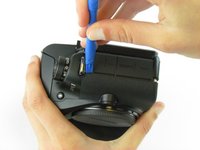
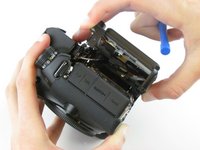
  7. Samsung NX1 Viewfinder Replacement: step 7, image 1 of 3 Samsung NX1 Viewfinder Replacement: step 7, image 2 of 3 Samsung NX1 Viewfinder Replacement: step 7, image 3 of 3
    • Use a plastic opening tool to separate the back cover from the front cover.

    • Pry the back cover in this order: bottom, right side, left side.

    Ask FixBot

    Add Comment

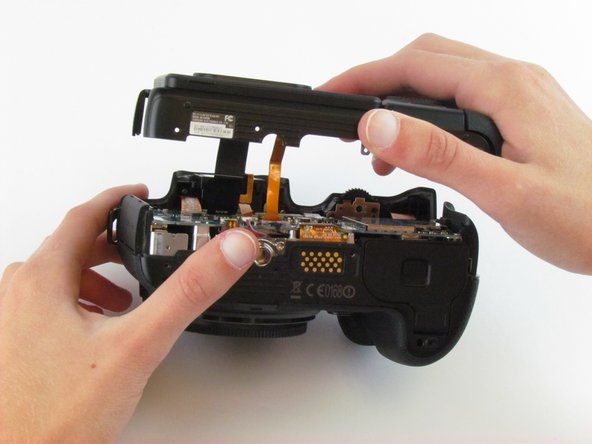
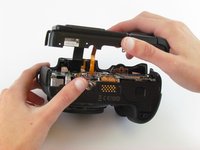
  8. Samsung NX1 Viewfinder Replacement: step 8, image 1 of 2 Samsung NX1 Viewfinder Replacement: step 8, image 2 of 2
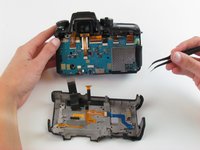
    • Use your fingers to pull the back cover away from the front cover.

    • Do not completely separate the back cover from the front cover as two cables hold these components together.

    Ask FixBot
    Add Comment

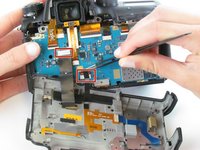
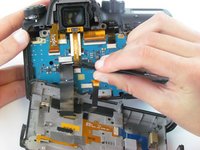
  9. Samsung NX1 Viewfinder Replacement: step 9, image 1 of 3 Samsung NX1 Viewfinder Replacement: step 9, image 2 of 3 Samsung NX1 Viewfinder Replacement: step 9, image 3 of 3
    Tool used on this step:
    Tweezers
    $4.99
    Buy
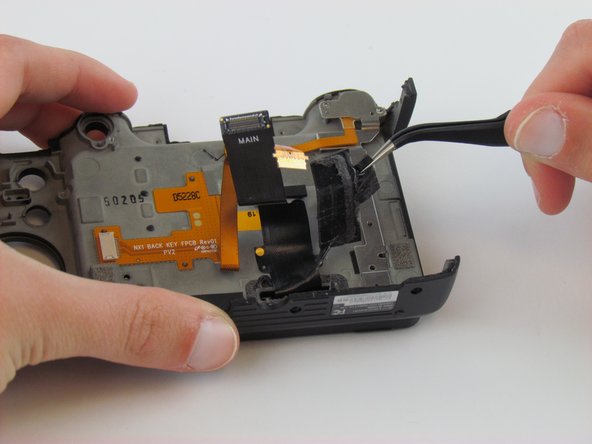
    • Use tweezers to pull the two ribbon cables horizontally out of their clips.

    Ask FixBot

    Add Comment

  10. Samsung NX1 Viewfinder Replacement, LCD Touch Screen: step 10, image 1 of 1
    • Use the Phillips #00 screwdriver to remove the seven screws (three silver 3.5 mm screws and four black 2.7 mm screws).

    Ask FixBot

    Add Comment

  11. Samsung NX1 Viewfinder Replacement: step 11, image 1 of 2 Samsung NX1 Viewfinder Replacement: step 11, image 2 of 2
    Tool used on this step:
    Tweezers
    $4.99
    Buy
    • Use tweezers to remove the glued rubber piece.

    Ask FixBot

    Add Comment

  12. Samsung NX1 Viewfinder Replacement: step 12, image 1 of 3 Samsung NX1 Viewfinder Replacement: step 12, image 2 of 3 Samsung NX1 Viewfinder Replacement: step 12, image 3 of 3
    • Use the Phillips #00 screwdriver to remove the four black 2.3 mm screws.

    • Use your fingers to separate the LCD screen from the folding mechanism.

    Ask FixBot

    Add Comment

  13. Samsung NX1 Viewfinder Replacement, Motherboard: step 13, image 1 of 1
    Tool used on this step:
    Tweezers
    $4.99
    Buy
    • Use tweezers to pull the five ribbon cables horizontally out of their clips.

    • Use a spudger or your fingernail to flip up the four, small retaining flap, or zero insertion force (ZIF) connectors. Then, pull the ribbon cable out to disconnect it.

    • Remove the green tape using your fingernail. Then, use a spudger to pry the one antenna cable connector straight up from the board.

    • Use tweezers or a spudger to pry up each side of the flat-topped connector. Then, lift the one connector straight up from its socket.

    • Use tweezers or your fingers to pull the two double-bundled cables up and away from the connector in the same direction that the individual wires are running.

    Ask FixBot

    Add Comment

  14. Samsung NX1 Viewfinder Replacement: step 14, image 1 of 1
    • Use the Phillips #00 screwdriver to remove the six silver 4.5 mm screws.

    Ask FixBot

    Add Comment

  15. Samsung NX1 Viewfinder Replacement: step 15, image 1 of 2 Samsung NX1 Viewfinder Replacement: step 15, image 2 of 2
    • Use a spudger to lift the motherboard up starting on the right side proceeding to the left side.

    • Use your fingers to lift the motherboard completely out of the camera.

    Ask FixBot

    Add Comment

  16. Samsung NX1 Viewfinder Replacement, Viewfinder: step 16, image 1 of 1
    Tool used on this step:
    Tweezers
    $4.99
    Buy
    • Use tweezers to lift the black tab on the ZIF connector.

    • Use tweezers to pull the large orange ribbon cable out of the connector to get a clearer view of the screws lying beneath it.

    Ask FixBot

    Add Comment

  17. Samsung NX1 Viewfinder Replacement: step 17, image 1 of 1
    • Use the Phillips #00 screwdriver to remove the three black 3.8 mm screws below the viewfinder.

    Ask FixBot

    Add Comment

  18. Samsung NX1 Viewfinder Replacement: step 18, image 1 of 2 Samsung NX1 Viewfinder Replacement: step 18, image 2 of 2
    • Use a spudger to gently push the viewfinder cube, starting at the top of the cube and pushing it toward the bottom of the camera.

    • Use your fingers to lift the viewfinder cube out of the camera.

    Ask FixBot

    Add Comment

Conclusion

To reassemble your device, follow these instructions in reverse order.

Cancel: I did not complete this guide.

One other person completed this guide.

Hannah Patrick

Member since: 02/24/16

903 Reputation

6 Guides authored

Team

USF Tampa, Team 1-4, Leahy Spring 2016 Member of USF Tampa, Team 1-4, Leahy Spring 2016

USFT-LEAHY-S16S1G4

3 Members

6 Guides authored

0 Guide Comments

Add Comment

View Statistics:

Past 24 Hours: 0

Past 7 Days: 6

Past 30 Days: 37

All Time: 1,542