Free Shipping on Domestic Orders $75+

Samsung NE59K3310SS Range Dual Surface Element Control Switch Replacement

What you need

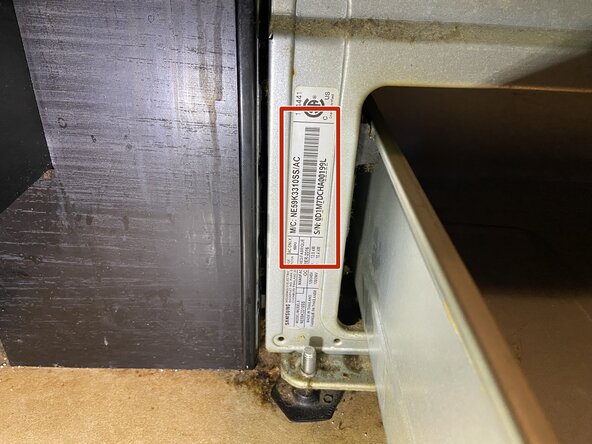
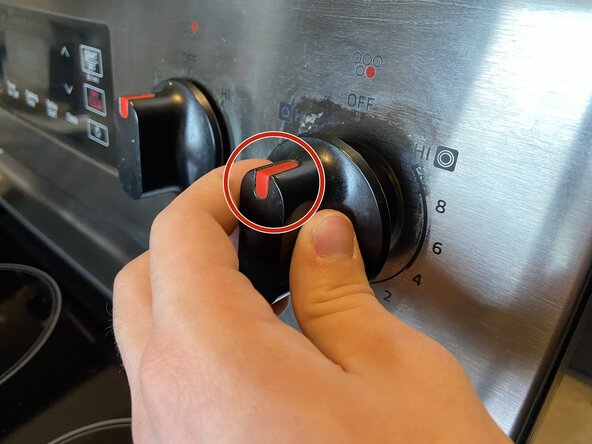
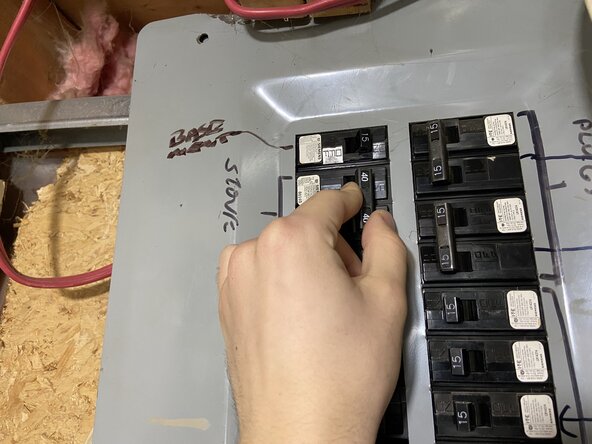
  1. Samsung NE59K3310SS Range Dual Surface Element Control Switch Replacement, Range Dual Surface Element Control Switch: step 1, image 1 of 3 Samsung NE59K3310SS Range Dual Surface Element Control Switch Replacement, Range Dual Surface Element Control Switch: step 1, image 2 of 3 Samsung NE59K3310SS Range Dual Surface Element Control Switch Replacement, Range Dual Surface Element Control Switch: step 1, image 3 of 3
    • Open the warming drawer and confirm the stove model (NE59K3310SS) at the bottom left corner of the stove before purchasing a new Dual Surface Element Control Switch.

    Ask FixBot

    Add Comment

  2. Samsung NE59K3310SS Range Dual Surface Element Control Switch Replacement: step 2, image 1 of 1
    • You can purchase a new control switch suitable for your particular model once you have identified the model number.

    • For the Samsung NE59K3310SS, the correct part number of the Dual Surface Element Control Switch is "PER001-12D." Here's the link to a compatible part.

    • You can verify the part number of the control switch further at Step 9 by comparing it with the part number of the old switch.

    Ask FixBot

    Add Comment

  3. Samsung NE59K3310SS Range Dual Surface Element Control Switch Replacement: step 3, image 1 of 2 Samsung NE59K3310SS Range Dual Surface Element Control Switch Replacement: step 3, image 2 of 2
    • Find the breaker switch for your stove and flip it to the “off” position. Confirm that the stove is not receiving power.

    Ask FixBot

    Add Comment

  4. Samsung NE59K3310SS Range Dual Surface Element Control Switch Replacement: step 4, image 1 of 3 Samsung NE59K3310SS Range Dual Surface Element Control Switch Replacement: step 4, image 2 of 3 Samsung NE59K3310SS Range Dual Surface Element Control Switch Replacement: step 4, image 3 of 3
    • Move the stove away from the wall to allow space to work.

    • Unplug the stove from the power source.

    • Make sure the power cable is out of way to eliminate any tripping hazards.

    Ask FixBot

    Add Comment

  5. Samsung NE59K3310SS Range Dual Surface Element Control Switch Replacement: step 5, image 1 of 3 Samsung NE59K3310SS Range Dual Surface Element Control Switch Replacement: step 5, image 2 of 3 Samsung NE59K3310SS Range Dual Surface Element Control Switch Replacement: step 5, image 3 of 3
    • Use a Phillips #2 screwdriver to remove the five 10 mm screws that secure the top rear control panel.

    • Remove the panel.

    • The dual surface element control switch is located to the left of the mainboard.

    Ask FixBot

    Add Comment

  6. Samsung NE59K3310SS Range Dual Surface Element Control Switch Replacement: step 6, image 1 of 2 Samsung NE59K3310SS Range Dual Surface Element Control Switch Replacement: step 6, image 2 of 2
    • Pull the dual switch knob directly off of the switch shaft.

    Ask FixBot

    Add Comment

  7. Samsung NE59K3310SS Range Dual Surface Element Control Switch Replacement: step 7, image 1 of 2 Samsung NE59K3310SS Range Dual Surface Element Control Switch Replacement: step 7, image 2 of 2
    • Take a photo of the wiring on the old switch prior to removal.

    • Refer to this photo when reconnecting the wire harnesses to the new switch.

    Ask FixBot

    Add Comment

  8. Samsung NE59K3310SS Range Dual Surface Element Control Switch Replacement: step 8, image 1 of 3 Samsung NE59K3310SS Range Dual Surface Element Control Switch Replacement: step 8, image 2 of 3 Samsung NE59K3310SS Range Dual Surface Element Control Switch Replacement: step 8, image 3 of 3
    • Disconnect the wire harnesses by pulling them directly off the old dual switch.

    Ask FixBot

    Add Comment

  9. Samsung NE59K3310SS Range Dual Surface Element Control Switch Replacement: step 9, image 1 of 2 Samsung NE59K3310SS Range Dual Surface Element Control Switch Replacement: step 9, image 2 of 2
    • Hold the dual switch to the front of the control panel.

    • Use a Phillips #2 screwdriver to remove the two 5 mm screws that secure the dual switch.

    Ask FixBot

    Add Comment

  10. Samsung NE59K3310SS Range Dual Surface Element Control Switch Replacement: step 10, image 1 of 3 Samsung NE59K3310SS Range Dual Surface Element Control Switch Replacement: step 10, image 2 of 3 Samsung NE59K3310SS Range Dual Surface Element Control Switch Replacement: step 10, image 3 of 3
    • Carefully remove the old switch.

    • Confirm the switch part number.

    Ask FixBot

    Add Comment

  11. Samsung NE59K3310SS Range Dual Surface Element Control Switch Replacement: step 11, image 1 of 2 Samsung NE59K3310SS Range Dual Surface Element Control Switch Replacement: step 11, image 2 of 2
    • Press the new switch in the control panel.

    • Fasten it with the two 5 mm Phillips #2 screws.

    Ask FixBot

    Add Comment

  12. Samsung NE59K3310SS Range Dual Surface Element Control Switch Replacement: step 12, image 1 of 3 Samsung NE59K3310SS Range Dual Surface Element Control Switch Replacement: step 12, image 2 of 3 Samsung NE59K3310SS Range Dual Surface Element Control Switch Replacement: step 12, image 3 of 3
    • Use the reference photo to reconnect the wire harnesses to the switch.

    Ask FixBot

    Add Comment

  13. Samsung NE59K3310SS Range Dual Surface Element Control Switch Replacement: step 13, image 1 of 2 Samsung NE59K3310SS Range Dual Surface Element Control Switch Replacement: step 13, image 2 of 2
    • Hold the knob with the red indicator in “up” position.

    • Slide the knob back on the new switch shaft.

    Ask FixBot

    Add Comment

  14. Samsung NE59K3310SS Range Dual Surface Element Control Switch Replacement: step 14, image 1 of 3 Samsung NE59K3310SS Range Dual Surface Element Control Switch Replacement: step 14, image 2 of 3 Samsung NE59K3310SS Range Dual Surface Element Control Switch Replacement: step 14, image 3 of 3
    • Resecure the five 10 mm Phillips #2 screws to reattach the cover on the rear side of the control panel.

    • Plug the stove back to the power source and turn the circuit breaker back on.

    Ask FixBot

    Add Comment

Conclusion

Move the stove back to its place.

Cancel: I did not complete this guide.

Kanan Huseynov

Member since: 01/08/25

229 Reputation

1 Guide authored

0 Guide Comments

Add Comment

View Statistics:

Past 24 Hours: 2

Past 7 Days: 11

Past 30 Days: 88

All Time: 826