Introduction
If your Samsung Galaxy Tab A8 isn't reading or writing to your SD card, then use this guide to replace the SD card reader.
Be sure to troubleshoot any possible causes and/or solutions before beginning this guide.
The mini SD card reader allows users to add additional storage to their device, allowing for more data to be stored and used on the tablet. This means more space for photos, large applications, and other important files now have room to be stored on the device.
If it seems that the reader isn't functioning properly, you can't access the storage from your tablet, or any other possible solutions are found, then follow the steps listed below.
What you need
-
-
Fully power off the device.
-
Orient the screen so it is face-up.
-
Apply anti-clamp or other suction device to apply constant upward force on the screen.
-
Heat the screen to soften the adhesive with a heat gun or blow dryer. Be sure to heat all sides as evenly as possible.
 Ask FixBot
-
-
-
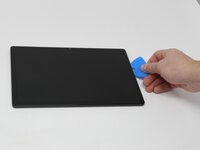
Use plastic opening picks, or a Jimmy if necessary, to remove the adhesive and get under the screen.
-
Using the plastic opening picks, move around the screen slowly, one corner at a time. Every few inches, leave an additional opening pick behind where you are working to hold the screen open while continuing to remove the adhesive.
-
-
-
Continue to pry the screen off with the opening picks, using additional tools if more leverage is required.
-
-
-
-
Using a Phillips #000 screwdriver, remove the 1.8mm screw holding the clamp that holds the screen ribbon in place.
-
Remove the battery connector ribbon to help prevent short circuiting of the device and/or shock hazards.
-
-
-
Disconnect the screen ribbon wire connector.
-
Remove the screen from the tablet.
-
-
-
Remove the fifteen 1.8mm screws using a Phillips #000 screwdriver.
-
Carefully remove the speaker cover to gain access to the port and other components.
-


To reassemble your device, follow these instructions in reverse order.

Team

Utah Tech University, Team 1-3, McMurrin Fall 2025 Member of Utah Tech University, Team 1-3, McMurrin Fall 2025
UTAHTECH-MCMURRIN-F25S1G3
3 Members
7 Guides authored