Introduction
Follow this guide to replace the display or screen adhesives for the Galaxy S8+. This procedure is meant to be used in conjunction with the Galaxy S8+ screen replacement guide.
What you need
-
-
-
Remove all traces of adhesive and debris from the phone's frame. Clean the adhesion surface with high concentration isopropyl alcohol (over 90%) and wipe it clean with a lint-free cloth.
-
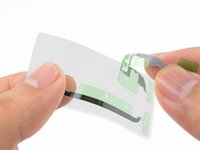
Lay the adhesive strips out to get an idea of where they go.
-
Peel off the clear plastic backing from the large pre-cut adhesive strip, exposing one side of adhesive.
 Ask FixBot
-
-
-
Carefully line up a long edge of the adhesive with the edge of the phone frame.
-
Set the adhesive down lightly on the frame.
-
If it is not properly aligned, carefully peel the adhesive back up.
-
Once the adhesive is aligned, use your fingers to press the adhesive onto the frame.
-
-
-
-
Peel one of the end adhesive strips from the clear plastic backing.
-
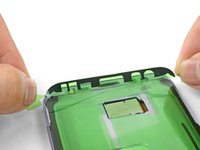
Hold the strip by the two green end tabs and line the adhesive strip with the phone frame.
-
Lay the adhesive down lightly on the phone. Make sure that all cutouts are properly aligned.
-
Once aligned, use your fingers to press the adhesive into place.
-
Repeat the procedure for the remaining adhesive strip.
-
-
-
Continue reassembling your device until you are ready to attach the screen.
-
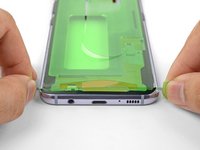
Peel and remove the green plastic liner from all adhesive strips to expose the screen-facing adhesive.
-
Align and set the phone screen on top of the adhesive.
-
Use your fingers to squeeze around the perimeter of the phone to set the adhesive.
-
Apply a few books worth of weight on top of the screen for an hour to help the adhesive bond.
-
-



Follow this link to return to the Galaxy S8+ screen replacement guide.
Cancel: I did not complete this guide.
10 other people completed this guide.


