Free Shipping on Domestic Orders $75+

Samsung Galaxy S6 Edge Motherboard Replacement

What you need

  1. Samsung Galaxy S6 Edge Motherboard Replacement, SIM Tray: step 1, image 1 of 3 Samsung Galaxy S6 Edge Motherboard Replacement, SIM Tray: step 1, image 2 of 3 Samsung Galaxy S6 Edge Motherboard Replacement, SIM Tray: step 1, image 3 of 3
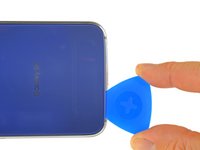
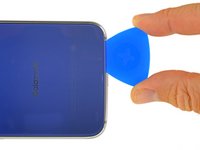
    • Insert a paper clip or SIM eject tool into the hole in the SIM card slot on top of the phone.

    • Do not insert the tool into the microphone hole or you could cause damage. Look for the outline of the SIM tray.

    • Press to eject the SIM card tray.

    • Remove the SIM card tray from the phone.

    Ask FixBot
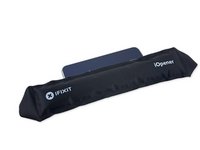
  2. Samsung Galaxy S6 Edge Motherboard Replacement, iOpener Heating: step 2, image 1 of 2 Samsung Galaxy S6 Edge Motherboard Replacement, iOpener Heating: step 2, image 2 of 2
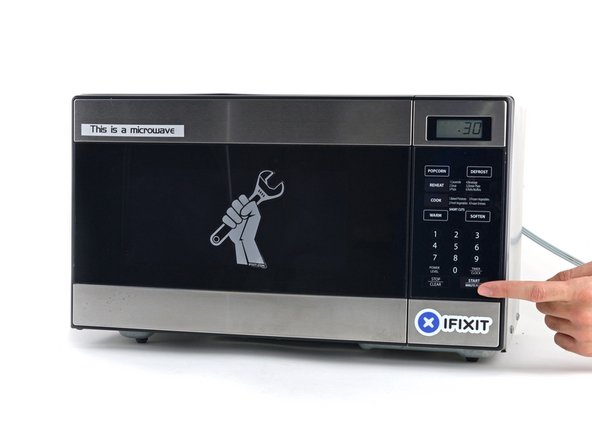
    • We recommend that you clean your microwave before proceeding, as any nasty gunk on the bottom may end up stuck to the iOpener.

    • Place the iOpener in the center of the microwave.

    • For carousel microwaves: Make sure the plate spins freely. If your iOpener gets stuck, it may overheat and burn.

    Ask FixBot
  3. Samsung Galaxy S6 Edge Motherboard Replacement: step 3, image 1 of 1
    • Heat the iOpener for thirty seconds.

    • Depending on the wattage of your microwave, more or less time may be required. The iOpener is sufficiently heated when it's barely too hot to touch.

    • Throughout the repair procedure, as the iOpener cools, reheat it in the microwave for an additional thirty seconds at a time.

    • Be careful not to overheat the iOpener during the repair. Overheating may cause the iOpener to burst. Do not attempt to heat over 100˚C (212˚F).

    • Never touch the iOpener if it appears swollen.

    • If the iOpener is still too hot in the middle to touch, continue using it while waiting for it to cool down some more before reheating. A properly heated iOpener should stay warm for up to 10 minutes.

    Ask FixBot
  4. Samsung Galaxy S6 Edge Motherboard Replacement: step 4, image 1 of 1
    • Remove the iOpener from the microwave, holding it by one of the two flat ends to avoid the hot center.

    • The iOpener will be very hot, so be careful when handling it. Use an oven mitt if necessary.

    Ask FixBot
  5. Samsung Galaxy S6 Edge Motherboard Replacement, Alternate iOpener heating method: step 5, image 1 of 2 Samsung Galaxy S6 Edge Motherboard Replacement, Alternate iOpener heating method: step 5, image 2 of 2
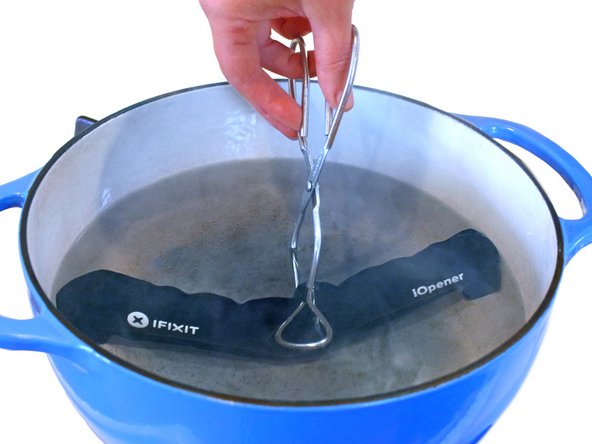
    • If you don't have a microwave, follow this step to heat your iOpener in boiling water.

    • Fill a pot or pan with enough water to fully submerge an iOpener.

    • Heat the water to a boil. Turn off the heat.

    • Place an iOpener into the hot water for 2-3 minutes. Make sure the iOpener is fully submerged in the water.

    • Use tongs to extract the heated iOpener from the hot water.

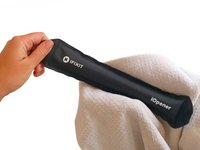
    • Thoroughly dry the iOpener with a towel.

    • The iOpener will be very hot, so be careful to hold it only by the end tabs.

    • Your iOpener is ready for use! If you need to reheat the iOpener, heat the water to a boil, turn off the heat, and place the iOpener in the water for 2-3 minutes.

    Ask FixBot
  6. Samsung Galaxy S6 Edge Motherboard Replacement, Rear Glass: step 6, image 1 of 2 Samsung Galaxy S6 Edge Motherboard Replacement, Rear Glass: step 6, image 2 of 2
    • Opening your phone will compromise its waterproof seals. Have replacement adhesive ready before you proceed, or take care to avoid liquid exposure if you reassemble your phone without replacing the adhesive.

    • If your glass is shattered, put packing tape over the entire panel to hold it together during the removal process.

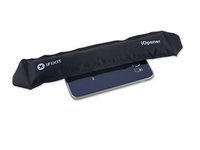
    • Lay the heated iOpener over the rear panel for about two minutes to loosen the adhesive around the edge of the glass.

    • You may need to reheat and reapply the iOpener several times to get the phone warm enough. Follow the iOpener instructions to avoid overheating.

    • Shift the iOpener to heat the remaining section of the panel for another two minutes.

    • A hair dryer, heat gun, or hot plate may also be used, but be careful not to overheat the phone—the OLED display and internal battery are both susceptible to heat damage.

    Ask FixBot
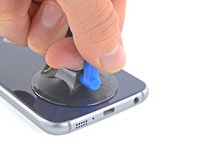
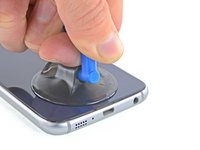
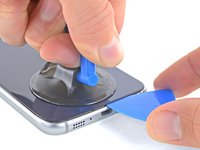
  7. Samsung Galaxy S6 Edge Motherboard Replacement: step 7, image 1 of 3 Samsung Galaxy S6 Edge Motherboard Replacement: step 7, image 2 of 3 Samsung Galaxy S6 Edge Motherboard Replacement: step 7, image 3 of 3
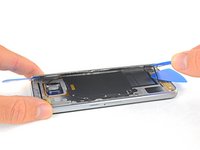
    • Once the rear glass is hot to the touch, apply a suction cup near the bottom edge of the glass.

    • Lift on the suction cup to create a small gap underneath the rear glass, and insert an opening pick into the gap.

    • Optionally, once the pick is inserted, you can add a few drops of isopropyl alcohol into the gap to help weaken the adhesive in the following steps.

    Ask FixBot
  8. Samsung Galaxy S6 Edge Motherboard Replacement: step 8, image 1 of 2 Samsung Galaxy S6 Edge Motherboard Replacement: step 8, image 2 of 2
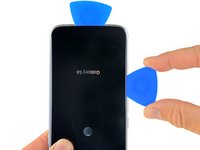
    • Slide the pick along the bottom edge of the phone to slice through the adhesive securing the rear glass.

    • Afterward, it may help to leave the pick in place and grab a second pick as you proceed to the next step. Leaving the pick inserted can help prevent the glue you just separated from re-adhering.

    • Re-heat the rear glass as needed to prevent the glue from cooling and hardening.

    Ask FixBot
  9. Samsung Galaxy S6 Edge Motherboard Replacement: step 9, image 1 of 3 Samsung Galaxy S6 Edge Motherboard Replacement: step 9, image 2 of 3 Samsung Galaxy S6 Edge Motherboard Replacement: step 9, image 3 of 3
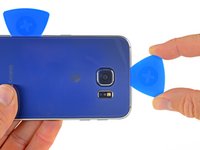
    • Repeat the heating and cutting procedure for the remaining three sides of the phone.

    • Leave an opening pick under each edge to prevent the adhesive from resealing.

    Ask FixBot
  10. Samsung Galaxy S6 Edge Motherboard Replacement: step 10, image 1 of 2 Samsung Galaxy S6 Edge Motherboard Replacement: step 10, image 2 of 2
    • Use an opening pick to slice through any remaining adhesive.

    • Remove the rear glass.

    Ask FixBot
  11. Samsung Galaxy S6 Edge Motherboard Replacement: step 11, image 1 of 2 Samsung Galaxy S6 Edge Motherboard Replacement: step 11, image 2 of 2
    Tool used on this step:
    Tweezers
    $4.99
    Buy
    • To install new rear glass:

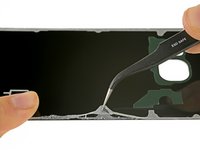
    • Use tweezers to peel away any remaining adhesive from the phone's chassis.

    • Clean the adhesion areas with high concentration isopropyl alcohol (at least 90%) and a lint-free cloth. Swipe in one direction only, not back and forth. This will help prep the surface for the new adhesive.

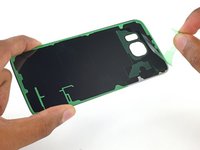
    • Peel the adhesive backing off of the new rear glass, carefully line up one edge of the glass against the phone chassis, and firmly press the glass onto the phone.

    • If you're reinstalling the old rear glass, or using rear glass without adhesive pre-installed, follow this guide.

    Ask FixBot
  12. Samsung Galaxy S6 Edge Motherboard Replacement, Midframe Assembly: step 12, image 1 of 1
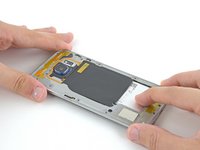
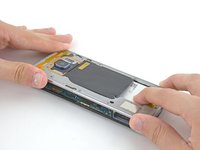
    • Remove the thirteen 3.3 mm Phillips #00 screws from the midframe.

    Ask FixBot
  13. Samsung Galaxy S6 Edge Motherboard Replacement: step 13, image 1 of 3 Samsung Galaxy S6 Edge Motherboard Replacement: step 13, image 2 of 3 Samsung Galaxy S6 Edge Motherboard Replacement: step 13, image 3 of 3
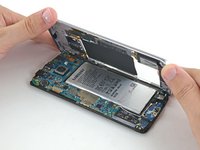
    • Press down on the back of the battery and lift up on the edges of the midframe to separate it from the rest of the phone.

    Ask FixBot
  14. Samsung Galaxy S6 Edge Motherboard Replacement, Motherboard Removal: step 14, image 1 of 2 Samsung Galaxy S6 Edge Motherboard Replacement, Motherboard Removal: step 14, image 2 of 2
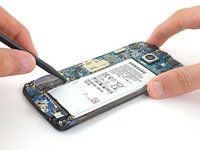
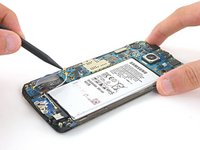
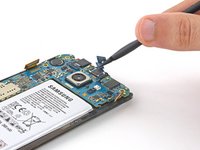
    • Using the flat end of the spudger, disconnect the battery ribbon cable from the motherboard.

    Ask FixBot
  15. Samsung Galaxy S6 Edge Motherboard Replacement: step 15, image 1 of 2 Samsung Galaxy S6 Edge Motherboard Replacement: step 15, image 2 of 2
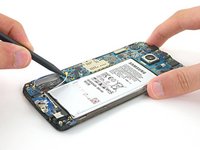
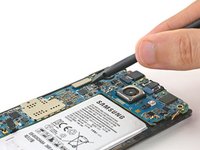
    • Disconnect the home button ribbon cable from the motherboard.

    Ask FixBot
  16. Samsung Galaxy S6 Edge Motherboard Replacement: step 16, image 1 of 3 Samsung Galaxy S6 Edge Motherboard Replacement: step 16, image 2 of 3 Samsung Galaxy S6 Edge Motherboard Replacement: step 16, image 3 of 3
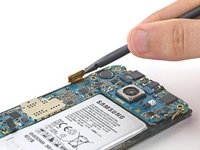
    • Use the pointed end of a spudger to disconnect the two antenna interconnect cables from the motherboard.

    Ask FixBot
  17. Samsung Galaxy S6 Edge Motherboard Replacement: step 17, image 1 of 2 Samsung Galaxy S6 Edge Motherboard Replacement: step 17, image 2 of 2
    • Disconnect the display ribbon cable from the motherboard using the flat end of the spudger.

    Ask FixBot
  18. Samsung Galaxy S6 Edge Motherboard Replacement: step 18, image 1 of 2 Samsung Galaxy S6 Edge Motherboard Replacement: step 18, image 2 of 2
    • Disconnect the earpiece ribbon cable from the motherboard.

    Ask FixBot
  19. Samsung Galaxy S6 Edge Motherboard Replacement: step 19, image 1 of 2 Samsung Galaxy S6 Edge Motherboard Replacement: step 19, image 2 of 2
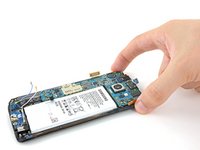
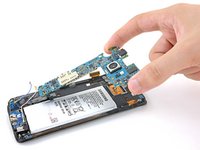
    • The motherboard is an ESD sensitive component and should be handled with care. iFixit recommends using a anti-static bracelet whenever handling components of this nature to avoid damage.

    • Grip the motherboard on both edges toward the top of the device.

    • Do not lift the motherboard all the way out in this step; the ribbon cable on the underside needs to be disconnected first.

    • Lift the motherboard up and away from the display, taking care not to put too much stress on the daughterboard ribbon cable.

    Ask FixBot
  20. Samsung Galaxy S6 Edge Motherboard Replacement: step 20, image 1 of 2 Samsung Galaxy S6 Edge Motherboard Replacement: step 20, image 2 of 2
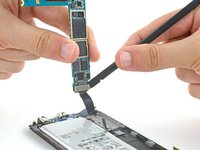
    • Disconnect the daughterboard ribbon cable from the underside of the motherboard.

    Ask FixBot
  21. Samsung Galaxy S6 Edge Motherboard Replacement, Motherboard Components: step 21, image 1 of 3 Samsung Galaxy S6 Edge Motherboard Replacement, Motherboard Components: step 21, image 2 of 3 Samsung Galaxy S6 Edge Motherboard Replacement, Motherboard Components: step 21, image 3 of 3
    • Using the flat end of a spudger, pry up the front facing camera's connector.

    • Carefully remove the front facing camera from the motherboard.

    Ask FixBot
  22. Samsung Galaxy S6 Edge Motherboard Replacement: step 22, image 1 of 3 Samsung Galaxy S6 Edge Motherboard Replacement: step 22, image 2 of 3 Samsung Galaxy S6 Edge Motherboard Replacement: step 22, image 3 of 3
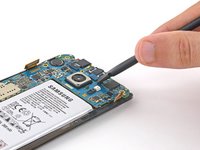
    • Using a spudger, pry up the connector for the rear facing camera from the motherboard.

    • Remove the rear facing camera from the motherboard.

    Ask FixBot
  23. Samsung Galaxy S6 Edge Motherboard Replacement: step 23, image 1 of 2 Samsung Galaxy S6 Edge Motherboard Replacement: step 23, image 2 of 2
    • Remove the microphone from the motherboard.

    Ask FixBot
Conclusion

To reassemble your device, follow these instructions in reverse order. Follow this guide to reinstall the rear glass.

31 other people completed this guide.

Sam Goldheart

Member since: 10/18/12

477,281 Reputation

538 Guides authored

Team

iFixit Member of iFixit

Staff

123 Members

25,718 Guides authored

3 Guide Comments

Mas claro ni el agua

Christian Arenas - Reply Share

I cant get the wifi cables to re attach to the motherboard connectors ? Is there a special tool ?

Dennis - Reply Share
Bonjour, je recherche une carte mère s6 Edge Samsung SM-G925 F 32GB d'occasion en bon état de de fonctionement.

Pour me contacter email: gilles_clavreul@hotmail.fr

MERCI

gilles_clavreul - Reply Share
Add Comment

View Statistics:

Past 24 Hours: 1

Past 7 Days: 19

Past 30 Days: 113

All Time: 27,689