Introduction
The display assembly includes the LCD, digitizer and frame. You may need to transfer some components from your original display. Used assemblies may be missing one or more of the elastic grommets shown in the new assemblies.
What you need
-
-
Pry with a plastic opening tool, or your fingernail, in the divot to the left of the rear-facing camera, near the power button.
-
Lift the rear case by the corner nearest the divot and remove it from the phone.
 Ask FixBot
-
-
-
Use a plastic opening tool, or your fingernail, to press the microSD card slightly deeper into its slot until you hear a click.
-
After the click, release the card and it will pop out of its slot.
-
Remove the microSD card.
-
-
-
Insert a plastic opening tool, or your finger, into the notch of the battery compartment and lift the battery upward to remove it.
-
-
-
Use a plastic opening tool, or your fingernail, to press the SIM card slightly deeper into its slot until you hear a click.
-
After the click, release the card and it will pop out of its slot.
-
Remove the SIM card.
-
-
-
-
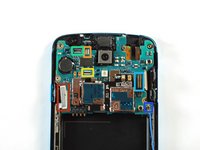
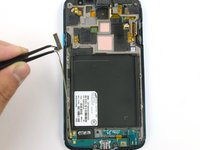
Use the tip of a spudger to remove the four metallic pads located in each corner of the device.
-
Using a Phillips #00 screwdriver, remove the 12 screws connecting the midframe to the device.
-
-
-
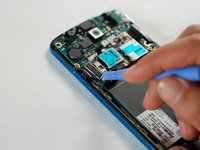
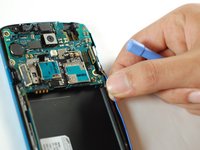
Use the plastic opening tool to pry around the entire edge of the midframe now to release it from the front case.
-
-
-
Use the flat end of a plastic opening tool to disconnect the USB board connector.
-
Disconnect the front-facing camera cable connector.
-
Disconnect the earpiece speaker assembly cable connector.
-
Disconnect the headphone jack assembly cable connector.
-
Disconnect the display/digitizer cable connector.
-
Disconnect the antenna cable connector.
-
-
-
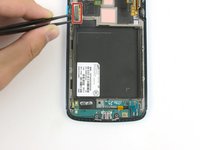
Disconnect the daughterboard connector from the frame.
-
Slowly peel off the daughterboard and remove it from the device.
-


To reassemble your device, follow these instructions in reverse order.
Cancel: I did not complete this guide.
5 other people completed this guide.
