What you need
-
-
-
It is very important to heat the display on the side parts where the double-sided adhesive is well with a hairdryer or other so as to make it lose its adhesion and facilitate the operation of inserting the blade to lift it.
-
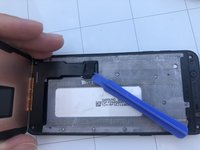
Insert the blade between the body and the glass and begin to separate the display from the body, I recommend starting from the top paying attention.
-
The flat connection connectors are located at the bottom.
 Ask FixBot
-
-
-
-
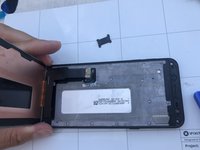
Unplug the black plastic plug securing the display connector.
-
Unhook the display connector.
-
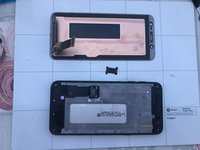
Remove the old display and place the new display.
-
Put some glue to attach the new display.
-
-


To reassemble your device, follow these instructions in reverse order.
Cancel: I did not complete this guide.
55 other people completed this guide.
Special thanks to these translators:
100%


These translators are helping us fix the world! Want to contribute?
Start translating ›

10 Guide Comments
You mentioned nothing about disconnecting the battery. If the phone accidentally turns on in the middle of a display swap [with no way to turn it off, since there’s no display or digitser connected] you will blow an internal fuse, rendering the phone useless. Complete waste of time! You should have included that the battery be disconnected before attempting this.
Ciao ti ringrazio per la Puntualizzazione ed il buon consiglio.
io non ho mai avuto problemi nello scollegare i display perché il telefono è precedentemente spento e rimane spento fino a quando non scollego il connettore display.
se per sfortuna si dovesse toccare il tasto power (che comunque richiede una lunga pressione e non un semplice tocco ) si vedrebbe accendere il display o vibrare il telefono o accendersi i led. Quindi prima di scollegare lo spegnerei nuovamente.
non vedo il problema.
scollegare la batteria comporta una procedura analoga a togliere il display e quindi molto tempo in più ed accollarsi i rischi di rompere un componente posteriore per rimuoverlo,perdendo così impermeabilità se non si dispone di adesivo specifico per questa sostituzione.
