Free Shipping on Domestic Orders $75+

Samsung Galaxy J1 Motherboard Replacement

What you need

  1. Samsung Galaxy J1 Motherboard Replacement, Midframe: step 1, image 1 of 1
    • Insert a finger nail or plastic opening tool between the back cover and the device.

    • Gently pry the rear cover off of the back of the phone.

    Ask FixBot
  2. Samsung Galaxy J1 Motherboard Replacement: step 2, image 1 of 2 Samsung Galaxy J1 Motherboard Replacement: step 2, image 2 of 2
    • Using a finger, pull the SIM card down out of its slot.

    • Remove the SIM card.

    • The pictured device is missing the SIM card and battery.

    Ask FixBot
  3. Samsung Galaxy J1 Motherboard Replacement: step 3, image 1 of 1
    • Using a Phillips #00 screwdriver remove the eleven 3 mm screws.

    Ask FixBot
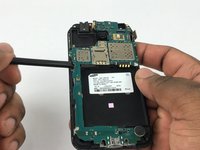
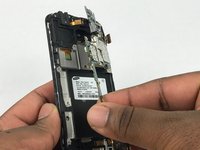
  4. Samsung Galaxy J1 Motherboard Replacement: step 4, image 1 of 3 Samsung Galaxy J1 Motherboard Replacement: step 4, image 2 of 3 Samsung Galaxy J1 Motherboard Replacement: step 4, image 3 of 3
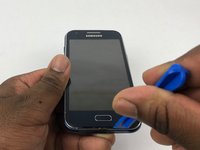
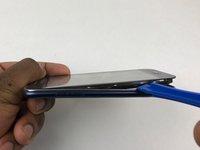
    • Insert a plastic opening tool between the screen and the back of the device.

    • Starting at the bottom of the device, gently slide the tool along the edges of the screen.

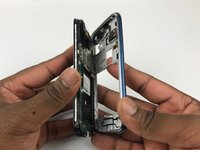
    • Gently pry the main assembly from the midframe of the device.

    • When removing the main assembly, pry gently so as to not crack the glass screen or break any clips within the device.

    Ask FixBot
  5. Samsung Galaxy J1 Motherboard Replacement, Motherboard: step 5, image 1 of 2 Samsung Galaxy J1 Motherboard Replacement, Motherboard: step 5, image 2 of 2
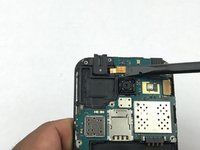
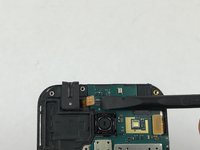
    • Use the flat edge of a spudger to disconnect the ear speaker connector.

    Ask FixBot
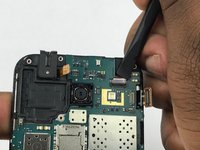
  6. Samsung Galaxy J1 Motherboard Replacement: step 6, image 1 of 2 Samsung Galaxy J1 Motherboard Replacement: step 6, image 2 of 2
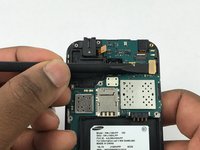
    • Use the flat end of a spudger disconnect the digitizer connector.

    Ask FixBot
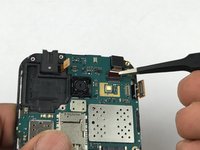
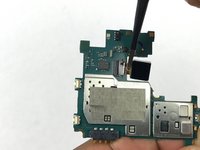
  7. Samsung Galaxy J1 Motherboard Replacement: step 7, image 1 of 2 Samsung Galaxy J1 Motherboard Replacement: step 7, image 2 of 2
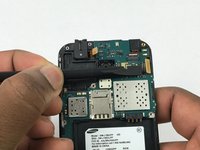
    • Use the flat end of a spudger disconnect the front-facing camera cable connector.

    Ask FixBot
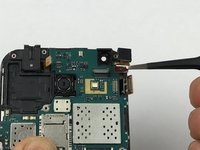
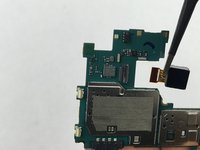
  8. Samsung Galaxy J1 Motherboard Replacement: step 8, image 1 of 2 Samsung Galaxy J1 Motherboard Replacement: step 8, image 2 of 2
    • Remove the front-facing camera.

    Ask FixBot
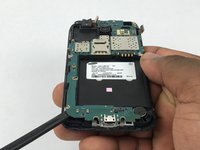
  9. Samsung Galaxy J1 Motherboard Replacement: step 9, image 1 of 3 Samsung Galaxy J1 Motherboard Replacement: step 9, image 2 of 3 Samsung Galaxy J1 Motherboard Replacement: step 9, image 3 of 3
    • Use the flat end of a spudger to gently pry under the motherboard.

    • Remove the motherboard.

    Ask FixBot
  10. Samsung Galaxy J1 Motherboard Replacement: step 10, image 1 of 1
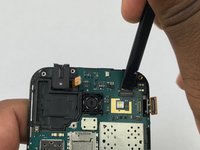
    • Use the flat end of a spudger to disconnect the rear camera cable connector.

    Ask FixBot
  11. Samsung Galaxy J1 Motherboard Replacement: step 11, image 1 of 2 Samsung Galaxy J1 Motherboard Replacement: step 11, image 2 of 2
    • Remove the rear camera.

    Ask FixBot
Conclusion

To reassemble your device, follow these instructions in reverse order.

24 other people completed this guide.

Sean Kramer

Member since: 02/14/18

1,632 Reputation

6 Guides authored

Team

USF Tampa, Team S5-G4, Eyestone Spring 2018 Member of USF Tampa, Team S5-G4, Eyestone Spring 2018

USFT-EYESTONE-S18S5G4

3 Members

8 Guides authored

4 Guide Comments

can you plz give use a amazon link to part

Sean Gynn - Reply Share
Very good illustration..where can I get a motherboard?

Isaac Samuels - Reply Share
Where can I get a motherboard for this phone Samsung J100?

Isaac Samuels - Reply Share

I need the details of the motherboard

FUN FIRST - Reply Share

Add Comment

View Statistics:

Past 24 Hours: 1

Past 7 Days: 17

Past 30 Days: 144

All Time: 7,902