
Free Shipping on Domestic Orders $75+

Samsung Galaxy A7 (2018) Display Assembly Replacement

What you need

Video Overview

  1. Samsung Galaxy A7 (2018) Display Assembly Replacement, Display Assembly: step 1, image 1 of 2 Samsung Galaxy A7 (2018) Display Assembly Replacement, Display Assembly: step 1, image 2 of 2
    • It's better to use Display Assembly (Screen With Frame) to fix your broken device.

    Ask FixBot

    Add Comment

  2. Samsung Galaxy A7 (2018) Display Assembly Replacement, Battery Cover Removal: step 2, image 1 of 3 Samsung Galaxy A7 (2018) Display Assembly Replacement, Battery Cover Removal: step 2, image 2 of 3 Samsung Galaxy A7 (2018) Display Assembly Replacement, Battery Cover Removal: step 2, image 3 of 3
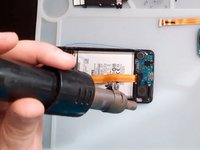
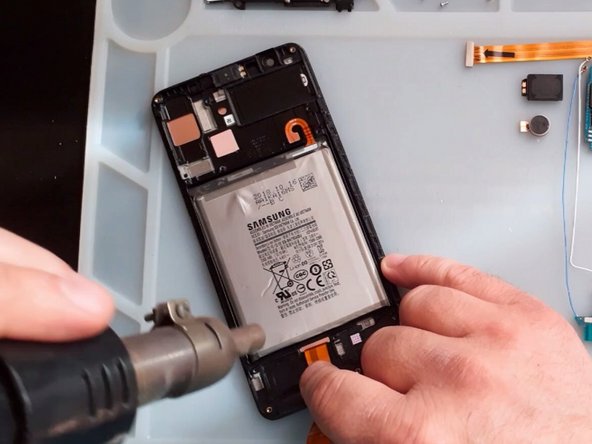
    • Use hot air to warm the device and soften the adhesive type.

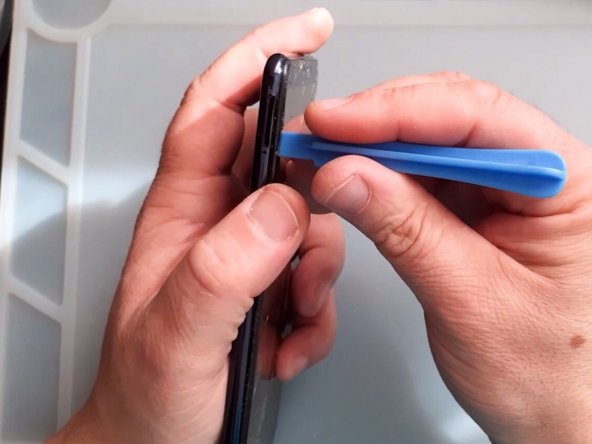
    • Gently separate the back cover.

    • Use Suction Cup and a plastic opening tool (Paying cart).

    Ask FixBot

    Add Comment

  3. Samsung Galaxy A7 (2018) Display Assembly Replacement, Middle Frame Removal: step 3, image 1 of 3 Samsung Galaxy A7 (2018) Display Assembly Replacement, Middle Frame Removal: step 3, image 2 of 3 Samsung Galaxy A7 (2018) Display Assembly Replacement, Middle Frame Removal: step 3, image 3 of 3
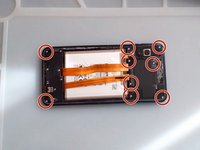
    • You need a screwdriver Phillips to remove all 9 screws.

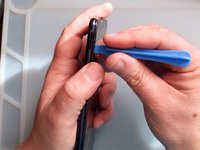
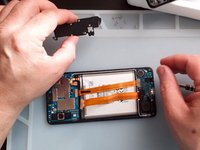
    • Again - using only Plastic tools remove the middle frame.

    Ask FixBot

    Add Comment

  4. Samsung Galaxy A7 (2018) Display Assembly Replacement, Test New Spare Part: step 4, image 1 of 3 Samsung Galaxy A7 (2018) Display Assembly Replacement, Test New Spare Part: step 4, image 2 of 3 Samsung Galaxy A7 (2018) Display Assembly Replacement, Test New Spare Part: step 4, image 3 of 3
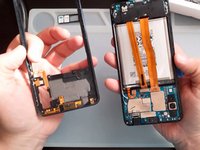
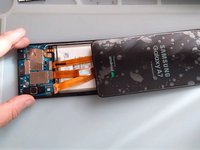
    • Once you have access to the battery, disconnect it.

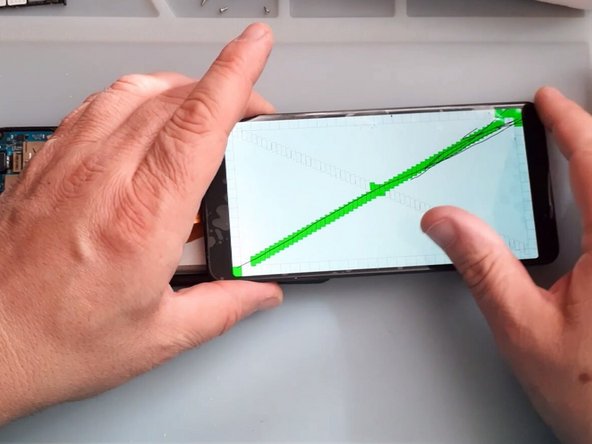
    • Test the new screen before installing it.

    Ask FixBot

    Add Comment

  5. Samsung Galaxy A7 (2018) Display Assembly Replacement, Sub board Cover Removal: step 5, image 1 of 2 Samsung Galaxy A7 (2018) Display Assembly Replacement, Sub board Cover Removal: step 5, image 2 of 2
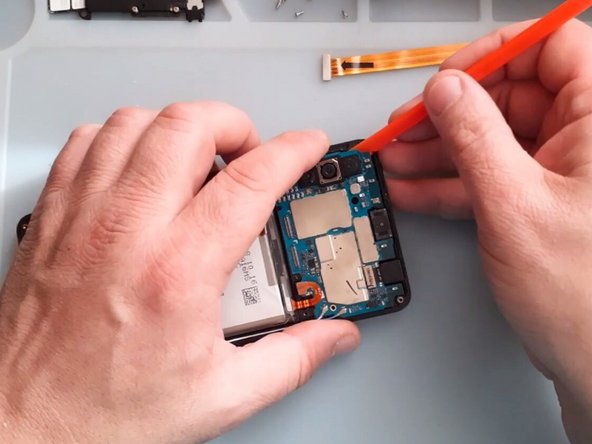
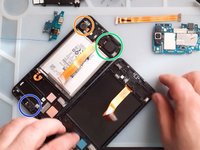
    • Use Phillips Screwdriver and plastic tool and remove the Sub board cover.

    Ask FixBot

    Add Comment

  6. Samsung Galaxy A7 (2018) Display Assembly Replacement, Logic Board Removal: step 6, image 1 of 3 Samsung Galaxy A7 (2018) Display Assembly Replacement, Logic Board Removal: step 6, image 2 of 3 Samsung Galaxy A7 (2018) Display Assembly Replacement, Logic Board Removal: step 6, image 3 of 3
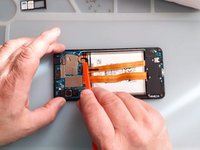
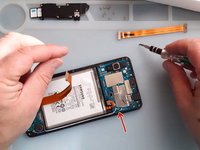
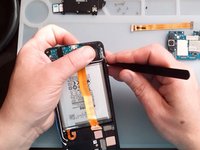
    • Remove the black Philips screw and gently take out the Mother board.

    Ask FixBot

    Add Comment

  7. Samsung Galaxy A7 (2018) Display Assembly Replacement, Sub Board Removal: step 7, image 1 of 3 Samsung Galaxy A7 (2018) Display Assembly Replacement, Sub Board Removal: step 7, image 2 of 3 Samsung Galaxy A7 (2018) Display Assembly Replacement, Sub Board Removal: step 7, image 3 of 3
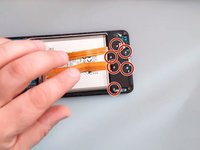
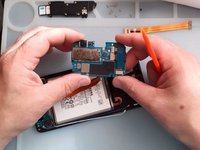
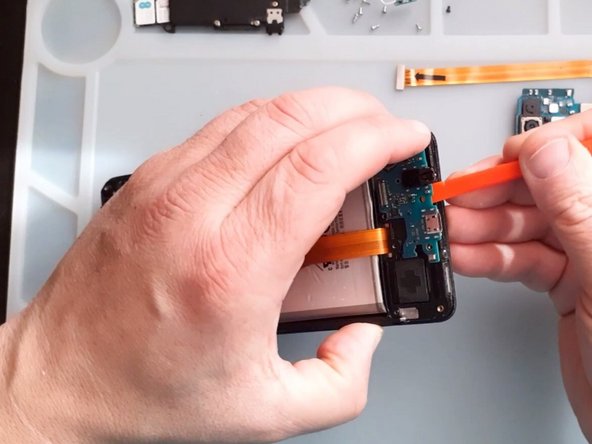
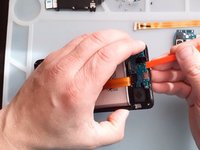
    • Remove the Antenna Sub-PBA board.

    • It's easier to take out the sub board if you warm it a little.

    Ask FixBot

    Add Comment

  8. Samsung Galaxy A7 (2018) Display Assembly Replacement, Receiver, Vibrator, Loudspeaker, Battery Transfer: step 8, image 1 of 3 Samsung Galaxy A7 (2018) Display Assembly Replacement, Receiver, Vibrator, Loudspeaker, Battery Transfer: step 8, image 2 of 3 Samsung Galaxy A7 (2018) Display Assembly Replacement, Receiver, Vibrator, Loudspeaker, Battery Transfer: step 8, image 3 of 3
    • Transfer to the New Screen frame:

    • Vibrator motor

    • Loudspeacker

    • Receiver

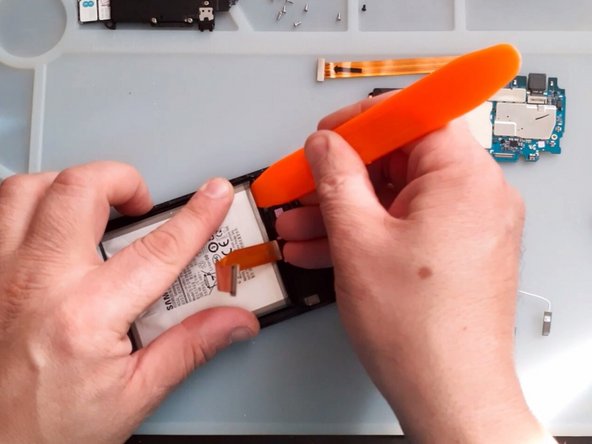
    • Use hot air and plastic tools to remove the battery.

    Ask FixBot

    Add Comment

  9. Samsung Galaxy A7 (2018) Display Assembly Replacement, That's all friends: step 9, image 1 of 1
    • That's all friends!

    Ask FixBot

    Add Comment

Conclusion

To reassemble your device, follow these instructions in reverse order.

Cancel: I did not complete this guide.

22 other people completed this guide.

ZFix

Member since: 12/09/13

197,270 Reputation

330 Guides authored

Team

Master Techs Member of Master Techs

Community

333 Members

1,521 Guides authored

2 Guide Comments

Hey!!!!!!. I’ve just recently fixed my A7 (2018) screen, and with this screen, you’ll have to remove the old one, and replace it. The adhesive what is on your old screen is very strong, So i advise to use isopropyl alcohol, and/or heat, also with suction, so that you can pry up the screen. Also, Do NOT bent the Flex Cable because it is very delicate, and it will tear easy. All in all, the repair was fun, for a repairman myself, and allowed me to use my talent!!. 10/10 Recommend

Marlion Russell - Reply Share

I want buy the screen for samsung a7 ?

Zouhair Guermah - Reply Share

Add Comment

View Statistics:

Past 24 Hours: 6

Past 7 Days: 51

Past 30 Days: 157

All Time: 21,682