Free Shipping on Domestic Orders $75+

Samsung Galaxy A20e Back Cover Replacement

Views: 5.7K

View statistics:

Past 24 Hours:
57
Past 7 Days:
149
Past 30 Days:
424
All Time:
5,681
Comments: 0

No one has left comments on this guide. Will you be first?

Go to guide comments
Completed: 3

3 people have marked this guide "completed." Will you be next?

Favorites: 0

No one has favorited (and subscribed to) this guide. Will you be the first?

Time Required: 10 - 20 minutes
Difficulty: Moderate
Samsung Galaxy A20e Back Cover Replacement

Introduction

Go to step 1 ↓

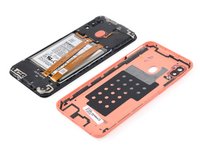
Use this guide to replace a damaged back cover on your Samsung Galaxy A20e.

What you need

Tools

    1. Samsung Galaxy A20e Back Cover Replacement, Remove the SIM tray: step 1, image 1 of 3 Samsung Galaxy A20e Back Cover Replacement, Remove the SIM tray: step 1, image 2 of 3 Samsung Galaxy A20e Back Cover Replacement, Remove the SIM tray: step 1, image 3 of 3
      • Before starting repairs, take your Galaxy A20e off the charger and power it down.

      • Insert a SIM card eject tool, a SIM eject bit or a straightened paper clip into the hole on the SIM tray located on the left side of the phone.

      • Press your SIM card eject tool firmly into the hole in order to eject the SIM card tray.

      • Remove the SIM card tray.

      • When reinserting the cards, make sure to properly orient them in the tray.

      Ask FixBot

      Add Comment

    2. Samsung Galaxy A20e Back Cover Replacement, Unclip the plastic clips: step 2, image 1 of 2 Samsung Galaxy A20e Back Cover Replacement, Unclip the plastic clips: step 2, image 2 of 2
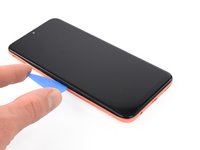
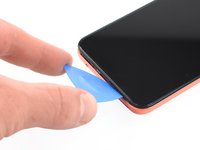
      • The back cover is held in place by plastic clips.

      • Insert an opening pick between the screen and the back cover on the left edge next to the hole for the SIM-eject tool.

      Ask FixBot

      Add Comment

    3. Samsung Galaxy A20e Back Cover Replacement: step 3, image 1 of 3 Samsung Galaxy A20e Back Cover Replacement: step 3, image 2 of 3 Samsung Galaxy A20e Back Cover Replacement: step 3, image 3 of 3
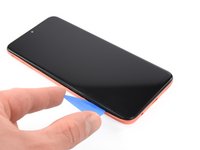
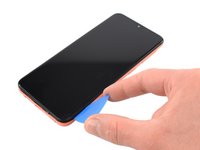
      • Slide the opening pick around the bottom left corner to unclip the plastic clips.

      Ask FixBot

      Add Comment

    4. Samsung Galaxy A20e Back Cover Replacement: step 4, image 1 of 2 Samsung Galaxy A20e Back Cover Replacement: step 4, image 2 of 2
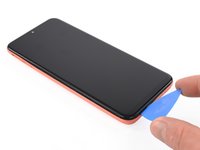
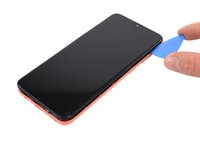
      • Slide the opening pick along the bottom edge to unclip the plastic clips.

      Ask FixBot

      Add Comment

    5. Samsung Galaxy A20e Back Cover Replacement: step 5, image 1 of 2 Samsung Galaxy A20e Back Cover Replacement: step 5, image 2 of 2
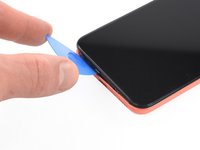
      • Slide the opening pick along the right edge to the top right corner to unclip the plastic clips.

      Ask FixBot

      Add Comment

    6. Samsung Galaxy A20e Back Cover Replacement, Remove the back cover: step 6, image 1 of 2 Samsung Galaxy A20e Back Cover Replacement, Remove the back cover: step 6, image 2 of 2
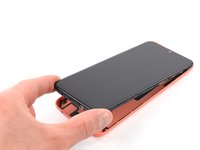
      • Separate the phone assembly from the back cover.

      Ask FixBot

      Add Comment

Conclusion

To reassemble your device, follow these instructions in reverse order.

Take your e-waste to an R2 or e-Stewards certified recycler.

Repair didn’t go as planned? Try some basic troubleshooting, or ask our Answers community for help.

Cancel: I did not complete this guide.

3 other people completed this guide.

Adriana Zwink

Member since: 12/18/19

69,190 Reputation

167 Guides authored

Team

iFixit Member of iFixit

Staff

121 Members

72,885 Guides authored

0 Guide Comments

Add Comment

View Statistics:

Past 24 Hours: 57

Past 7 Days: 149

Past 30 Days: 424

All Time: 5,681