
Samsung Epix Keyboard Replacement

Chris and 11 other contributors
Last updated on Jan 10, 2025
Views: 2.1K
View statistics:
- Past 24 Hours:
- 1
- Past 7 Days:
- 11
- Past 30 Days:
- 41
- All Time:
- 2,134
Comments: 0
No one has left comments on this guide. Will you be first?
Go to guide commentsCompleted: 2 3
2 people have marked this guide "completed." Will you be next?
3 people have marked this guide "completed." Including you — great job!
Favorites: 1 2
1 person has favorited (and subscribed to) this guide. Will you be next?
2 people have favorited (and subscribed to) this guide — including you!
Introduction
Go to step 1 ↓The Samsung Epix's keyboard is an important part of the device, as it is crucial to its functionality. If your keyboard becomes unresponsive or worn out, this tutorial will walk you through the replacement process, allowing you to swiftly and efficiently restore your device's functionality. Follow each step carefully and store any tools or screws in a secure container, as these components are critical to the device's structural integrity. Carefully handle all parts to prevent damage and enable a smooth replacement operation.
Before You Begin:
- Prepare your workspace: Clear a space in which you may operate comfortably and without interruption.
- Turn off your phone and make sure it is disconnected from the charger.
This article will walk you through the process of securely replacing your Samsung Epix keyboard and restoring it to like-new condition. Let us get going!
What you need
Tools
-
Spudger4.9


-
-
-
Just below the phone's camera, press the button and hold it
-
While the button is held down, slide the back panel off to remove it completely.
 Ask FixBot
-
-
-
Grasp the bottom corners of the battery with two fingers and gently lift.
-
Gently lift the battery and remove it from the phone.
-
-
-
-
-
Using a plastic prying tool, remove the screw cover in the top left corner of the phone by lifting it up.
-
-
-
Use the Phillips #00 screwdriver to remove the six screws on the back of the phone.
-
-
-
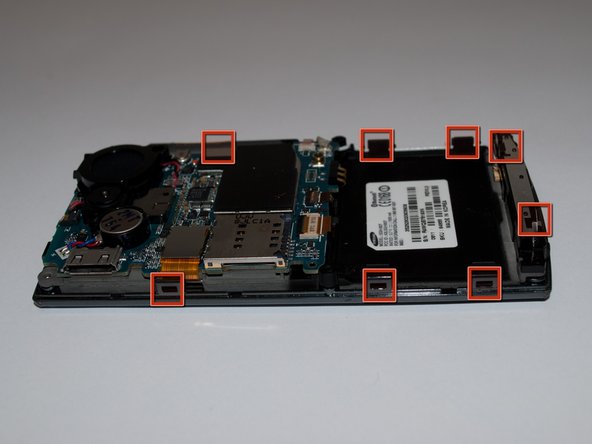
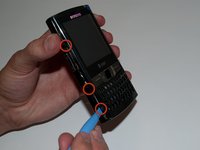
Insert the prying tool into the seam on the side of the phone and turn it slightly. Do this for each of the eight clips to unhook them
-
-
-
Once all eight of the clips have been unhooked, lift the back panel gently off of the phone.
-
-
-
-
Using the plastic prying tool, unlatch the ribbon cable located in the lower right corner of the motherboard.
-
-
-
Grasp the rubber keyboard in the corner with your fingers and lift to remove it.
-
Lift it and gently take it out the frame to remove it.
-
-




To reassemble your device, follow these instructions in reverse order.
Cancel: I did not complete this guide.
2 other people completed this guide.

Team

Cal Poly, Team 15-15, Regan Spring 2011 Member of Cal Poly, Team 15-15, Regan Spring 2011
CPSU-REGAN-S11S15G15
5 Members
60 Guides authored
