
Samsung DV300F Back LCD Screen Replacement

Timothy Gordon and 6 other contributors
Last updated on Jan 9, 2020
Views: 2K
View statistics:
- Past 24 Hours:
- 4
- Past 7 Days:
- 20
- Past 30 Days:
- 109
- All Time:
- 1,969
Comments: 6
6 comments on steps.
Completed: 5 6
5 people have marked this guide "completed." Will you be next?
6 people have marked this guide "completed." Including you — great job!
Favorites: 0 1
No one has favorited (and subscribed to) this guide. Will you be the first?
1 person has favorited (and subscribed to) this guide — and that's you!
Action Shots
Be an action hero! This guide needs images that better demonstrate how to perform specific actions.
Better Introduction
Improve this guide by completing or revising its introduction.
Introduction
Go to step 1 ↓This guide will show how to remove the Back LCD Screen.
What you need
Tools

-
-
-
Remove the two black 4.2 mm screws on the right side of the camera using a Phillips #0 screwdriver.
-
Remove the two black 4.2 mm screws on the left side of the camera using a Phillips #0 screwdriver.
-
Remove the two black 4.2 mm screws on the bottom of the camera using a Phillips #0 screwdriver.
 Ask FixBot
-
-
-
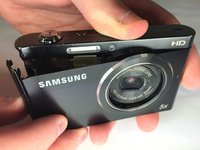
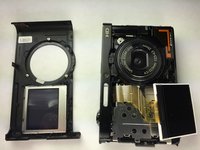
Remove the front case of the camera.
-
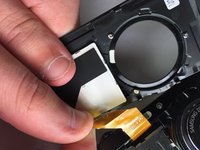
Remove the front LCD screen from the front case next to the lens.
-
-
-
-
-
-
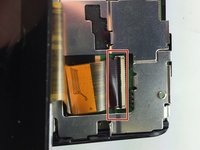
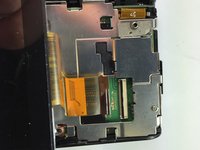
Flip the black tab where the back LCD screen connects to the circuit board.
-
Pull the tape connection to disconnect the back LCD screen from the circuit board.
-




To reassemble your device, follow these instructions in reverse order.
Cancel: I did not complete this guide.
5 other people completed this guide.

Team

Baylor, Team 5-10, Williams Spring 2015 Member of Baylor, Team 5-10, Williams Spring 2015
BU-WILLIAMS-S15S5G10
3 Members
60 Guides authored
