Free Shipping on Domestic Orders $75+

Ryobi RY40109 20" Mower Blade Replacement

Views: 1.9K

View statistics:

Past 24 Hours:
2
Past 7 Days:
26
Past 30 Days:
150
All Time:
1,897
Comments: 3

3 comments on steps.

Completed: 0

No one has marked this guide "completed." Will you be the first?

Favorites: 0

No one has favorited (and subscribed to) this guide. Will you be the first?

Time Required: 15 - 30 minutes
Difficulty: Easy
Featured Student Guide

This guide has been the hard work of our awesome students and is found to be exceptionally cool by the iFixit staff.

Ryobi RY40109 20" Mower Blade Replacement

Introduction

Go to step 1 ↓

Operating your mower with a dull blade can be hard on your lawn, leaving the grass tattered or torn rather than cut. This will cause it to look yellow and restrict healthy growth. Also, a damaged blade can be a danger to the operator or nearby people.

Replacing the blade isn't difficult and is a task that anyone should be able to complete in 15-30 minutes. There are some things to keep in mind as you start this project though. You will be working with a sharp object (the blade), so using a pair of heavy-duty gloves, removing the battery, and carefully blocking the blade are important safety measures to keep in mind as you start your work.

Once you've completed the replacement, I recommend mowing your yard right away and experience the satisfaction of your crisply mowed lawn!

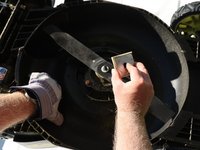
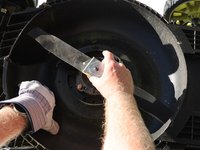
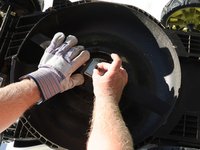
    1. Ryobi RY40109 20" Mower Blade Replacement, Blade: step 1, image 1 of 3 Ryobi RY40109 20" Mower Blade Replacement, Blade: step 1, image 2 of 3 Ryobi RY40109 20" Mower Blade Replacement, Blade: step 1, image 3 of 3
      • Before working with the blade, remove the battery.

      • Firmly grasp the battery, depressing the battery release and slide the battery out.

      Ask FixBot

      Add Comment

    2. Ryobi RY40109 20" Mower Blade Replacement: step 2, image 1 of 1
      • Turn the mower upside down on a flat, stable surface.

      Ask FixBot

      Add Comment

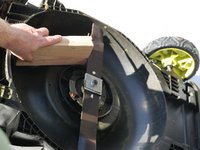
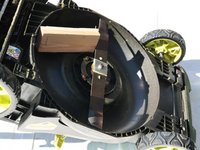
    3. Ryobi RY40109 20" Mower Blade Replacement: step 3, image 1 of 2 Ryobi RY40109 20" Mower Blade Replacement: step 3, image 2 of 2
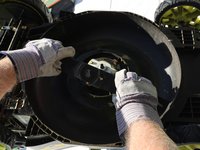
      • Preventing the blade from spinning is an important safety step!

      • Use an 8" to 10" block of 2x4 to prevent the blade from spinning counterclockwise.

      • You may have to experiment a bit to position it correctly.

      Ask FixBot

      Add Comment

    4. Ryobi RY40109 20" Mower Blade Replacement: step 4, image 1 of 1
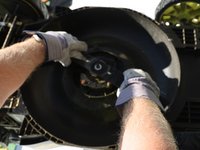
      • Protect your hands by putting on your heavy-duty canvas gloves while working around the blade.

      • Using a 15 mm socket wrench, remove the blade nut by turning it counterclockwise.

      Ask FixBot

      Add Comment

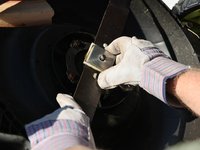
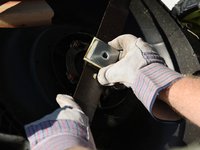
    5. Ryobi RY40109 20" Mower Blade Replacement: step 5, image 1 of 3 Ryobi RY40109 20" Mower Blade Replacement: step 5, image 2 of 3 Ryobi RY40109 20" Mower Blade Replacement: step 5, image 3 of 3
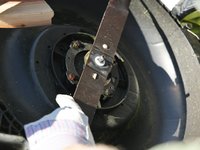
      • Remove the nut spacer and blade insulator.

      • Remove the blade.

      Ask FixBot

      Add Comment

    6. Ryobi RY40109 20" Mower Blade Replacement: step 6, image 1 of 3 Ryobi RY40109 20" Mower Blade Replacement: step 6, image 2 of 3 Ryobi RY40109 20" Mower Blade Replacement: step 6, image 3 of 3
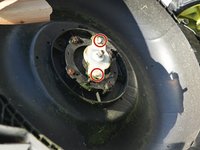
      • Identify the alignment shapes on the blade hub.

      • Install the new blade on the hub using the alignment posts.

      Ask FixBot

      Add Comment

    7. Ryobi RY40109 20" Mower Blade Replacement: step 7, image 1 of 3 Ryobi RY40109 20" Mower Blade Replacement: step 7, image 2 of 3 Ryobi RY40109 20" Mower Blade Replacement: step 7, image 3 of 3
      • Replace the insulator, spacer, and nut.

      Ask FixBot

      Add Comment

    8. Ryobi RY40109 20" Mower Blade Replacement: step 8, image 1 of 1
      • Re-block the blade to keep it from spinning clockwise this time.

      Ask FixBot

      Add Comment

      • Set the torque wrench to between 310-360 in.lbs.

      Ask FixBot

      Add Comment

    9. Ryobi RY40109 20" Mower Blade Replacement: step 10, image 1 of 1
      • Tighten the blade nut with the torque wrench by rotating the wrench clockwise.

      • You have completed the replacement! Time to mow the grass!

      Ask FixBot

      Add Comment

Finish Line

Cancel: I did not complete this guide.

Jim Keplinger

Member since: 09/25/24

181 Reputation

1 Guide authored

Team

CSU Sacramento, Team 1-8, Laflen Fall 2024 Member of CSU Sacramento, Team 1-8, Laflen Fall 2024

CSUSAC-LAFLEN-F24S1G8

1 Member

12 Guides authored

0 Guide Comments

Add Comment

View Statistics:

Past 24 Hours: 2

Past 7 Days: 26

Past 30 Days: 150

All Time: 1,897