
Ryobi CSB125 Protective Shell Replacement

Curtis Melo and one other contributor
Last updated on Jan 6, 2020
Views: 3K
View statistics:
- Past 24 Hours:
- 1
- Past 7 Days:
- 18
- Past 30 Days:
- 87
- All Time:
- 2,962
Comments: 5
1 comment on steps, 4 guide comments.
Go to guide commentsCompleted: 4 5
4 people have marked this guide "completed." Will you be next?
5 people have marked this guide "completed." Including you — great job!
Favorites: 0 1
No one has favorited (and subscribed to) this guide. Will you be the first?
1 person has favorited (and subscribed to) this guide — and that's you!
Introduction
Go to step 1 ↓This guide will show you how to properly install a new protective shell to your Ryobi CSB125 circular saw. If the protective shield is cracked/damaged, or isn’t functioning properly, then the protective shell should be replaced. This troubleshooting pagewill help diagnose any potential problems occurring due to a faulty protective shell. In the event that a new shell is needed, this guide will show the steps to properly install a new one. The only tools you will need are a 7”/32 Allen key and T20 Torx screwdriver.
What you need
Tools


-
-
-
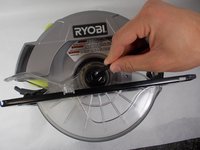
Remove the bumper by using the T20 Torx screwdriver to loosen the M5 x 20mm screw.
-
-
-
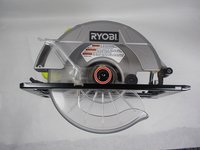
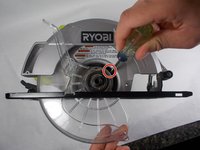
Remove the 5/16-18 x 9/16 in. blade screw, spring washer, the outer blade washer, the blade, and the inner blade washer.
-
-
-
-
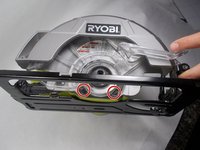
Remove the lower blade guard support assembly from the rest of the saw.
-
Remove the protective shell.
-

 Ask FixBot





To reassemble your device, follow these instructions in reverse order.
Cancel: I did not complete this guide.
4 other people completed this guide.

Team

UMass Dartmouth, Team S2-G1, Barthe Fall 2019 Member of UMass Dartmouth, Team S2-G1, Barthe Fall 2019
UMASSD-BARTHE-F19S2G1
3 Members
60 Guides authored
4 Guide Comments
Instructions fail at step #5. Bottom-left screw is under the plastic blade guard which blocks removal of the screw. Blade guard covers the screw no matter how it’s positioned.
If you wiggle the plastic you can remove
I was able to remove… be patient it does work
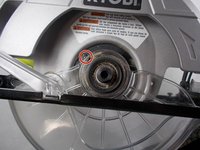
Instructions also fail at step #6. I have no idea how to remove the plastic blade guard from the axle so I can transfer it to the new (replacement) blade guard.
I also was struggling… … but if you look closely there is a thin metal ring around the center plastic ring that the spindle runs through… this has a split in it…. I used a small flat Precision screwdriver (type used to tighten reading glasses,etc)and was able to pry at the split and remove the thin metal ring.
Once removed this frees the plastic guard and it drops right out.
Just reverse to reassemble.
This works… just be patient
