Free Shipping on Domestic Orders $75+

Rozia HQ242 Trimmer Spring Replacement

What you need

    1. Rozia HQ242 Trimmer Spring Replacement, Spring: step 1, image 1 of 3 Rozia HQ242 Trimmer Spring Replacement, Spring: step 1, image 2 of 3 Rozia HQ242 Trimmer Spring Replacement, Spring: step 1, image 3 of 3
      • Use a Phillips #1 screwdriver to remove the two 6 mm screws securing the blade to the trimmer.

      Ask FixBot

      Add Comment

    2. Rozia HQ242 Trimmer Spring Replacement: step 2, image 1 of 2 Rozia HQ242 Trimmer Spring Replacement: step 2, image 2 of 2
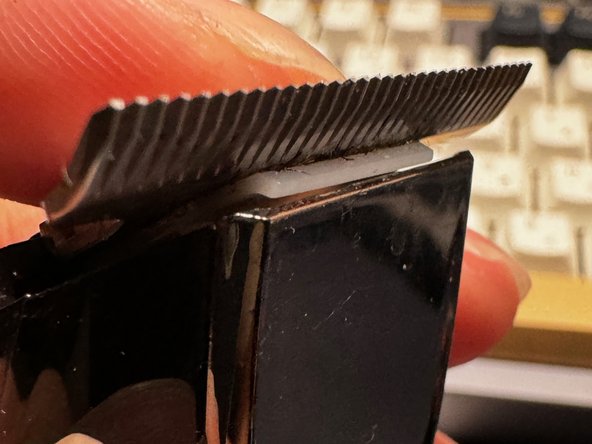
      • Gently lift the inner blade straight up and away from the device.

      • With the blades removed, now is a good time to clean the trimmer using a small brush, dust blower, or q-tips.

      Ask FixBot

      Add Comment

    3. Rozia HQ242 Trimmer Spring Replacement: step 3, image 1 of 3 Rozia HQ242 Trimmer Spring Replacement: step 3, image 2 of 3 Rozia HQ242 Trimmer Spring Replacement: step 3, image 3 of 3
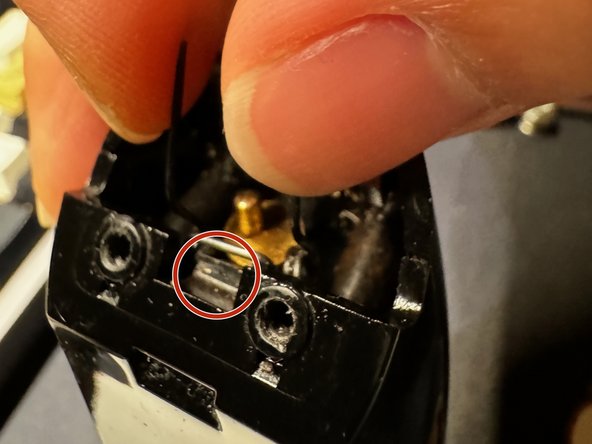
      • Gently lift the spring away from the trimmer.

      • You may need to point the legs of the spring at a 45-degree angle before you can pull it out.

      • Take note of the shape of the spring. There is a flat U-shaped bend that rests on a notch in the trimmer. This information will be important when putting everything back together!

      Ask FixBot

      Add Comment

    4. Rozia HQ242 Trimmer Spring Replacement: step 4, image 1 of 3 Rozia HQ242 Trimmer Spring Replacement: step 4, image 2 of 3 Rozia HQ242 Trimmer Spring Replacement: step 4, image 3 of 3
      • Align the flat U-shaped end of the spring to the notch on the trimmer.

      • Gently pinch the two legs of the spring with your thumb and index finger, aligning them to point towards the front of the trimmer at a 45-degree angle, then drop it into the slot.

      • Once it is successfully in, carefully let go. If it falls off the notch, you will have to wedge it out and try again. This may take multiple attempts.

      • Make sure that the spring is securely resting on the notch, or the trimmer may not function properly!

      Ask FixBot

      Add Comment

    5. Rozia HQ242 Trimmer Spring Replacement: step 5, image 1 of 3 Rozia HQ242 Trimmer Spring Replacement: step 5, image 2 of 3 Rozia HQ242 Trimmer Spring Replacement: step 5, image 3 of 3
      • Reinstall the inner blade.

      • The notch located on the back of the blade must align with the gold-plated contact.

      • Gently push down so that the plate rests against the front of the trimmer.

      • Take extra caution not to dislodge the spring from its position, especially after pressing down on the blade.

      Ask FixBot

      Add Comment

    6. Rozia HQ242 Trimmer Spring Replacement: step 6, image 1 of 3 Rozia HQ242 Trimmer Spring Replacement: step 6, image 2 of 3 Rozia HQ242 Trimmer Spring Replacement: step 6, image 3 of 3
      • Carefully reattach the outer blade.

      • The screw holes protrude just enough to allow the blade to 'click' into position.

      • Use a Phillips #1 screwdriver to replace the two 6 mm screws that secure the outer blade.

      Ask FixBot

      Add Comment

Conclusion

To reassemble your device, follow these instructions in reverse order.

Cancel: I did not complete this guide.

4 other people completed this guide.

Jose Lucio

Member since: 03/05/24

213 Reputation

1 Guide authored

Team

1 Guide Comment

can i get charging cord for it

Anil Singhal - Reply Share

Add Comment

View Statistics:

Past 24 Hours: 9

Past 7 Days: 53

Past 30 Days: 221

All Time: 2,668