Free Shipping on Domestic Orders $75+

Roku 4 Motherboard Replacement

What you need

  1. Roku 4 Motherboard Replacement, Motherboard: step 1, image 1 of 1
    • Place the Roku 4 face-down on a table. The rubber sticker should be facing you.

    Ask FixBot

    Add Comment

  2. Roku 4 Motherboard Replacement: step 2, image 1 of 1
    • Starting at one corner of the device, pull the rubber sticker back toward the opposite corner of the device carefully to reveal the underlying screws.

    • Completely remove the rubber sticker to reveal the underlying screws on the device.

    • Place the rubber sticker facing up on the table to preserve its adhesiveness. It will be needed to reassemble the device.

    Ask FixBot

    Add Comment

  3. Roku 4 Motherboard Replacement: step 3, image 1 of 1
    • Turn the Phillips PH1 screwdriver counterclockwise to unscrew all 4 of the 12.0 mm screws.

    • Store the screws in a safe place, such as on a magnetic project mat, so they do not get lost before reassembly.

    Ask FixBot

    Add Comment

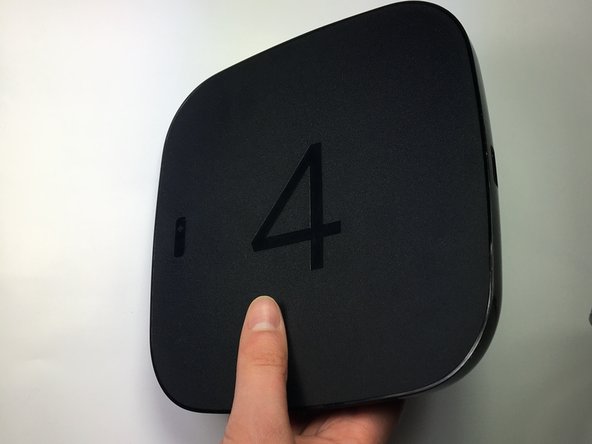
  4. Roku 4 Motherboard Replacement: step 4, image 1 of 2 Roku 4 Motherboard Replacement: step 4, image 2 of 2
    • Turn the device over so you can see the "4" on the top cover.

    Ask FixBot

    Add Comment

  5. Roku 4 Motherboard Replacement: step 5, image 1 of 2 Roku 4 Motherboard Replacement: step 5, image 2 of 2
    • Wedge a plastic opening tool into the seam between the top cover and bottom casing of the device and create a gap.

    • Prying open the device is quite difficult and requires a large amount of force. Use caution to avoid breaking the device or hurting yourself.

    Ask FixBot

    Add Comment

  6. Roku 4 Motherboard Replacement: step 6, image 1 of 1
    • After you have created a gap large enough to fit your fingers between, gently lift up the top cover to open the device and reveal the motherboard.

    • The motherboard should still be attached to the underside of the top cover by a red wire, a blue wire, and a black wire.

    Ask FixBot

    Add Comment

  7. Roku 4 Motherboard Replacement: step 7, image 1 of 3 Roku 4 Motherboard Replacement: step 7, image 2 of 3 Roku 4 Motherboard Replacement: step 7, image 3 of 3
    • To begin removing the motherboard from the plastic casing, pinch the black plastic clip and gently pull upward.

    • Once you feel the motherboard begin to loosen from the plastic casing, pull it upward to remove it completely.

    • The motherboard should still be attached to the underside of the top cover by a red wire, a blue wire, and a black wire.

    Ask FixBot

    Add Comment

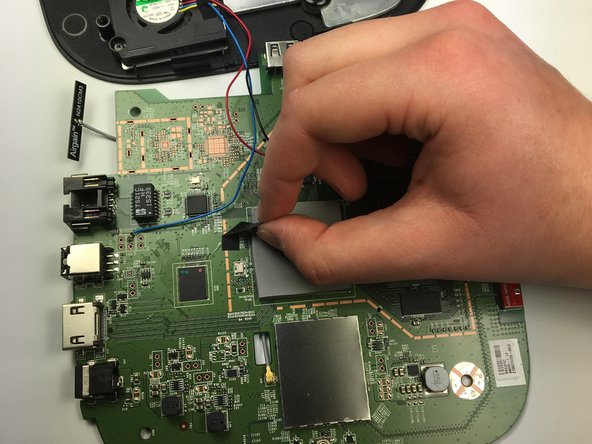
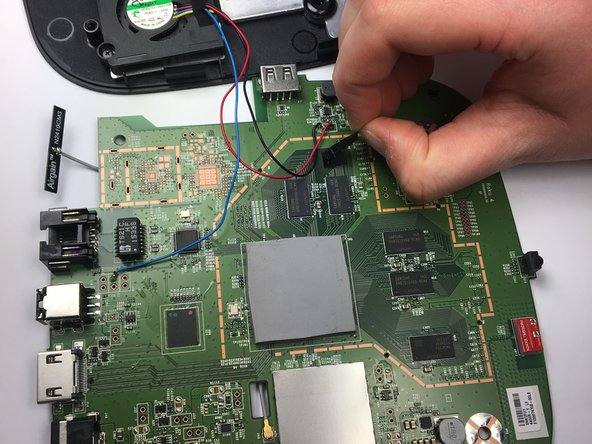
  8. Roku 4 Motherboard Replacement: step 8, image 1 of 3 Roku 4 Motherboard Replacement: step 8, image 2 of 3 Roku 4 Motherboard Replacement: step 8, image 3 of 3
    • Peel back the black adhesive strip that attaches the blue wire to the motherboard.

    • Repeat this step for the strip that attaches the black and red wires to the motherboard.

    Ask FixBot

    Add Comment

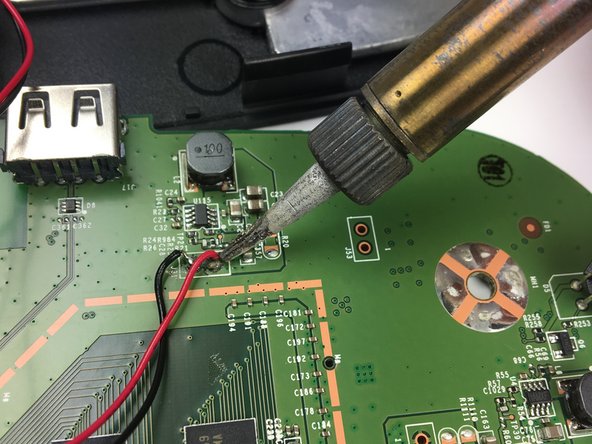
  9. Roku 4 Motherboard Replacement: step 9, image 1 of 3 Roku 4 Motherboard Replacement: step 9, image 2 of 3 Roku 4 Motherboard Replacement: step 9, image 3 of 3
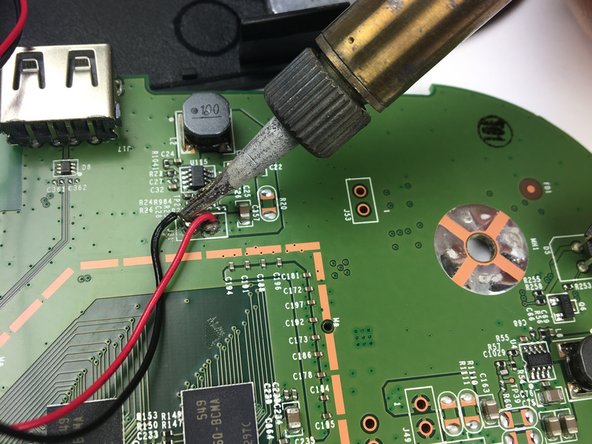
    • Using a soldering iron, desolder the blue, red, and black wires from the motherboard.

    • Consult iFixit's Soldering Skills guide to safely use the soldering iron.

    • The motherboard should now be completely disconnected from the top cover of the device.

    Ask FixBot

    Add Comment

Conclusion

Follow these steps in the reverse order to reassemble your device.

Cancel: I did not complete this guide.

7 other people completed this guide.

Bradley Rains

Member since: 03/26/17

166 Reputation

1 Guide authored

Team

Baylor, Team S5-G4, Williams Spring 2017 Member of Baylor, Team S5-G4, Williams Spring 2017

BU-WILLIAMS-S17S5G4

3 Members

4 Guides authored

4 Guide Comments

Thank you, have you upgraded to a new 2019 Ultra model yet?

Allan Landwer - Reply Share

Soldering the fan to the mobo is a suck move. However, they used a good quality bearing-less fan.

smbrannon - Reply Share

Can you gve me areson? will it suck out the perfomance?

Kind-hearted, spirited Man - Reply Share

Because it makes replacing the motherboard more difficult. For a few cents more, they could have placed a small connector inline between the fan and motherboard, making disconnecting the fan and top case really easy.

Bob Reed - Reply Share

Add Comment

View Statistics:

Past 24 Hours: 1

Past 7 Days: 5

Past 30 Days: 60

All Time: 6,367