Introduction
The scroll wheel on the G403 is infamously known for beginning to skip and scroll backwards. Forum posts say to update firmwares and all manner of things.
But in reality the most common issue is the scroll wheel sensor.
The encoder has materials which wear out internally and clog up the scroll mechanism.
This can either be cleaned if you have delicate hands and Q-Tips, or replaced altogether as in this guide.
What you need
-
-
Remove the non-stick skates underneath the G403 using a spatula or screw driver.
-
Be careful if you intend to reuse these skates.
-
-
-
Carefully open the shell by lifting the back of the mouse, then moving the front forward.
-
Be very careful not to pull too far, since there is a thin cable bridging the two halves.
-
-
-
-
You can try this if you want to attempt to save the existing sensor, but replacing it will most likely be better. If you've decided to replace the sensor, skip this step.
-
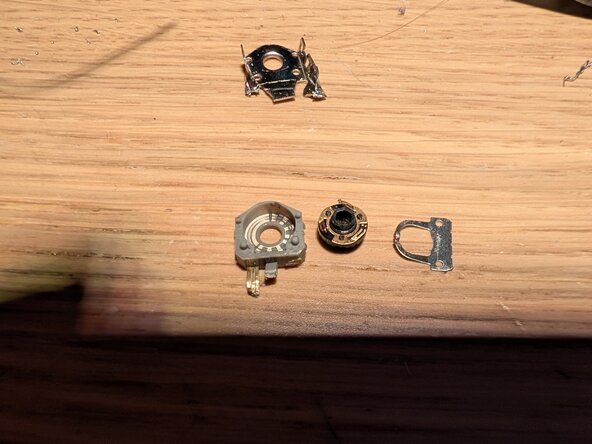
NOTE: These photos are from a damaged sensor, so as to show the internals.
-
First, unclip the small metal brackets on the side of the encoder using something like a small flat screwdriver, pick, or other flat tool.
-
Second, separate the two halves of the sensor. (As they are connected on the board, you'll need to bend the gray part+pins to the side.)
-
Use a pry tool to separate the metal locking clip from the grey component.
-
This will reveal the rotor and grey components contacts. Clean the grey component's contacts using a Q-tip. No IPA is needed, but could be used if you have some.
-
Reassemble the encoder by following the steps on this page in reverse order, and test the sensor by temporarily putting the rest of the scroll wheel into the sensor and scrolling with the mouse connected to a PC.
-
If this worked; Congratulations, you can skip the rest of the guide!
-
-
-
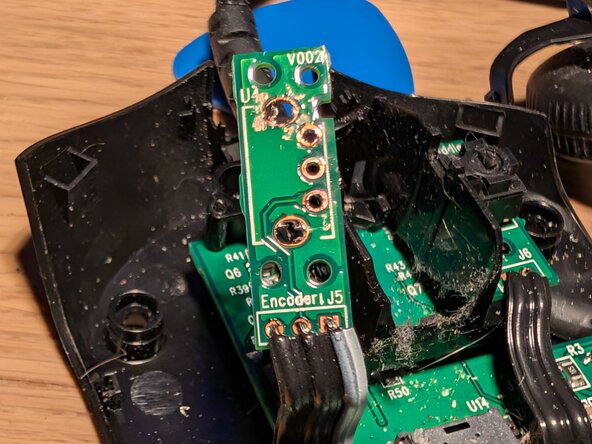
First, remove the screws holding the rotary sensor in place. (Make sure to keep them separate from the previous screws)
-
Carefully move the scrollwheel and sensor assembly to the side.
-
Put the scroll wheel plastic to the side.
-
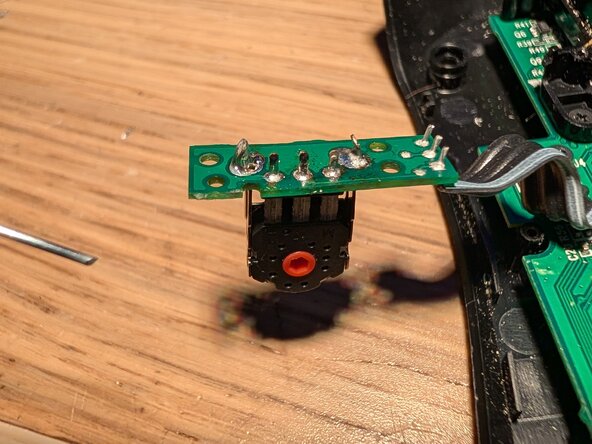
Now to remove the sensor, either:
-
Desolder using the soldering iron and solder sucker which takes some skill.
-
Or snip the legs of the encoder carefully, making sure not to damage the PCB. Then use the soldering iron and solder sucker to remove the remnants. (Much easier, i opted for this)
-
Be careful not to destroy the cable linking the PCB to the rest of the mouse.
-
-
-
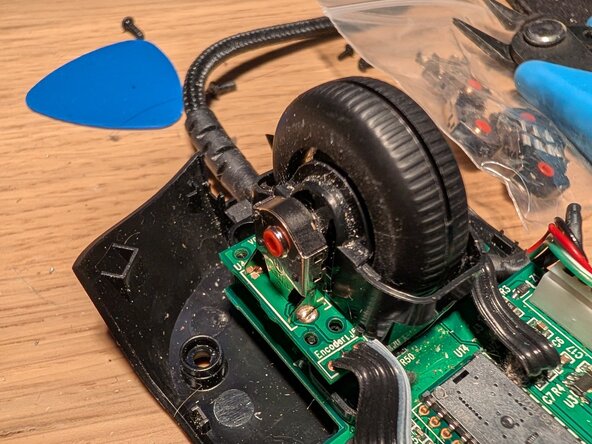
After cleaning existing solder, install the new sensor.
-
Start by putting the sensor in place and soldering it one point.
-
This allows you to adjust the orientation of the sensor should it not be correct by reheating the solder joint and moving it in-place.
-
Solder the rest of the legs for the encoder.
-
I also recommend going through the insides of the mouse with a toothbrush at this point, making sure to get all the dust out from inside of it.
-


To reassemble your device, follow these instructions in reverse order.
