
Replacing an Atari Capacitor

John Lopez and 4 other contributors
Last updated on Mar 17, 2014
Views: 6.1K
View statistics:
- Past 24 Hours:
- 6
- Past 7 Days:
- 32
- Past 30 Days:
- 104
- All Time:
- 6,126
Comments: 0
No one has left comments on this guide. Will you be first?
Go to guide commentsCompleted: 1 2
1 person has marked this guide "completed." Will you be next?
2 people have marked this guide "completed." Including you — great job!
Favorites: 1 2
1 person has favorited (and subscribed to) this guide. Will you be next?
2 people have favorited (and subscribed to) this guide — including you!
Needs Better Images
Better photos will improve this guide. Help out by taking, editing, or uploading new ones!
Introduction
Go to step 1 ↓Before starting this guide you may need some experience with soldering/ desoldering. If you do not know how, you can learn by clicking the link on step 5 (when you have to desolder the aluminum tabs).
What you need
Tools


-
-
-
Before disassembling your Atari Lynx, be sure the device is powered off.
-
Remove any game in the console by opening the right latch and sliding the game to the right.
 Ask FixBot
-
-
-
Remove the four 35 mm Phillips #1 screws at each corner of the backside on the Atari Lynx.
-
Pinch the rear panel with your fingers and lift away from the Atari.
-
-
-
Remove the battery panel by pinching the sides with your fingers and lifting it away from the Atari.
-
-
-
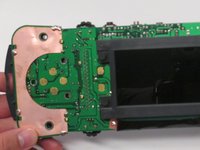
Remove the control panel by pinching the sides with your fingers and lifting it away from the Atari.
-
-
-
-
-
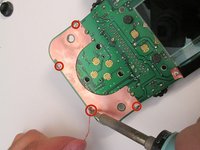
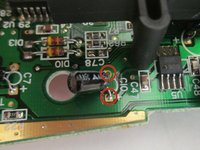
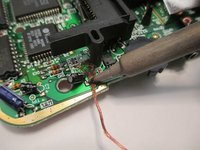
Desolder the four aluminum tabs and for more information on soldering click here.
-
-
-




To reassemble your device, follow these instructions in reverse order.
Cancel: I did not complete this guide.
One other person completed this guide.

Team

Cal Poly, Team 1-42, Maness Winter 2014 Member of Cal Poly, Team 1-42, Maness Winter 2014
CPSU-MANESS-W14S1G42
5 Members
72 Guides authored
