This translation was generated by a machine and has not been reviewed by a person yet. Speak this language? Review it.

Repairing a Broken Bumper

Last updated on Sep 29, 2026
Views: 47
View statistics:
- Past 24 Hours:
- 3
- Past 7 Days:
- 15
- Past 30 Days:
- 47
- All Time:
- 47
Comments: 0
No one has left comments on this guide. Will you be first?
Go to guide commentsCompleted: 0 1
No one has marked this guide "completed." Will you be the first?
1 person has marked this guide "completed." It's you — great job!
Favorites: 0 1
No one has favorited (and subscribed to) this guide. Will you be the first?
1 person has favorited (and subscribed to) this guide — and that's you!
Introduction
Go to step 1 ↓Normally, a window cleaning robot should not fall, but unfortunately, it sometimes happens. A fall puts the bumpers with the spray nozzles at particular risk. In general, many spare parts for the device are available, but this specific part is not always easy to find. It is made of ABS and you can try to glue it. This guide shows you how to do that.
You only need a single tool: a Phillips #2 screwdriver. Keep the screws well organized, as they are of different sizes.
What you need

-
-
-
Empty the fluid reservoir. Remove the mop pad. Unplug the power cord.
-
Place the device with its underside facing up on your workspace.
-
Remove the four screws on the grey mop pad bracket.
-
Lift the grey bracket off.
-
Remove the eight screws underneath the grey bracket.
 Ask FixBot
-
-
-
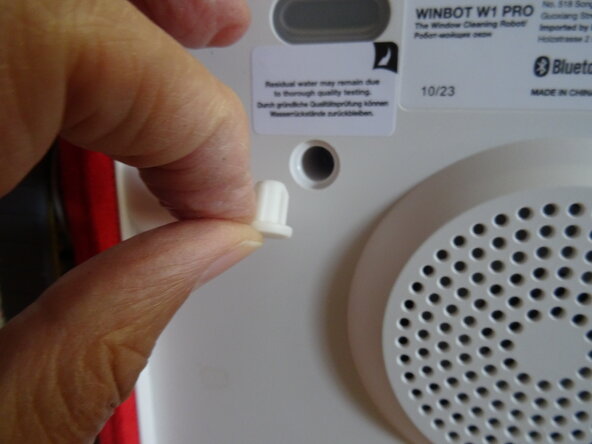
Use a pointed tool to peel off the rubber cap on the underside.
-
Remove the screw underneath.
-
Turn the device over.
-
Carefully lift the top cover slightly. Be careful not to strain the cables underneath too much.
-
-
-
Remove the two cable bundles from their retaining clips.
-
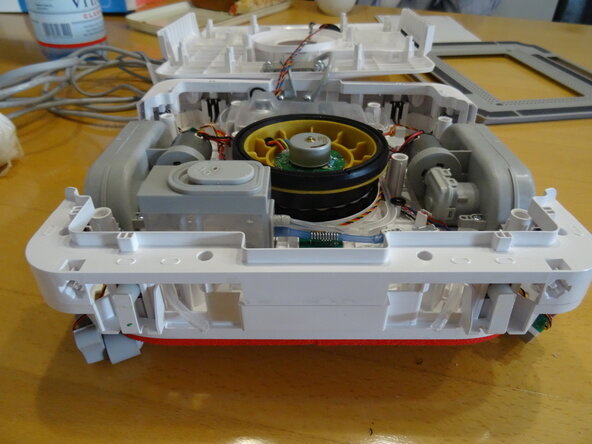
You can now flip up the top cover to access all the components inside.
-
-
-
-
-
The crack in the bumper is clearly visible here. There are sensors located underneath the bumper; because of the crack, they can no longer trigger correctly.
-
-
-
Remove two screws from each of the corner sensors.
-
Lift the sensors off. Let them simply hang by the cables.
-
-
-
Lift the bumper against light resistance from the right and left sides. Watch out for the hoses to the spray nozzles.
-
Reassembly is easier if you do not disconnect the hoses from the nozzles, but rather at the other end. Carefully cut the cable ties to do this.
-
Carefully remove the bumper.
-
-
-
-
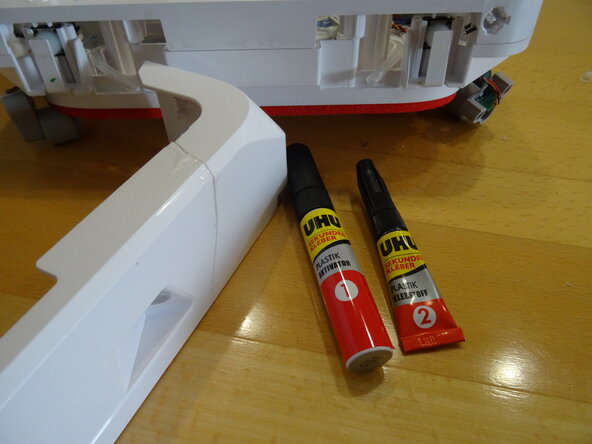
The bumper is made of ABS, which can be easily glued using a suitable adhesive—in this case, superglue with an activator.
-
-






Follow the steps in reverse order to reassemble your device.

