Introduction
Nokia 6500 Slide LCD replacement. Save your money & time. Do it for as low as IDR 50,000 and it takes less than 10 minutes.
What you need
-
-
Press the eject button to open battery enclosure. Remove battery, sim card and micro sd card.
 Ask FixBot
-
-
-
Pry each side evenly around its edges. The phone should start to split into two halves.
-
-
-
-
The top and bottom half of the phone is still connected by two ribbon connectors each side. Use a thin plastic like a credit card to carefully disconnect it.
-
-
-
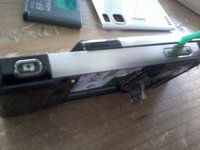
Pull the black part away from the rest of the phone in the direction shown by the white arrows follows by the blue.
-
This way you can accessing the two screws at the bottom of the phone. Remove four srews using torx 5 screwdriver.
-
-
-
Carefully pry out the lcd cover.
-
Make sure the board connector pass the cover by angle.
-
-
-
Disconnect the LCD connector.
-
Carefully peel the ribbon away from the back of the screen. It's held in place with double sided tape.
-
The LCD screen will now be loose and can be removed and replace with the new one.
-


To reassemble your device, follow these instructions in reverse order.
Cancel: I did not complete this guide.
2 other people completed this guide.

2 Guide Comments
Great - have screen in. Now, have you ever replaced the port / jack for the charger? Mine will not accept the prong all of a sudden
Got new charger port in 2017, now the battery goes - tried several batteries - and tried them in other phones and are fine - thinking something shorting or draining it in the phone?