Introduction
If the cuff or sleeve of your sweatshirt is fraying, unraveling, or has loose threads sticking out, use this guide to fix it up by hand. Frayed cuffs happen when the fabric edges wear down from washing and everyday use. If you leave it alone, the fraying just keeps spreading, and the cuff falls apart faster.
This guide will show you how to trim the loose threads and stitch with a basic whip stitch using a needle, thread, and scissors.
It's best to work somewhere with good lighting, and be careful with your fingers around the needle.
What you need
-
-
Take a close look at the frayed area of the cuff and find where the loose threads are coming from.
-
Lay the sweatshirt flat on a clean surface so the damaged cuff is easy to work with.
 Ask FixBot
-
-
-
Use scissors to carefully trim off any long, loose threads sticking out from the cuff.
-
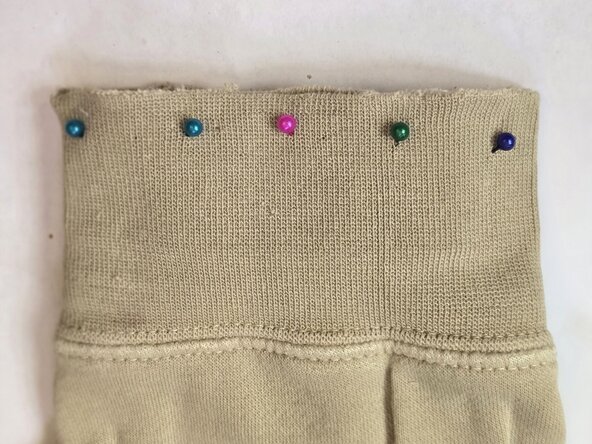
Place sewing pins evenly along the frayed edge to hold the fabric flat and steady while you sew.
-
-
-
Flip cuff inside out so it is easier to work with.
-
Push pins through both layers of fabric to hold them flat and steady while sewing.
-
Once the pins have been placed, flip the cuff back to its normal position.
-
-
-
-
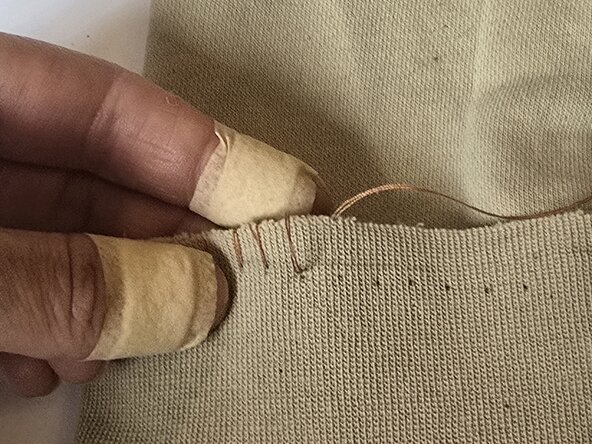
Cut a length of thread about as long as your forearm. Pinch the end of the thread tightly between your thumb and finger so only a tiny bit sticks out, like in the photo.
-
Push the pinched end of the thread through the eye of the needle and pull it through.
-
Pull the thread through the needle until both ends are even and flush with each other, so the thread is doubled up and ready to be knotted in the next step.
-
-
-
Loop the end of the doubled thread around the tip of your pointer finger so it crosses over itself.
-
Use your thumb to push the loop up off your ring finger, rolling the thread until it twists into a small knot.
-
Pull the thread tight to lock the knot in place at the very end.
-
-
-
Push the needle up through the inside of the cuff so the knot stays hidden on the back side of the fabric.
-
Pull the thread all the way through until the knot catches against the fabric.
-
Bring the needle over the top edge of the cuff and push it back up through the fabric from the inside, a short distance from your first stitch.
-
-
-
Slide the needle under the last stitch on the inside of the cuff and pull the thread through, leaving a small loop.
-
Pass the needle through that loop and pull the thread snug to lock the knot in place.
-
Repeat this one more time so the knot is doubled up and won't come undone.
-


Your cuff should now be secure and free of fraying. Trim any extra thread sticking out, and your sweatshirt is ready to wear again.
Team

CSU Los Angeles, Team 7-1, Grodsky Spring 2026 Member of CSU Los Angeles, Team 7-1, Grodsky Spring 2026
CSULA-GRODSKY-S26S7G1
1 Member
1 Guide authored