Free Shipping on Domestic Orders $75+

Removing Canon PowerShot A550 Front and Back Covers

What you need

  1. Removing Canon PowerShot A550 Front and Back Covers, Front and Back Covers: step 1, image 1 of 3 Removing Canon PowerShot A550 Front and Back Covers, Front and Back Covers: step 1, image 2 of 3 Removing Canon PowerShot A550 Front and Back Covers, Front and Back Covers: step 1, image 3 of 3
    • Unscrew a total of 6 4.45 mm phillips head screws using a #00 phillips head screwdriver.

    • There are 2 screws on the left side (when looking at the front of the camera).

    • There are 3 screws on the bottom

    • There is 1 screw on the right side

    Ask FixBot
  2. Removing Canon PowerShot A550 Front and Back Covers: step 2, image 1 of 1
    • Turn to the bottom of the camera.

    • Open the memory card cover by sliding the "CARD/BATT." button up, and then pulling the cover to the left.

    Ask FixBot
  3. Removing Canon PowerShot A550 Front and Back Covers: step 3, image 1 of 1
    • This is what the SD card/battery compartment looks like when opened.

    • Remove one 4.45mm phillips head screw from the SD card/battery compartment using a #00 phillips head screwdriver.

    Ask FixBot
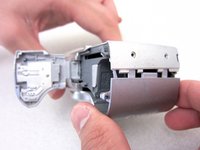
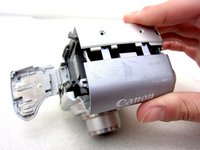
  4. Removing Canon PowerShot A550 Front and Back Covers: step 4, image 1 of 2 Removing Canon PowerShot A550 Front and Back Covers: step 4, image 2 of 2
    • Gently remove the front cover away from the camera body.

    • Tip: Start by loosening the teeth on the left side of the camera next to the battery compartment.

    Ask FixBot
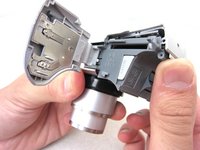
  5. Removing Canon PowerShot A550 Front and Back Covers: step 5, image 1 of 1
    • The camera should look like this once the front cover is removed.

    Ask FixBot
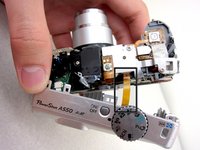
  6. Removing Canon PowerShot A550 Front and Back Covers: step 6, image 1 of 3 Removing Canon PowerShot A550 Front and Back Covers: step 6, image 2 of 3 Removing Canon PowerShot A550 Front and Back Covers: step 6, image 3 of 3
    Tool used on this step:
    Tweezers
    $4.99
    Buy
    • Start from the battery compartment and remove the back cover.

    • Caution: Do not tug on the back cover after it is removed. This could tear the ribbon attaching the back cover to the camera body.

    • Remove the connecting ribbon from the body of the camera using a pair of tweezers.

    Ask FixBot
  7. Removing Canon PowerShot A550 Front and Back Covers: step 7, image 1 of 1
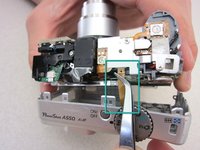
    • Once the ribbon connecting the back cover is removed, the back of the camera body should look like this.

    Ask FixBot
Conclusion

To reassemble your device, follow these instructions in reverse order.

5 other people completed this guide.

Shaelyn Thomas

Member since: 04/19/11

392 Reputation

4 Guides authored

Team

Cal Poly, Team 8-6, Regan Spring 2011 Member of Cal Poly, Team 8-6, Regan Spring 2011

CPSU-REGAN-S11S8G6

4 Members

22 Guides authored

0 Guide Comments

Add Comment

View Statistics:

Past 24 Hours: 1

Past 7 Days: 14

Past 30 Days: 75

All Time: 5,189