Free Shipping on Domestic Orders $75+

Remove Scanner Assembly

Views: 2.7K

View statistics:

Past 24 Hours:
6
Past 7 Days:
54
Past 30 Days:
211
All Time:
2,654
Comments: 1

1 comment on steps.

Completed: 0

No one has marked this guide "completed." Will you be the first?

Favorites: 0

No one has favorited (and subscribed to) this guide. Will you be the first?

Time Required: 15 minutes
Difficulty: Moderate
Community-Contributed Guide

An awesome member of our community made this guide. It was not created by iFixit staff.

Remove Scanner Assembly

What you need

Tools

    1. Remove Scanner Assembly, Prepare the Printer.: step 1, image 1 of 2 Remove Scanner Assembly, Prepare the Printer.: step 1, image 2 of 2
      • Remove the printer from the optional second paper tray.

      • Pull out the paper tray from the front, and the duplexer from the rear.

      • Removing the print head (see the HP user guide) may also reduce the chance of ink leakage while working on the printer.

      Ask FixBot

      Add Comment

    2. Remove Scanner Assembly, Control Panel: step 2, image 1 of 2 Remove Scanner Assembly, Control Panel: step 2, image 2 of 2
      • Hold up the control panel with one hand, reach underneath it with the other, and pull firmly downward on the curved support to detach it from the display

      • Lifting the display further up, reach behind the brown plastic cover, and pull it forwards to release it

      Ask FixBot

      Add Comment

    3. Remove Scanner Assembly, Control Panel: step 3, image 1 of 3 Remove Scanner Assembly, Control Panel: step 3, image 2 of 3 Remove Scanner Assembly, Control Panel: step 3, image 3 of 3
      • Rest the machine on it's rear panel, so you can access the cable.

      • Lift up the brown clamp, and pull out the cable

      • Using a T-10 Torx screwdriver, undo the two screws beneath the display (pictured)

      • The display remains attached to the scanner assembly for now. If you need to detach it from the scanner - for instance, to operate the printer while it is open - you can detach it once the scanner assembly is removed.

      Ask FixBot

      Add Comment

    4. Remove Scanner Assembly, Left Side Panel Screws: step 4, image 1 of 2 Remove Scanner Assembly, Left Side Panel Screws: step 4, image 2 of 2
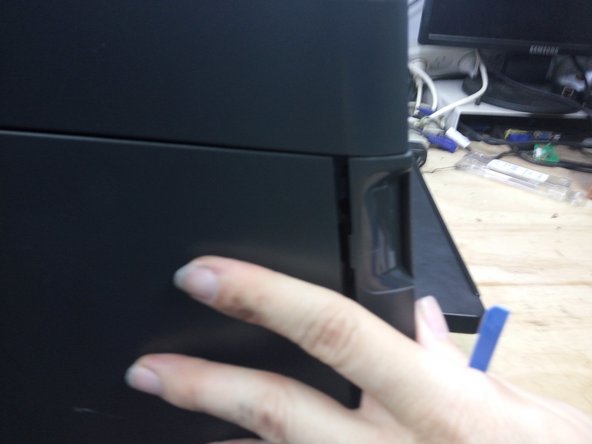
      • On the back of the printer, remove the two screws on the right hand side (left-hand when viewed from the front. (pictured)

      • Open the door on the front of the computer, and remove the one screw on the lower left-hand side. (pictured)

      Ask FixBot

      Add Comment

    5. Remove Scanner Assembly, Left Side (Controller Board) Panel: step 5, image 1 of 3 Remove Scanner Assembly, Left Side (Controller Board) Panel: step 5, image 2 of 3 Remove Scanner Assembly, Left Side (Controller Board) Panel: step 5, image 3 of 3
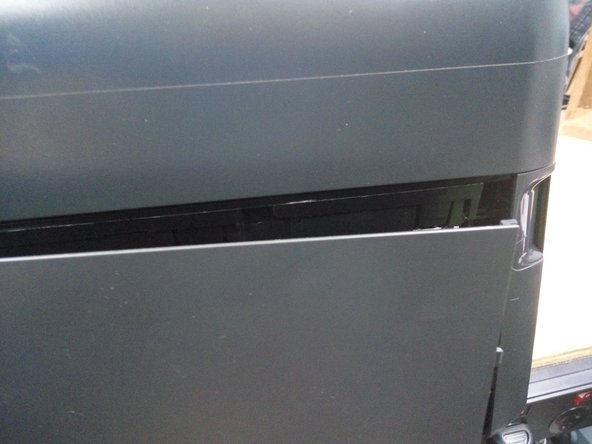
      • Recommend you remove spudger step as it is unneccesary and damaging potentially, All it did was break off a tab when I did it, all that is needed is to remove screws to slide left side panel off. Prying breaks plastic tab.

      • Using a spudger lever firmly outwards on the lower rear side of the panel.

      • With your other hand, push the panel backwards, It will slide half a centimeter backwards and come free.

      Ask FixBot

      Add Comment

    6. Remove Scanner Assembly, Disconnect Cables: step 6, image 1 of 1
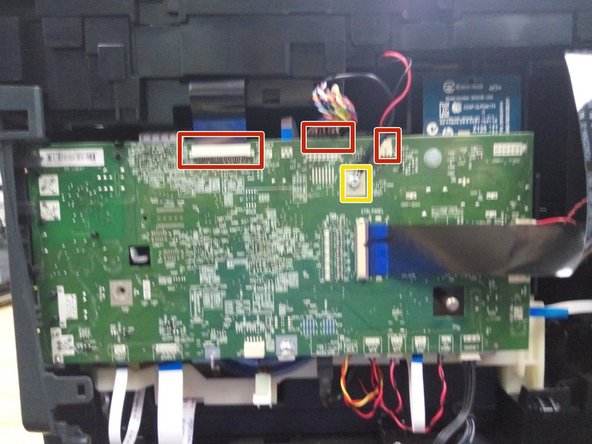
      • Disconnect the scanner flatfex, sheet feeder and LED cables (marked in red).

      • Remove the earth strap (marked in yellow).

      • No other cables need to be removed at this time.

      Ask FixBot

      Add Comment

    7. Remove Scanner Assembly, Remove scanner screws: step 7, image 1 of 2 Remove Scanner Assembly, Remove scanner screws: step 7, image 2 of 2
      • Remove the five remaining screws around the top of the printer. Front side behind door is first screw. (pictured)

      • The last four screws are on back. (pictured).

      Ask FixBot

      Add Comment

    8. Remove Scanner Assembly, Remove the scanner assembly: step 8, image 1 of 2 Remove Scanner Assembly, Remove the scanner assembly: step 8, image 2 of 2
      • Lift the scanner assembly away from the printer.

      • If you need to detach the display, lay the scanner assembly upside down, lower the display assembly, push it to the right, and then adjust the angle of the display until it drops away from the scanner. Reconnect it to the flat-flex cable, and clip the support back into the rear to hold it. The printer will operate normally without the scanner.

      Ask FixBot

      Add Comment

Conclusion

To reassemble your device, follow these instructions in reverse order.

Cancel: I did not complete this guide.

Robert Backhaus

Member since: 11/10/12

1,033 Reputation

5 Guides authored

0 Guide Comments

Add Comment

View Statistics:

Past 24 Hours: 6

Past 7 Days: 54

Past 30 Days: 211

All Time: 2,654