Introduction
Two tools required for the completion of this task include a PH1 screwdriver, and a prying tool.
All screws on this device are 10mm (0.393 in).
What you need
-
-
Using a Phillips #1 screwdriver, remove the 3 screws holding the black plastic cover in place.
-
Pull upwards and remove the black plastic cover.
-
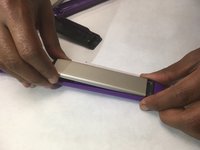
Remove the ceramic plate by pulling the plate parallel to the straightener, while pulling upwards.
 Ask FixBot
-
-
-
-
Using a Phillips #1 screwdriver, remove the 3 screws holding the black plastic cover in place. The screws are located in the same places as the other side.
-
Pull upwards and remove the black plastic cover.
-
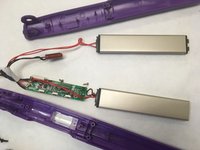
Remove the two screws off of the chip using a Phillips #1 screwdriver.
-
Pull off the chip with the same method as the black plastic cover.
-
-
-
Remove the ceramic plate by pulling the plate parallel to the straightener, while pulling upwards.
-


To reassemble your device, follow these instructions in reverse order.

Team

IUPUI, Team S3-G3, Wilson Summer 2018 Member of IUPUI, Team S3-G3, Wilson Summer 2018
IUPUI-WILSON-SU18S3G3
5 Members
2 Guides authored
