Free Shipping on Domestic Orders $75+

Remington MB4040 Thermal Switch Replacement

What you need

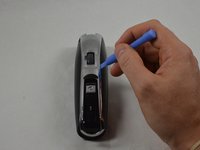
  1. Remington MB4040 Thermal Switch Replacement, Remove Blade Assembly: step 1, image 1 of 3 Remington MB4040 Thermal Switch Replacement, Remove Blade Assembly: step 1, image 2 of 3 Remington MB4040 Thermal Switch Replacement, Remove Blade Assembly: step 1, image 3 of 3
    • Press the black button below the blade to remove the blade.

    Ask FixBot

    Add Comment

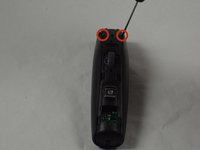
  2. Remington MB4040 Thermal Switch Replacement, Remove Back Cover Hardware: step 2, image 1 of 2 Remington MB4040 Thermal Switch Replacement, Remove Back Cover Hardware: step 2, image 2 of 2
    • Place the device so the back of the product is facing up.

    • Remove the two 11.0 mm PH00 screws from the black plastic housing at the bottom of the device.

    Ask FixBot

    Add Comment

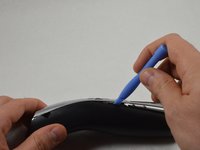
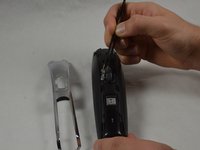
  3. Remington MB4040 Thermal Switch Replacement, Remove Front Cover Hardware: step 3, image 1 of 3 Remington MB4040 Thermal Switch Replacement, Remove Front Cover Hardware: step 3, image 2 of 3 Remington MB4040 Thermal Switch Replacement, Remove Front Cover Hardware: step 3, image 3 of 3
    • Remove the chrome plated plastic piece by using the plastic opening tool to pry it from the housing assembly.

    • Remove the small clear plastic piece that covers the zoom wheel numbers.

    Ask FixBot

    Add Comment

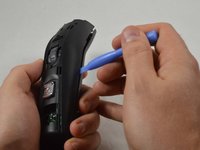
  4. Remington MB4040 Thermal Switch Replacement, Front Cover (cont.): step 4, image 1 of 2 Remington MB4040 Thermal Switch Replacement, Front Cover (cont.): step 4, image 2 of 2
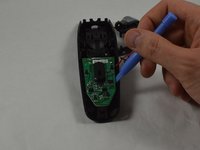
    • Remove the two 16.0 mm PH00 screws from the front cover.

    • Use the blue plastic opening tool to pry apart the two halves of the device.

    Ask FixBot

    Add Comment

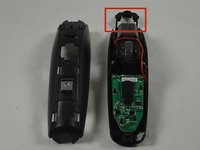
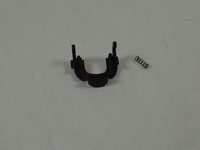
  5. Remington MB4040 Thermal Switch Replacement, Blade Button Removal: step 5, image 1 of 2 Remington MB4040 Thermal Switch Replacement, Blade Button Removal: step 5, image 2 of 2
    • Remove the black blade button and the two 10.0 mm springs, which are sandwiched between the cover assembly halves.

    • The blade button is sandwiched between the halves and the two springs may fall out when the halves are separated.

    Ask FixBot

    Add Comment

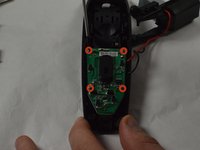
  6. Remington MB4040 Thermal Switch Replacement, Remove Motherboard: step 6, image 1 of 2 Remington MB4040 Thermal Switch Replacement, Remove Motherboard: step 6, image 2 of 2
    Ask FixBot

    Add Comment

  7. Remington MB4040 Thermal Switch Replacement, Remove Thermal Switch: step 7, image 1 of 1
    • Separate the thermal switch from the battery by using a spudger to pry it from the adhesive.

    • Use a low temperature RTV to readhere the thermal switch to the battery.

    • Remove the soldering holding the thermal switch to the motherboard.

    Ask FixBot

    Add Comment

Conclusion

To reassemble your device, follow these instructions in reverse order.

Cancel: I did not complete this guide.

3 other people completed this guide.

Cameron Carnahan

Member since: 01/20/15

1,112 Reputation

6 Guides authored

Team

USF Tampa, Team 1-5, Blackwell Winter 2015 Member of USF Tampa, Team 1-5, Blackwell Winter 2015

USFT-BLACKWELL-W15S1G5

3 Members

14 Guides authored

0 Guide Comments

Add Comment

View Statistics:

Past 24 Hours: 1

Past 7 Days: 5

Past 30 Days: 23

All Time: 3,333