Introduction
In this guide, we will show you how to replace the battery compartment on your Razer Naga V2 HyperSpeed Wireless Mouse.
Common Causes
- The battery would leak its chemicals, causing corrosion on the metals, and crust would form around the ends of the battery.
In this guide, we will show you how to replace the battery module.
What you need
-
-
Use an iOpener or hairdryer to gently heat the mouse feet.
-
Use an opening pick or opening tool to remove the mouse feet.
-
-
-
-
Flip the mouse back over.
-
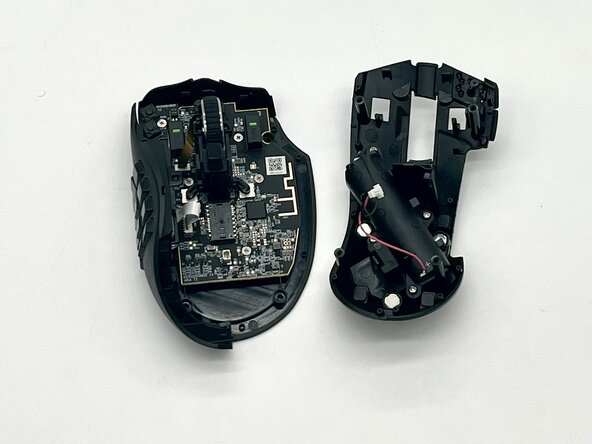
Use an opening tool to slowly take the top shell off, and the right shell should fall off as well.
-
-
-
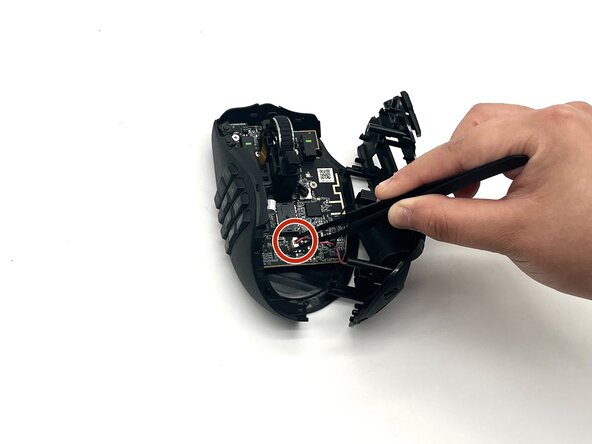
When taking the top shell off (middle shell), use precision tweezers to disconnect the battery connector.
-
-
-
Use a Phillips #000 screwdriver to remove the four screws securing the battery compartment.
-


 Ask FixBot




To reassemble your device, follow the above steps in reverse order.
For optimal performance, after completing this guide, calibrate your newly installed battery.
Take your e-waste to an R2 or e-Stewards certified recycler.
Repair didn’t go as planned? Try some basic troubleshooting or ask our Answers community for help.

Team

University of North Texas, Team 2-6, Harold Fall 2025 Member of University of North Texas, Team 2-6, Harold Fall 2025
UNT-HAROLD-F25S2G6
4 Members
6 Guides authored
