Introduction
This is a guide on how to take off the Razer Kishi v2 pro Front panel. Use this guide as a prerequisite for all other replacement guides related to this device.
What you need
-
-
Put the device down with the bottom facing up.
-
Remove the eight 12 mm screws from the back of the controller using a T5 screwdriver.
 Ask FixBot
-
-
-
-
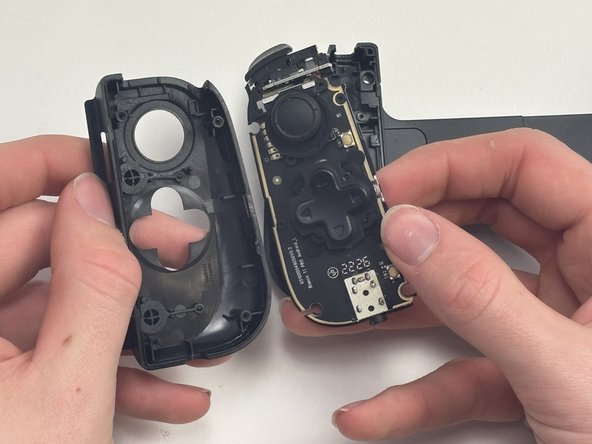
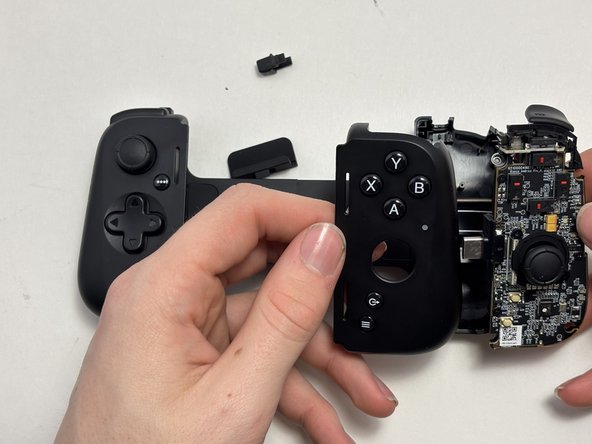
Gently apply light pressure to the front top half of the controller and slowly lift it up.
-
Repeat for the opposite side of the controller.
-




To reassemble your device, follow these instructions in reverse order.
Cancel: I did not complete this guide.
One other person completed this guide.

Team

Austin Community College, Team 1-1, Watkins Spring 2025 Member of Austin Community College, Team 1-1, Watkins Spring 2025
AUSTINCC-WATKINS-S25S1G1
4 Members
5 Guides authored
