
Ray-Ban Wayfarer RB2140 Lens Replacement

ReplacementLensesWorkshop and one other contributor
Last updated on Oct 7, 2026
Views: 823
View statistics:
- Past 24 Hours:
- 16
- Past 7 Days:
- 89
- Past 30 Days:
- 347
- All Time:
- 823
Comments: 0
No one has left comments on this guide. Will you be first?
Go to guide commentsCompleted: 2 3
2 people have marked this guide "completed." Will you be next?
3 people have marked this guide "completed." Including you — great job!
Favorites: 0 1
No one has favorited (and subscribed to) this guide. Will you be the first?
1 person has favorited (and subscribed to) this guide — and that's you!
Community-Contributed Guide
An awesome member of our community made this guide. It was not created by iFixit staff.
Introduction
Go to step 1 ↓The Wayfarer is probably the frame we've worked on more than any other in
our optical workshop in Granada. Scratched lenses, heat-damaged coatings,
faded tints — we see them every week. The good news is that the RB2140 is
one of the friendliest acetate frames to work on yourself. No screws, no
tools with a sharp edge. The lens sits in a thick acetate rim and comes
out with a combination of gentle heat and even pressure.
Before you start, confirm two things: the model number printed inside your
temple arm (should read RB2140) and the lens size (50 or 54, printed as
50□18 or 54□18). Getting the wrong size is the most common mistake people
make — the lens won't seat properly and you'll think something is broken
when it isn't.
One more thing: if you're doing this in winter or somewhere cold, the
acetate will be stiffer. Give the frame a few extra seconds of heat and
don't force anything.
What you need
Parts
Tools

-
-
-
The most important thing you can do before touching the frame is confirm your exact size. Open the left temple arm and look at the inside. You'll see a string of numbers stamped into the acetate — something like "RB2140 901 52□18 150" or "RB2140 902S 54□18 150".
-
The number before the □ symbol is your lens caliber: 52 mm or 54 mm. Write it down. This is the number you need when ordering replacement lenses. If the stamp is worn or hard to read, measure across the existing lens at its widest horizontal point. It should be close to 52 or 54 mm.
 Ask FixBot
-
-
-
Before trying to remove the lens, you need to make the acetate pliable. Hold the frame 15–20 cm away from a hair dryer on low heat. Move it back and forth across the rim — don't point the heat at one spot. Ten to fifteen seconds is usually enough. The frame should feel slightly warm to the touch, not hot.
-
Don't use boiling water or a heat gun on high — acetate can warp or lose its polish if you overheat it. If you're unsure, less heat is always better. You can always repeat this step.
-
-
-
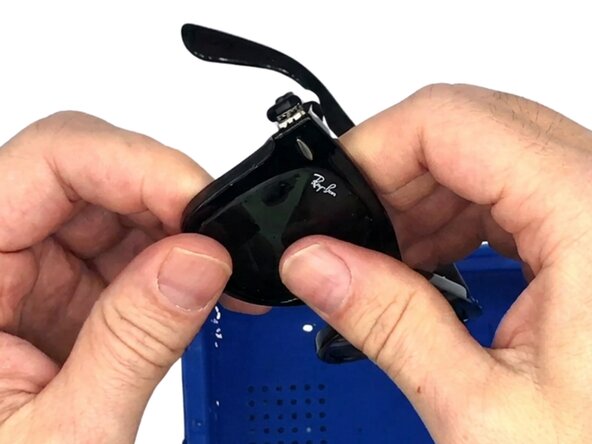
Work on a flat, soft surface — a folded towel is ideal. Hold the frame with both hands, thumbs on the back face of the lens, fingers supporting the outer rim. Apply steady, even pressure with your thumbs pushing forward. The lens should pop out from the back with a satisfying click.
-
If it resists, don't force it. Go back to the hair dryer for another ten seconds. The acetate needs to flex slightly for the lens to come free. On a cold day or with an older frame, you may need to repeat the heat step two or three times.
-
Once the lens is out, set it aside. Repeat for the other side.
-
-
-
With the lens out, take a moment to look at the groove (the channel inside the rim where the lens sits). Sometimes there's dust, debris or residue from old coatings. Wipe it clean with a dry microfiber cloth. A clean groove means the new lens will seat evenly and won't have any pressure points that could cause cracking later.
-
Also check the rim for any stress cracks, especially near the nose bridge and hinge areas. If you see cracks in the acetate, be extra gentle — the frame is fragile and professional repair may be needed.
-
-
-
Place the new lens against the front face of the rim, aligning it so the lens sits flush across the entire opening. The RB2140 lens has a slight curve — make sure the convex side faces outward. Start at the nose bridge side (the inner edge), which is usually the easiest point to get in, and work your way around the rim using gentle thumb pressure.
-
You'll hear or feel a soft click as each section of the lens edge drops into the groove. Work slowly around the perimeter — rushing this step is how lenses crack.
-
-
-
-
This is the step most people skip, and it's the one that matters most. Once the lens appears to be in, press firmly and evenly around the entire rim edge with your thumb — front and back.
-
The lens should be flush with the acetate rim on both sides, with no gaps and no wobble. If you see any part of the edge sticking out slightly, that section isn't fully seated. Apply more pressure there specifically.
-
New line.Look at the frame from the front, from the side, and from behind. The lens should sit completely level, not tilted or offset.
-
-
-
Put the glasses on and look straight ahead. The tint should look even across both lenses, and your vision should be clear without any distortion. If one side looks slightly twisted or you see odd glare around the edge of the lens, take the glasses off and press that rim edge again.
-
Original Ray-Ban lenses include the Ray-Ban logo etched on the right lens and an "RB" laser mark on the left lens — these confirm authenticity.
-
-



That's it — your Wayfarers are back in action. The whole process usually
takes under ten minutes once you're comfortable with it.
If the lens keeps popping back out after fitting, the replacement lens
may not match your exact size. Double-check the stamp inside your temple
arm and make sure you ordered the right caliber (50 or 54 mm).
Cancel: I did not complete this guide.
2 other people completed this guide.

