
Ray-Ban Justin RB4165 Lens Replacement

Last updated on Oct 7, 2026
Views: 20
View statistics:
- Past 24 Hours:
- 4
- Past 7 Days:
- 20
- Past 30 Days:
- 20
- All Time:
- 20
Comments: 0
No one has left comments on this guide. Will you be first?
Go to guide commentsCompleted: 0 1
No one has marked this guide "completed." Will you be the first?
1 person has marked this guide "completed." It's you — great job!
Favorites: 0 1
No one has favorited (and subscribed to) this guide. Will you be the first?
1 person has favorited (and subscribed to) this guide — and that's you!
Community-Contributed Guide
An awesome member of our community made this guide. It was not created by iFixit staff.
Introduction
Go to step 1 ↓This guide shows how to replace the lenses of Ray-Ban Justin RB4165 sunglasses. The lenses are press-fitted into the rim, with no screws, so they are removed and fitted by hand. No tools and no heat are needed.
Before you start, read the code printed on the inside of one of the temple arms. It should start with RB4165, followed by the colour code and two numbers separated by the □ symbol. The number before the □ is the lens width in millimetres and the number after it is the bridge width. The RB4165 is made in sizes 51, 54 and 55.
Replacement lenses for this frame are sold as original Ray-Ban lenses, which carry the Ray-Ban logo, and as compatible (non-original) lenses made by an independent manufacturer, which have no logo. Lenses for another lens size or another model will not fit.
What you need
Video Overview
Video of the whole procedure filmed in our workshop.
-
-
-
Open the temple arms and hold the frame with the inside (the side facing your eyes) towards you.
-
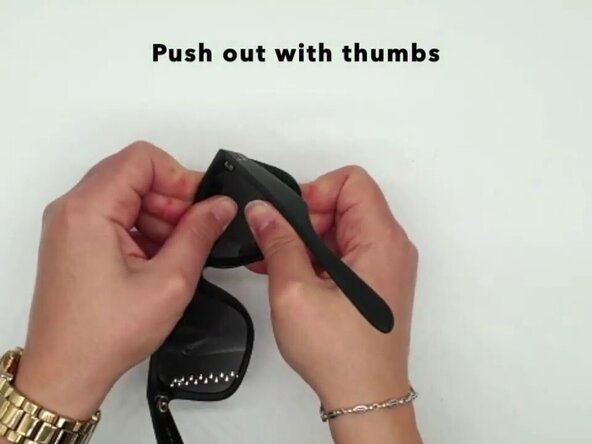
Place both thumbs near the centre of the lens, on the inside, and press gently outwards until the lens clicks out of the rim.
-
Push from the inside only. Do not lever the lens out with a screwdriver or a knife: it marks the frame and scratches the lens.
 Ask FixBot
-
-
-
Check that you have the lens for this side: the curved face goes outwards and the outline must match the rim.
-
Working from the front of the frame, place the top edge of the new lens in the groove of the rim first.
-
Work downwards, pressing the lower edge into the rim until the lens clicks into place.
-
Run your finger around the edge. No part of the lens should sit outside the groove and the lens must not turn.
-
-
-

If a lens turns or pops out again, check that it is fully seated and that its size matches the number printed on the temple arm.

