Free Shipping on Domestic Orders $75+

ROG Strix GTX 1080 Ti Thermal Paste Replacement

What you need

    1. ROG Strix GTX 1080 Ti Thermal Paste Replacement, Thermal Paste: step 1, image 1 of 1
      • Before you start, make sure to ground yourself and your work surface properly to prevent damage from static electricity.

      Ask FixBot

      Add Comment

    2. ROG Strix GTX 1080 Ti Thermal Paste Replacement, Heatsink: step 2, image 1 of 1
      • Unscrew the four heatsink screws from the back of the graphics card.

      • These are the ones nearest the PCIe connector, with the springs.

      Ask FixBot

      Add Comment

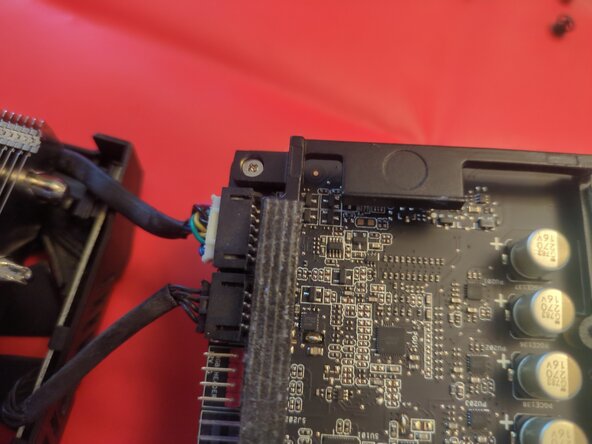
    3. ROG Strix GTX 1080 Ti Thermal Paste Replacement: step 3, image 1 of 3 ROG Strix GTX 1080 Ti Thermal Paste Replacement: step 3, image 2 of 3 ROG Strix GTX 1080 Ti Thermal Paste Replacement: step 3, image 3 of 3
      • Gently lift the GPU and its backplate off the heatsink.

      • If the thermal paste on the GPU die is gluing it to the heatsink, warm it up a bit. Or carefully wiggle it side to side until it loosens.

      • Unplug the two cables holding the halves together.

      Ask FixBot

      Add Comment

    4. ROG Strix GTX 1080 Ti Thermal Paste Replacement: step 4, image 1 of 1
      • Only the GPU die requires thermal paste; the other chips are covered by thermal pads under the black reinforcing frame.

      • Clean off the thermal paste and apply fresh paste.

      • Good quality thermal paste is recommended here - paste that keeps its consistency and won't dry out at high temperatures.

      • Skip this step and the next when replacing the thermal pads.

      Ask FixBot

      Add Comment

    5. ROG Strix GTX 1080 Ti Thermal Paste Replacement, Reassembly: step 5, image 1 of 2 ROG Strix GTX 1080 Ti Thermal Paste Replacement, Reassembly: step 5, image 2 of 2
      • When reassembling, place the GPU on the heatsink, lining up the four holes for the screws.

      • Start each of the screws in their threaded holes before tightening any of them.

      • Tighten the screws a little at a time in a star pattern to keep even pressure on the GPU die.

      • Reconnect the two cables into the black sockets after the heatsink is secured.

      Ask FixBot

      Add Comment

Conclusion

To reassemble your device, follow these instructions in reverse order.

Cancel: I did not complete this guide.

Sparky

Member since: 03/15/26

1,729 Reputation

13 Guides authored

0 Guide Comments

Add Comment

View Statistics:

Past 24 Hours: 8

Past 7 Days: 42

Past 30 Days: 162

All Time: 283