Introduction
This guide will serve as a step-by-step guide for speaker replacement.
What you need
-
-
-
Using a separating tool, look for a seam in the plastic casing that looks most accessible.
-
Use the prying tool to separate the front and back casing, working your way around the perimeter.
-
Utilize a card tool or a pick to assist in keeping the case separated.
 Ask FixBot
-
-
-
-
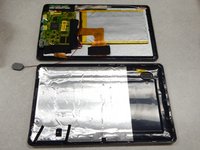
Flip over the back of the device while keeping it close to the front, the speaker is attached to it.
-
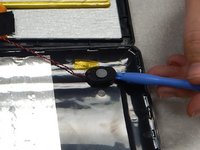
Remove the yellow tape securing the speaker to the back casing.
-
-
-
Use the separating tool to pry the speaker from its surface.
-
Cut or desolder the wires to replace or repair the speaker.
-
-


To reassemble your device, follow these instructions in reverse order.

Team

Pasco Hernando, Team 1-1, Prince Winter 2015 Member of Pasco Hernando, Team 1-1, Prince Winter 2015
PHSC-PRINCE-W15S1G1
6 Members
60 Guides authored
