Introduction
This guide will show you how to replace the Front Panel and Focus Ring of the camera if it is damaged or if the lens has gotten dirt lodged in it.
What you need
-
-
-
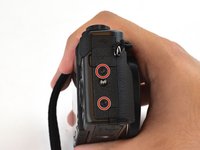
Use a Phillips #000 screwdriver to remove four 4mm screws from the NFC panel cover on the bottom of the camera.
 Ask FixBot
-
-
-
Use a Phillips #000 screwdriver to remove five screws from under the LCD screen:
-
Three 2.4 mm screws
-
Two 3 mm screws
-
-
-
Use a Phillips #000 screwdriver to remove two 3mm screws on the left of the camera.
-
-
-
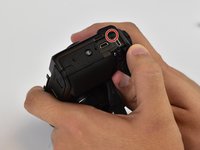
Use a Phillips #000 screwdriver to remove one 3mm and one 4mm screw on the surface of the right face of the camera, and one under the USB/HDMI cover.
-
-
-
-
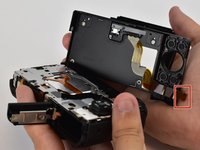
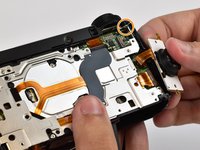
Carefully remove the back cover off of the camera by hand. Press the brown actuator in the FFC socket to release the FPC (Flexible Printed Circuit - brown cable attached to the back cover) and pull the FPC out of the socket.
-
Take time to determine how the actuator moves before trying to release it. If pressing it does not release it then it may need to be released by lightly pulling the LEFT side, rotating the actuator around it's right hand long side. (the hook end of a plastic halberd spudger may be used here to lightly tug the LEFT hand side)
-
If the FPC doesn't come out easily, you haven't yet released it. Do not force the FPC out. Do not use a spudger because it will break the socket. A broken socket cannot be fixed and has to be replaced by a skilled technician.
-
-
-
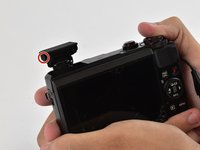
Use a Phillips #000 screwdriver to remove two 3mm screws on the pop-up flash.
-
-
-
Use a Phillips #000 screwdriver to remove two 2mm screws attaching the button panel to the camera body.
-
Use a Phillips #000 screwdriver to remove a 3mm screw from beneath the mode dial.
-
-
-
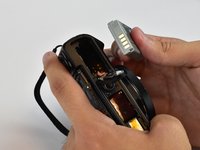
Open the battery compartment and remove the battery by flipping the small latch holding it in.
-
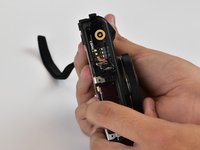
Use a Phillips #000 screwdriver to remove one 6mm screw in the bottom of the battery compartment.
-
-
-
Release the ribbon cable that runs from the top cover assembly to the camera body by carefully manipulating the black actuator.
-
Pry the top cover button assembly off of the camera body by carefully detaching clips around the base of it.
-
If the top cover does not come off easily, ensure that the screw in the battery compartment was removed, and the FPC/ribbon cable has been released.
-
-
-
-
-
Use a Phillips #000 screwdriver to remove two 3mm screws on the left and one 5mm screw on the right from the front panel.
-
-
-
Separate the front cover and focus ring assembly from the front of the camera. Use a plastic spudger to detach the ZIF connector holding the ribbon cable connected to the focus assembly.
-
-












To reassemble your device, follow these instructions in reverse order.
Cancel: I did not complete this guide.
2 other people completed this guide.

Team

USF Tampa, Team 12-3, Eyestone Spring 2017 Member of USF Tampa, Team 12-3, Eyestone Spring 2017
USFT-EYESTONE-S17S12G3
3 Members
48 Guides authored
