
PowerBook 3400 M3553 RAM Replacement

Michael Mondragon and 3 other contributors
Last updated on Jul 30, 2014
Views: 3.4K
View statistics:
- Past 24 Hours:
- 2
- Past 7 Days:
- 18
- Past 30 Days:
- 100
- All Time:
- 3,404
Comments: 2
1 comment on steps, 1 guide comment.
Go to guide commentsCompleted: 2 3
2 people have marked this guide "completed." Will you be next?
3 people have marked this guide "completed." Including you — great job!
Favorites: 0 1
No one has favorited (and subscribed to) this guide. Will you be the first?
1 person has favorited (and subscribed to) this guide — and that's you!
Introduction
Go to step 1 ↓In order to upgrade your PowerBook's RAM or replace a faulty RAM card you will need first remove the existing RAM card.
What you need
Tools


-
-
-
Close the screen and turn the PowerBook over, orienting the computer upside down, using the label to guide you.
 Ask FixBot
-
-
-
-
-
With a Torx T8 screwdriver, remove the three Torx 24mm screws along the center of the back panel.
-
-
-
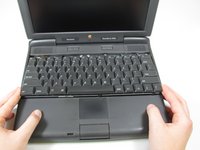
Turn the computer over and open the display. You should see that the keyboard is loose.
-
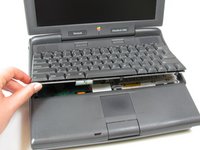
Slightly lift the front of the keyboard up, and slide the keyboard towards yourself.
-
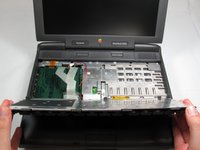
Carefully lift the top half of the keyboard and pull it towards yourself.
-
-
-
-
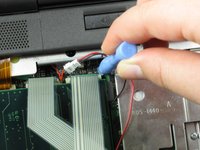
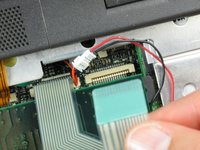
Loosen the ribbon cables connecting the keyboard to the computer by using a plastic opening tool to lift the tabs on either side of the cable port.
-
Gently remove the ribbons from its tabs.
-
-
-






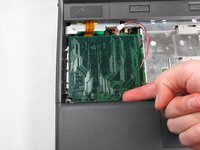
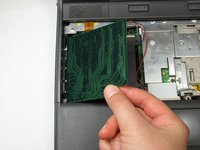
To install the new RAM card, follow these steps in reverse order.
Cancel: I did not complete this guide.
2 other people completed this guide.

Team

Cal Poly, Team 24-59, Amido Spring 2011 Member of Cal Poly, Team 24-59, Amido Spring 2011
CPSU-AMIDO-S11S24G59
4 Members
108 Guides authored
