
Power Mac G4 MDD RAM Replacement

Chris Green and 5 other contributors
Last updated on Jul 10, 2020
Views: 14K
View statistics:
- Past 24 Hours:
- 4
- Past 7 Days:
- 29
- Past 30 Days:
- 125
- All Time:
- 13,570
Comments: 0
No one has left comments on this guide. Will you be first?
Go to guide commentsCompleted: 18 19
18 people have marked this guide "completed." Will you be next?
19 people have marked this guide "completed." Including you — great job!
Favorites: 4 5
4 people have favorited (and subscribed to) this guide. Will you be next?
5 people have favorited (and subscribed to) this guide — including you!
Introduction
Go to step 1 ↓The Power Mac G4 MDD Supports 2GB 333Mhz PC2700 DDR (4X512MB Optimal). It Has four slots on the motherboard.
What you need
Parts
-
-
-
The Power Mac G4 MDD: the last, and the fastest G4-based Mac. This computer boasted up to a Dual 1.42GHz PowerPC G4 CPU (though I have a single 1.25GHz).
-
Two USB 1.1 Ports
-
Assorted Audio
-
Video (ADC & DVI)
-
Networking (RJ-45 Ethernet/56k Modem)
-
Some later model MDD's (such as the dual 1.42GHz) Have a FireWire 800 Port Here:
 Ask FixBot
-
-
-
Unplug the computer.
-
Unplug the power supply and all external connections from the computer.
-
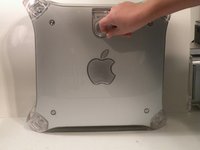
Pull on the side lever and lower the side of the case.
-
-
-
-
-
-
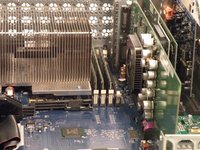
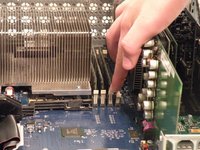
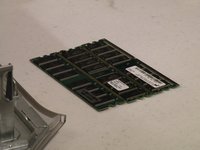
The ram is between the graphics card, and the CPU, and removal is simple. Push the tabs down on both sides, this will free the ram, then lift it out.
-
The MDD uses a maximum of 2GB PC2700 DDR RAM (512MB X4) and has 4 slots.
-
-




To reassemble your device, follow these instructions in reverse order.
Cancel: I did not complete this guide.
18 other people completed this guide.


