
Polaroid A10 Battery Replacement

armando and 4 other contributors
Last updated on Mar 4, 2024
Views: 1.3K
View statistics:
- Past 24 Hours:
- 3
- Past 7 Days:
- 16
- Past 30 Days:
- 84
- All Time:
- 1,313
Comments: 0
No one has left comments on this guide. Will you be first?
Go to guide commentsCompleted: 1 2
1 person has marked this guide "completed." Will you be next?
2 people have marked this guide "completed." Including you — great job!
Favorites: 0 1
No one has favorited (and subscribed to) this guide. Will you be the first?
1 person has favorited (and subscribed to) this guide — and that's you!
Introduction
Go to step 1 ↓Before you begin taking the device apart, make sure that you have conducted a thorough diagnosis to ensure that you will in fact need to replace the battery. Once you have determined that the battery no longer holds a charge, then you may proceed with this guide. It's also important that you have the appropriate tools and preferably a flat surface to work on, with good lighting.
What you need
Tools


-
-
-
Begin by having the side with volume and power button face up towards you.
-
Insert a plastic opening tool between the display and the back cover.
-
Once you have one plastic opening tool in, you can insert another one. While holding one in place, slide the other along the gap to release the tabs.
 Ask FixBot
-
-
-
-
Tool used on this step:Plastic Cards$2.99
-
Begin by inserting the flat end of a spudger underneath the battery to separate the glue from the battery.
-
Gently lift up the battery as you continue to separate the glue from the battery.
-
Once the glue has been separated, gently lift up the battery and you will notice two wires attached to the motherboard.
-
-
-
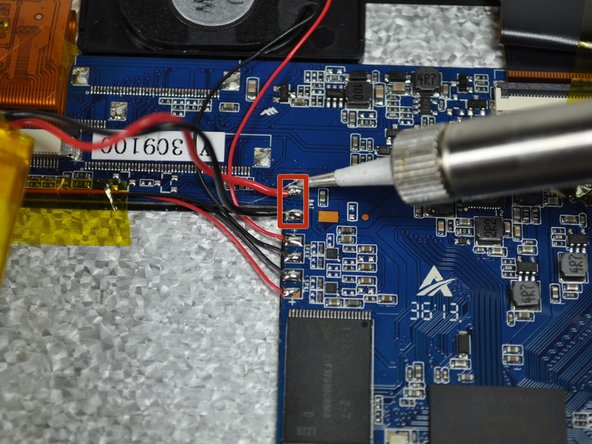
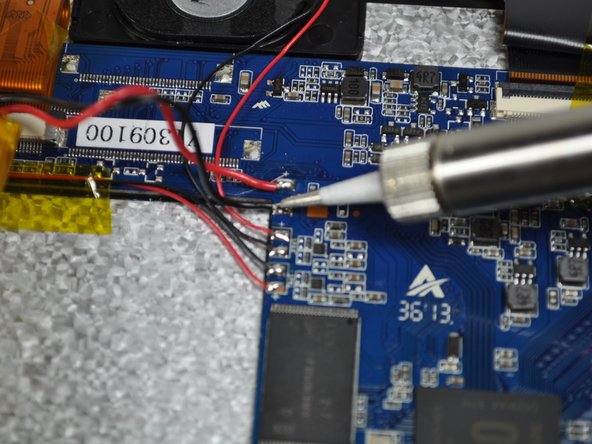
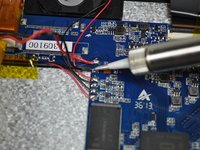
Follow the (Black and Red) wires from the battery to the motherboard.
-
The two wires (Black and Red) must be removed from the motherboard, as they are connected to the battery.
-
-
-



To reassemble your device, follow these instructions in reverse order.
Cancel: I did not complete this guide.
One other person completed this guide.

Team

UW Tacoma, Team 3-3, Rose Winter 2015 Member of UW Tacoma, Team 3-3, Rose Winter 2015
UWT-ROSE-W15S3G3
4 Members
72 Guides authored
