Free Shipping on Domestic Orders $75+

PlayStation Vita Rear Panel Replacement

What you need

  1. PlayStation Vita Rear Panel Replacement, Case Separation: step 1, image 1 of 2 PlayStation Vita Rear Panel Replacement, Case Separation: step 1, image 2 of 2
    • Power off and remove the memory card.

    • Using a Phillips #00 screwdriver, remove the four 6.4mm screws on the back casing.

    Ask FixBot

    Add Comment

  2. PlayStation Vita Rear Panel Replacement: step 2, image 1 of 3 PlayStation Vita Rear Panel Replacement: step 2, image 2 of 3 PlayStation Vita Rear Panel Replacement: step 2, image 3 of 3
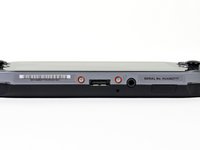
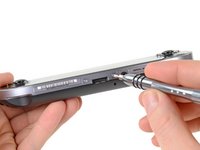
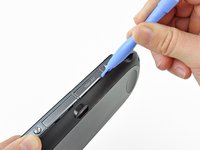
    • Using your fingernail or a spudger, pry open the accessory port cover on the top of the device.

    • Using a Phillips #00 screwdriver, remove the two 5.4mm screws hidden beneath the accessory port cover.

    Ask FixBot

    Add Comment

  3. PlayStation Vita Rear Panel Replacement: step 3, image 1 of 2 PlayStation Vita Rear Panel Replacement: step 3, image 2 of 2
    • Remove the two 5.4mm Phillips #00 screws on the bottom of the device near the charging port.

    Ask FixBot

    Add Comment

  4. PlayStation Vita Rear Panel Replacement: step 4, image 1 of 3 PlayStation Vita Rear Panel Replacement: step 4, image 2 of 3 PlayStation Vita Rear Panel Replacement: step 4, image 3 of 3
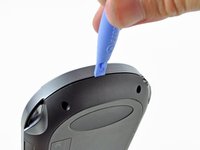
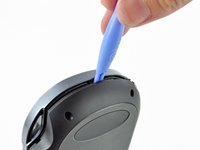
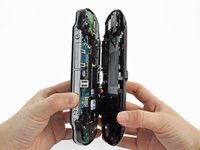
    • Beginning at the sides of the device, use a plastic opening tool to separate the front and rear cases.

    • Continue working your way around the device gently prying it open.

    • There are still wires holding the front and rear cases together. You may damage the connections if you yank the cases completely apart.

    Ask FixBot

    Add Comment

  5. PlayStation Vita Rear Panel Replacement: step 5, image 1 of 2 PlayStation Vita Rear Panel Replacement: step 5, image 2 of 2
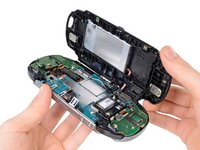
    • Gently separate the two cases, minding the battery and the touch screen controller connectors holding the two cases together.

    Ask FixBot

    Add Comment

  6. PlayStation Vita Rear Panel Replacement: step 6, image 1 of 1
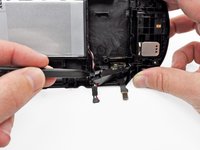
    • Using a spudger, free the touch screen controller flex cable by gently prying up the connection.

    Ask FixBot

    Add Comment

  7. PlayStation Vita Rear Panel Replacement: step 7, image 1 of 1
    • Free the battery cable by gently prying up on the connection with a spudger.

    Ask FixBot

    Add Comment

  8. PlayStation Vita Rear Panel Replacement: step 8, image 1 of 1
    • Separate the front and rear cases.

    Ask FixBot

    Add Comment

  9. PlayStation Vita Rear Panel Replacement, Battery: step 9, image 1 of 2 PlayStation Vita Rear Panel Replacement, Battery: step 9, image 2 of 2
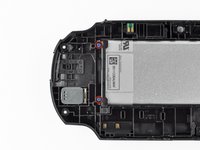
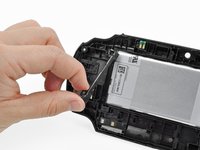
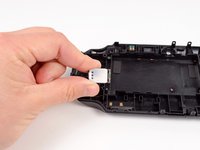
    • With the help of a spudger, gently pry off and remove the battery cable retainer on the back casing assembly.

    • The easiest access to the battery cable retainer is where the battery cable comes out.

    • You can also use the two small tabs on the side of the cable retainer. Locate the tabs and release one at a time. Be a little careful not to push the cover in and re-lock it.

    Ask FixBot

    Add Comment

  10. PlayStation Vita Rear Panel Replacement: step 10, image 1 of 2 PlayStation Vita Rear Panel Replacement: step 10, image 2 of 2
    • Using a Phillips #00 screwdriver, remove the two 5.0mm blue battery case screws.

    • Remove the plastic battery retaining bar.

    Ask FixBot

    Add Comment

  11. PlayStation Vita Rear Panel Replacement: step 11, image 1 of 3 PlayStation Vita Rear Panel Replacement: step 11, image 2 of 3 PlayStation Vita Rear Panel Replacement: step 11, image 3 of 3
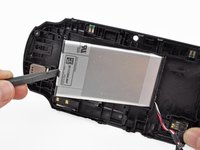
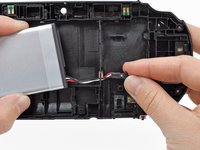
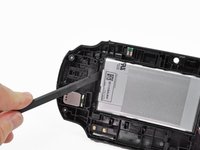
    • Using your finger or a spudger, lift the battery out and remove it.

    • Guide the battery wires through the hole in the back casing as you remove the battery.

    Ask FixBot

    Add Comment

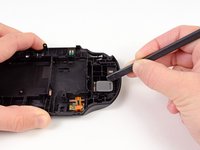
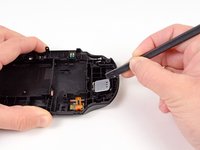
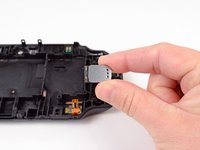
  12. PlayStation Vita Rear Panel Replacement, Rear Panel: step 12, image 1 of 3 PlayStation Vita Rear Panel Replacement, Rear Panel: step 12, image 2 of 3 PlayStation Vita Rear Panel Replacement, Rear Panel: step 12, image 3 of 3
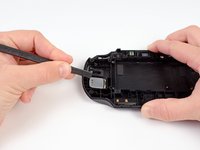
    • Slide the spuder between the right speaker and the rear casing.

    • Using a spudger, gently peel up the right speaker from the light adhesive connecting it to casing.

    • Remove the right speaker.

    Ask FixBot

    Add Comment

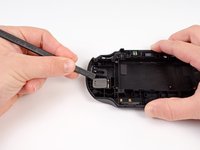
  13. PlayStation Vita Rear Panel Replacement: step 13, image 1 of 3 PlayStation Vita Rear Panel Replacement: step 13, image 2 of 3 PlayStation Vita Rear Panel Replacement: step 13, image 3 of 3
    • Slide the spudger between the left speaker and the rear casing.

    • Using a spudger, gently peel up the left speaker from the light adhesive connecting it to casing.

    • Remove the left speaker.

    Ask FixBot

    Add Comment

  14. PlayStation Vita Rear Panel Replacement: step 14, image 1 of 1
    • The rear panel remains.

    Ask FixBot

    Add Comment

Conclusion

To reassemble your device, follow these instructions in reverse order.

Cancel: I did not complete this guide.

11 other people completed this guide.

Brittany McCrigler

Member since: 03/05/12

90,933 Reputation

142 Guides authored

Team

iFixit Member of iFixit

Staff

122 Members

26,597 Guides authored

5 Guide Comments

I really enjoyed Your article ! I'm about to replace the touch pad, i got a Vita recently but it has some Heavy scuffs. I've seen the back touch pad has adhesive attached on it. I bought a replacement On Ebay. I'm not sure if the replacement has adhesive with it. If it doesn't what would be your guys Thoughts on what i should use?

Daniel - Reply Share

lol you will need some kind of adhesive its called common sense if Sony use it you use it simple

TH3ORY - Reply Share
I can't get pass Step 1. I can take out the bottom left screw of the rear touchpad but I can't take out the other 3. I bought a used Vita and there is a screw that turns but does not gout up. What should I do?

kken07655 - Reply Share

In the part that remains after complete disassembly, what are the two double pins at the top for, which later come into contact with the motherboard? I already have a new panel, but it has absolutely nothing except this one contact in the lower right part ...

Kamil Dębiec - Reply Share

Those are wifi antennas. You can get it out put it in to the new panel.

repairguy69 - Reply Share

Add Comment

View Statistics:

Past 24 Hours: 7

Past 7 Days: 96

Past 30 Days: 519

All Time: 41,214