Free Shipping on Domestic Orders $75+

PlayStation 5 Pro CMOS Board Replacement

What you need

  1. PlayStation 5 Pro CMOS Board Replacement, Before you begin: step 1, image 1 of 3 PlayStation 5 Pro CMOS Board Replacement, Before you begin: step 1, image 2 of 3 PlayStation 5 Pro CMOS Board Replacement, Before you begin: step 1, image 3 of 3
    • Before starting your repair:

    • Shut down your PlayStation and unplug all cables and accessories.

    • Remove any stands supporting your console and lay it down so the right side is facing up.

    Ask FixBot

    Add Comment

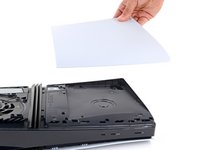
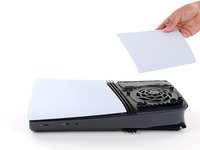
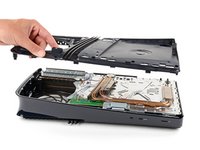
  2. PlayStation 5 Pro CMOS Board Replacement, Remove the console covers: step 2, image 1 of 3 PlayStation 5 Pro CMOS Board Replacement, Remove the console covers: step 2, image 2 of 3 PlayStation 5 Pro CMOS Board Replacement, Remove the console covers: step 2, image 3 of 3
    • Each console cover is secured with hooks along the rear edge and clips along the front edge.

    • To remove a cover, firmly pull up the front edge to release the clips.

    • You'll hear distinct "pops" as the clips release.

    • Remove the cover.

    Ask FixBot

    Add Comment

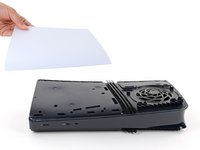
  3. PlayStation 5 Pro CMOS Board Replacement: step 3, image 1 of 3 PlayStation 5 Pro CMOS Board Replacement: step 3, image 2 of 3 PlayStation 5 Pro CMOS Board Replacement: step 3, image 3 of 3
    • Use the same process to remove the three remaining covers.

    • To reinstall a cover, place the hooks into their cutouts along the rear edge and firmly press the front edge of the cover into place to re‑engage the clips.

    Ask FixBot

    Add Comment

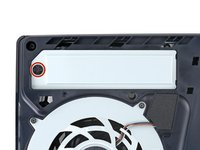
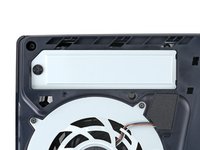
  4. PlayStation 5 Pro CMOS Board Replacement, Remove the expansion slot cover screw: step 4, image 1 of 2 PlayStation 5 Pro CMOS Board Replacement, Remove the expansion slot cover screw: step 4, image 2 of 2
    Tool used on this step:
    FixMat
    $36.95
    Buy
    • Throughout this repair, keep track of each screw and make sure it goes back exactly where it came from.

    • Use a Phillips screwdriver to remove the 17.1 mm‑long screw securing the expansion slot cover.

    Ask FixBot

    Add Comment

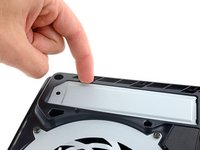
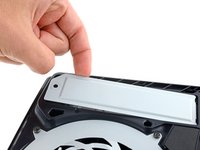
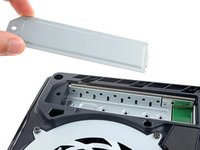
  5. PlayStation 5 Pro CMOS Board Replacement, Remove the expansion slot cover: step 5, image 1 of 3 PlayStation 5 Pro CMOS Board Replacement, Remove the expansion slot cover: step 5, image 2 of 3 PlayStation 5 Pro CMOS Board Replacement, Remove the expansion slot cover: step 5, image 3 of 3
    • Use your fingers to lift the expansion slot cover near the notch by the screw hole and remove it.

    Ask FixBot

    Add Comment

  6. PlayStation 5 Pro CMOS Board Replacement, Remove the fan cables cover: step 6, image 1 of 3 PlayStation 5 Pro CMOS Board Replacement, Remove the fan cables cover: step 6, image 2 of 3 PlayStation 5 Pro CMOS Board Replacement, Remove the fan cables cover: step 6, image 3 of 3
    Tool used on this step:
    Tesa 61395 Tape
    $8.95
    Buy
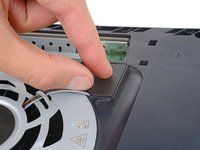
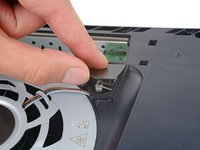
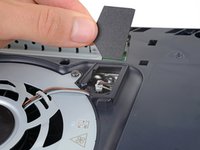
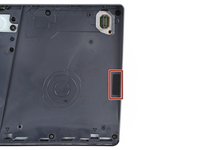
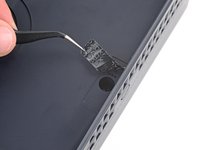
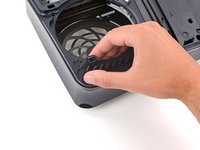
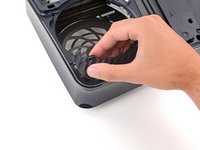
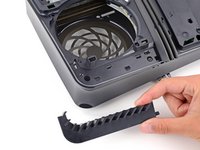
    • Use your fingers to remove the plastic cover hiding the fan cables connector.

    • The cover is secured with light adhesive.

    • During reassembly, press the piece of plastic back into place to secure it with the leftover adhesive. If it isn't sticking, use strips of double-sided tape to secure it.

    Ask FixBot

    Add Comment

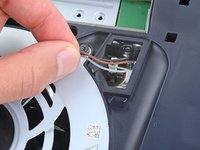
  7. PlayStation 5 Pro CMOS Board Replacement, Free the fan cables: step 7, image 1 of 2 PlayStation 5 Pro CMOS Board Replacement, Free the fan cables: step 7, image 2 of 2
    • Gently pull the fan cables out from under their plastic clip on the frame.

    Ask FixBot

    Add Comment

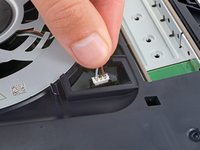
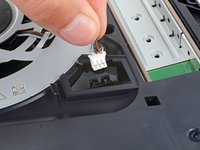
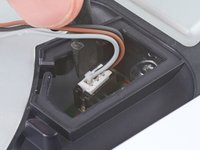
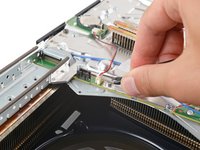
  8. PlayStation 5 Pro CMOS Board Replacement, Disconnect the fan: step 8, image 1 of 3 PlayStation 5 Pro CMOS Board Replacement, Disconnect the fan: step 8, image 2 of 3 PlayStation 5 Pro CMOS Board Replacement, Disconnect the fan: step 8, image 3 of 3
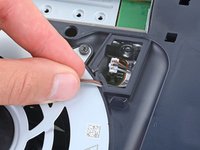
    • Firmly grip the fan cables' white connector head and pull it straight up and out of its socket.

    • If you're having trouble, grip the cables just above the connector head, and gently pull.

    • During reassembly, align the connector over its socket and push down on the edges with the flat end of a spudger until it slides fully into its socket.

    Ask FixBot

    Add Comment

  9. PlayStation 5 Pro CMOS Board Replacement, Remove the fan screws: step 9, image 1 of 2 PlayStation 5 Pro CMOS Board Replacement, Remove the fan screws: step 9, image 2 of 2
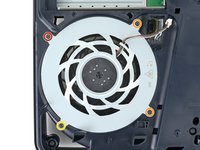
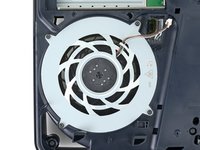
    • Use a T8 Torx Security screwdriver to remove the four screws securing the fan:

    • One 31.7 mm‑long screw

    • Two 21.5 mm‑long screws

    • One 11.5 mm‑long screw

    Ask FixBot

    Add Comment

  10. PlayStation 5 Pro CMOS Board Replacement, Remove the fan: step 10, image 1 of 2 PlayStation 5 Pro CMOS Board Replacement, Remove the fan: step 10, image 2 of 2
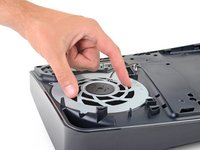
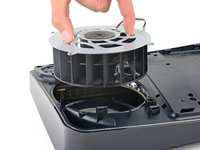
    • Use your fingers to grab the fan by its vents and lift it straight up to remove it.

    • During reassembly:

    • This is a good point to clean the fan. Use a clean cloth and some compressed air to remove any dust or dirt.

    • Insert the fan so its cables are near their connector.

    Ask FixBot

    Add Comment

  11. PlayStation 5 Pro CMOS Board Replacement, Peel up the tamper evident sticker: step 11, image 1 of 2 PlayStation 5 Pro CMOS Board Replacement, Peel up the tamper evident sticker: step 11, image 2 of 2
    Ask FixBot

    Add Comment

  12. PlayStation 5 Pro CMOS Board Replacement, Remove the fan grille: step 12, image 1 of 3 PlayStation 5 Pro CMOS Board Replacement, Remove the fan grille: step 12, image 2 of 3 PlayStation 5 Pro CMOS Board Replacement, Remove the fan grille: step 12, image 3 of 3
    • Use your fingers to unclip and remove the plastic grille near the fan recess.

    Ask FixBot

    Add Comment

  13. PlayStation 5 Pro CMOS Board Replacement, Remove the right‑side inner shell screws: step 13, image 1 of 2 PlayStation 5 Pro CMOS Board Replacement, Remove the right‑side inner shell screws: step 13, image 2 of 2
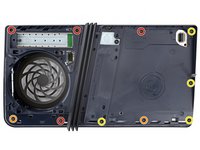
    • Use a T8 Torx Security screwdriver to remove the 10 screws securing the right‑side inner shell:

    • Four 18.8 mm‑long screws

    • Two 18.6 mm‑long screws

    • Four 31.7 mm‑long screws

    Ask FixBot

    Add Comment

  14. PlayStation 5 Pro CMOS Board Replacement, Remove the right‑side inner shell: step 14, image 1 of 2 PlayStation 5 Pro CMOS Board Replacement, Remove the right‑side inner shell: step 14, image 2 of 2
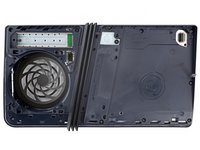
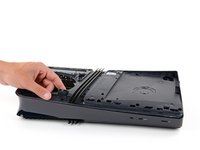
    • Lift the right‑side inner shell straight up and remove it.

    Ask FixBot

    Add Comment

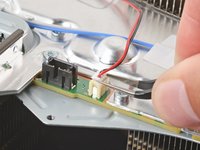
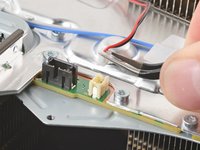
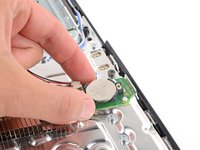
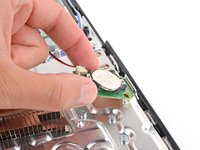
  15. PlayStation 5 Pro CMOS Board Replacement, Disconnect the CMOS board: step 15, image 1 of 3 PlayStation 5 Pro CMOS Board Replacement, Disconnect the CMOS board: step 15, image 2 of 3 PlayStation 5 Pro CMOS Board Replacement, Disconnect the CMOS board: step 15, image 3 of 3
    • Use a pair of angled tweezers to firmly grip the sides of the CMOS board connector, holding the tweezers as close to the connector as possible to get a good grip.

    • Pull the connector straight up and out of its socket to disconnect it.

    • If you're having trouble, try rocking the connector side-to-side to loosen it.

    Ask FixBot

    Add Comment

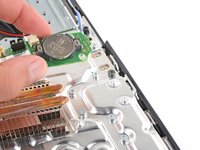
  16. PlayStation 5 Pro CMOS Board Replacement, Remove the CMOS board: step 16, image 1 of 3 PlayStation 5 Pro CMOS Board Replacement, Remove the CMOS board: step 16, image 2 of 3 PlayStation 5 Pro CMOS Board Replacement, Remove the CMOS board: step 16, image 3 of 3
    • Use your fingers to lift the CMOS board off the small metal nubs and pull it toward the center of your console to remove it.

    • If your new board doesn't come with a cable, transfer the original cable to your replacement board.

    Ask FixBot

    Add Comment

Conclusion

To reassemble your device, follow these instructions in reverse order.

Take your e-waste to an R2 or e-Stewards certified recycler.

Repair didn’t go as planned? Try some basic troubleshooting, or ask our Answers community for help.


Cancel: I did not complete this guide.

Spencer Day

Member since: 09/14/22

195,929 Reputation

1,243 Guides authored

Team

iFixit Member of iFixit

Staff

123 Members

27,603 Guides authored

0 Guide Comments

Add Comment

View Statistics:

Past 24 Hours: 5

Past 7 Days: 18

Past 30 Days: 97

All Time: 950