
Free Shipping on Domestic Orders $75+

PlayStation 5 Pro CMOS Battery Replacement

What you need

  1. PlayStation 5 Pro CMOS Battery Replacement, Before you begin: step 1, image 1 of 3 PlayStation 5 Pro CMOS Battery Replacement, Before you begin: step 1, image 2 of 3 PlayStation 5 Pro CMOS Battery Replacement, Before you begin: step 1, image 3 of 3
    • Before starting your repair:

    • Shut down your PlayStation and unplug all cables and accessories.

    • Remove any stands supporting your console and lay it down so the right side is facing up.

  2. PlayStation 5 Pro CMOS Battery Replacement, Remove the lower right cover: step 2, image 1 of 3 PlayStation 5 Pro CMOS Battery Replacement, Remove the lower right cover: step 2, image 2 of 3 PlayStation 5 Pro CMOS Battery Replacement, Remove the lower right cover: step 2, image 3 of 3
    • The cover is secured with hooks along the back edge and clips along the front edge.

    • Firmly pull up the front edge of the larger, lower cover to release the clips.

    • You'll hear distinct "pops" as the clips disengage.

    • To reinstall the cover, place the hooks into their cutouts along the rear edge and firmly press the front edge of the cover into place to re‑engage the three clips.

  3. PlayStation 5 Pro CMOS Battery Replacement, Unscrew the CMOS battery cover: step 3, image 1 of 2 PlayStation 5 Pro CMOS Battery Replacement, Unscrew the CMOS battery cover: step 3, image 2 of 2
    Tool used on this step:
    Flathead 4 mm Screwdriver
    $5.49
    Buy
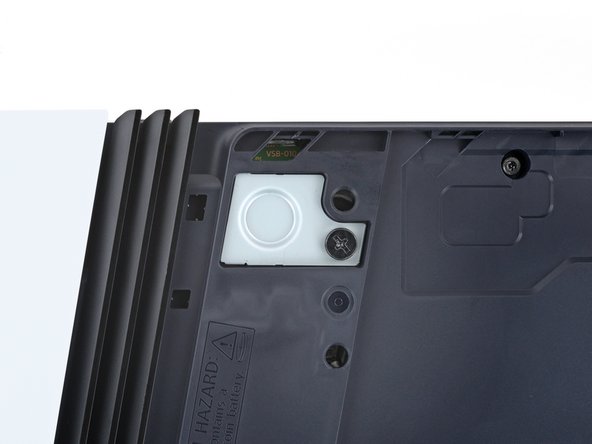
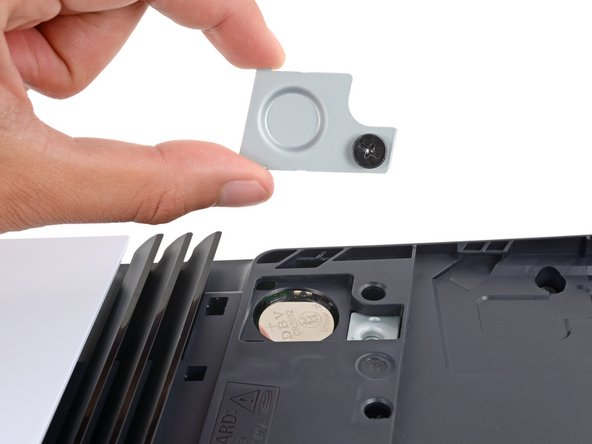
    • Use a Phillips screwdriver to fully loosen the captive screw securing the CMOS battery cover (the screw will stay in the cover—don't try to remove it).

    • You can also use a wide, flathead screwdriver to loosen the screw.

  4. PlayStation 5 Pro CMOS Battery Replacement, Remove the CMOS battery cover: step 4, image 1 of 3 PlayStation 5 Pro CMOS Battery Replacement, Remove the CMOS battery cover: step 4, image 2 of 3 PlayStation 5 Pro CMOS Battery Replacement, Remove the CMOS battery cover: step 4, image 3 of 3
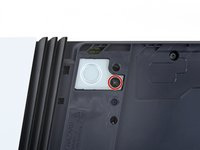
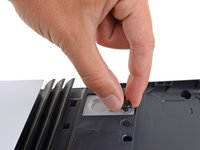
    • Use your fingers to grip the cover's screw and remove the cover.

    • During reassembly, insert the cover's tab into its slot before laying the cover down.

  5. PlayStation 5 Pro CMOS Battery Replacement, Remove the CMOS battery: step 5, image 1 of 3 PlayStation 5 Pro CMOS Battery Replacement, Remove the CMOS battery: step 5, image 2 of 3 PlayStation 5 Pro CMOS Battery Replacement, Remove the CMOS battery: step 5, image 3 of 3
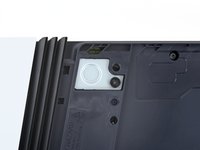
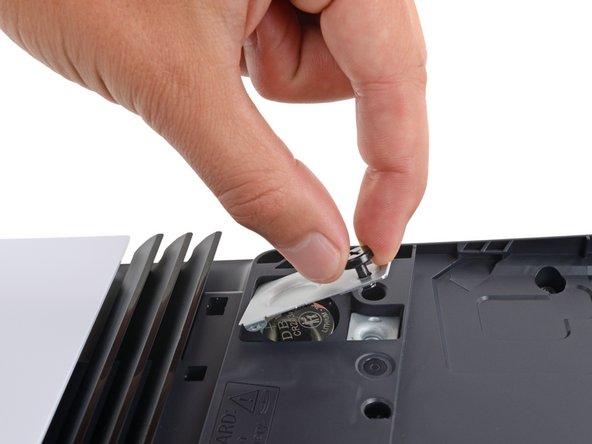
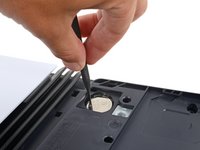
    • Use the point of a spudger to gently pry up the CMOS battery.

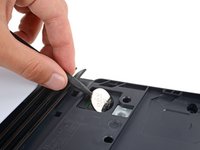
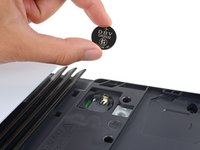
    • Remove the CMOS battery.

    • During reassembly, insert the battery negative () side down into the recess and press it into place.

Conclusion

To reassemble your device, follow these instructions in reverse order.

Take your e-waste to an R2 or e-Stewards certified recycler.

Repair didn’t go as planned? Try some basic troubleshooting, or ask our Answers community for help.

One other person completed this guide.

Spencer Day

Member since: 09/14/22

177,897 Reputation

1,142 Guides authored

Team

iFixit Member of iFixit

Staff

124 Members

25,086 Guides authored

0 Guide Comments

Add Comment

View Statistics:

Past 24 Hours: 3

Past 7 Days: 30

Past 30 Days: 174

All Time: 1,856