Free Shipping on Domestic Orders $75+

PlayStation 4 Slim Thermal Paste Replacement

What you need

Video Overview

    1. PlayStation 4 Slim Thermal Paste Replacement, Thermal Paste: step 1, image 1 of 2 PlayStation 4 Slim Thermal Paste Replacement, Thermal Paste: step 1, image 2 of 2
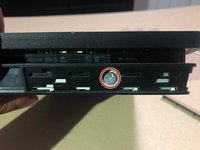
      • Remove the panel next to the ports by sliding it to the right.

      • Use a Philips PH1 screwdriver to remove the screw.

      Ask FixBot

      Add Comment

    2. PlayStation 4 Slim Thermal Paste Replacement: step 2, image 1 of 1
      • Pull the black ribbon on the side of the PS4 to remove the hard drive.

      Ask FixBot

      Add Comment

    3. PlayStation 4 Slim Thermal Paste Replacement: step 3, image 1 of 1
      • Locate the plastic warranty sticker next to the three ports on the side of the console.

      • Peel off the plastic warranty sticker next to the three ports on the side of the console.

      • Use a T8 Torx security screwdriver to remove the screw.

      Ask FixBot

      Add Comment

    4. PlayStation 4 Slim Thermal Paste Replacement: step 4, image 1 of 2 PlayStation 4 Slim Thermal Paste Replacement: step 4, image 2 of 2
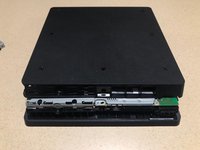
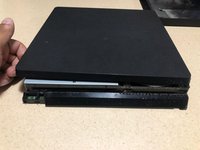
      • Flip the PS4 with the bottom side facing upwards and the side of the screw you just removed facing you.

      • Remove the cover by prying the two corners and then sliding it back.

      • This step will require some force and you will hear clicking sounds as the cover is coming off.

      Ask FixBot

      Add Comment

    5. PlayStation 4 Slim Thermal Paste Replacement: step 5, image 1 of 1
      • Use a Phillips #0 screwdriver to remove this screw.

      Ask FixBot

      Add Comment

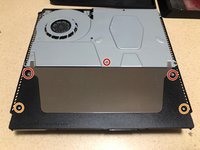
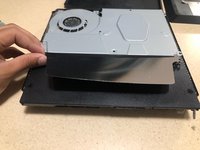
    6. PlayStation 4 Slim Thermal Paste Replacement: step 6, image 1 of 3 PlayStation 4 Slim Thermal Paste Replacement: step 6, image 2 of 3 PlayStation 4 Slim Thermal Paste Replacement: step 6, image 3 of 3
      • Remove the cover by prying the two corners and then sliding it back.

      • This step will require some force and you will hear clicking sounds as the cover is coming off.

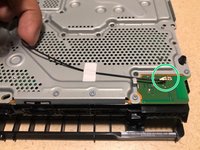
      • Remove the three T8 Torx security screws.

      • Use a Phillips #1 screwdriver to remove the two screws.

      • Lift and remove the metal panel after unscrewing.

      Ask FixBot

      Add Comment

    7. PlayStation 4 Slim Thermal Paste Replacement: step 7, image 1 of 1
      • Remove the power supply completely by disconnecting the wire.

      Ask FixBot

      Add Comment

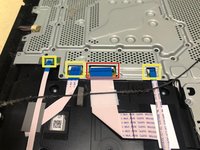
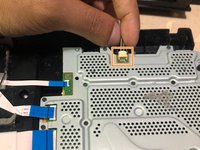
    8. PlayStation 4 Slim Thermal Paste Replacement: step 8, image 1 of 3 PlayStation 4 Slim Thermal Paste Replacement: step 8, image 2 of 3 PlayStation 4 Slim Thermal Paste Replacement: step 8, image 3 of 3
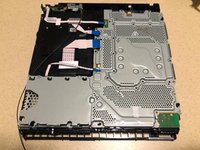
      • Flip the PS4 to view the metal paneling.

      • Lift the black clip on the largest connection to remove it.

      • Disconnect the wire by pulling it back with a little bit of force.

      • By pulling on the blue tabs gently you are able to remove the connections.

      • Gently lift the black wire to disconnect from the motherboard.

      Ask FixBot

      Add Comment

    9. PlayStation 4 Slim Thermal Paste Replacement: step 9, image 1 of 2 PlayStation 4 Slim Thermal Paste Replacement: step 9, image 2 of 2
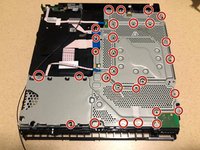
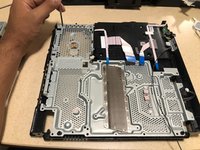
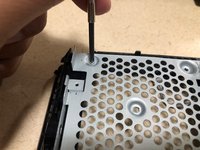
      • Use a Phillips #0 screwdriver to remove all screws.

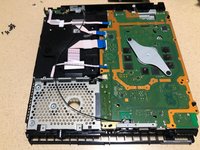
      • After unscrewing, remove the metal panel to access the motherboard.

      • Removing the metal panel may require some force but do not pull up too hard as you may have missed a screw.

      Ask FixBot

      Add Comment

    10. PlayStation 4 Slim Thermal Paste Replacement: step 10, image 1 of 2 PlayStation 4 Slim Thermal Paste Replacement: step 10, image 2 of 2
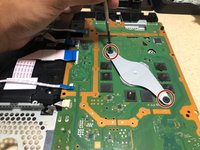
      • Use a Phillips #0 screwdriver to remove two screws.

      • Unplug the wire by pulling firmly.

      • Lift the metal brace with your fingers to expose the motherboard.

      Ask FixBot

      Add Comment

    11. PlayStation 4 Slim Thermal Paste Replacement: step 11, image 1 of 2 PlayStation 4 Slim Thermal Paste Replacement: step 11, image 2 of 2
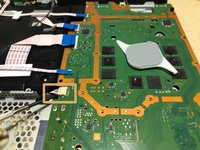
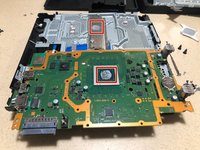
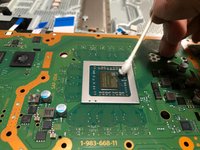
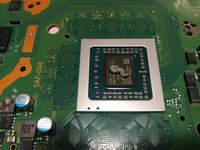
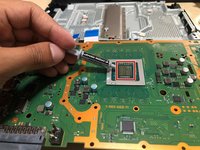
      • Apply 2-3 droplets of thermal material remover on Q-tips to remove the old thermal paste and then wipe it down with a micro fiber cloth until no residue of old paste is left.

      • Apply 2-3 droplets of thermal surface purifier on a new Q-tip and go over the area cleaned.

      • Both steps may require multiple repetitions.

      Ask FixBot

      Add Comment

    12. PlayStation 4 Slim Thermal Paste Replacement: step 12, image 1 of 2 PlayStation 4 Slim Thermal Paste Replacement: step 12, image 2 of 2
      • Squeeze about 3/4 of an inch of Arctic Silver 5 thermal paste onto the prepared surface.

      • Let the thermal paste rest for 10 minutes before reassembly.

      Ask FixBot

      Add Comment

    13. PlayStation 4 Slim Thermal Paste Replacement: step 13, image 1 of 1
      • Use a Phillips #0 screwdriver to remove the two screws.

      Ask FixBot

      Add Comment

    14. PlayStation 4 Slim Thermal Paste Replacement: step 14, image 1 of 2 PlayStation 4 Slim Thermal Paste Replacement: step 14, image 2 of 2
      • Flip the console.

      • Use a Phillips #0 screwdriver to remove the screw.

      Ask FixBot

      Add Comment

    15. PlayStation 4 Slim Thermal Paste Replacement: step 15, image 1 of 2 PlayStation 4 Slim Thermal Paste Replacement: step 15, image 2 of 2
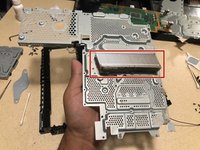
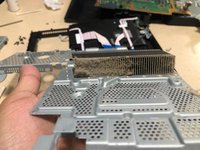
      • Lift up the metal panel and on the back the radiator is located.

      • Clean the radiator by using a brush and a compressed air can.

      Ask FixBot

      Add Comment

    16. PlayStation 4 Slim Thermal Paste Replacement: step 16, image 1 of 2 PlayStation 4 Slim Thermal Paste Replacement: step 16, image 2 of 2
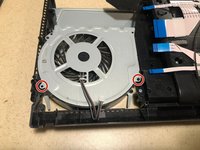
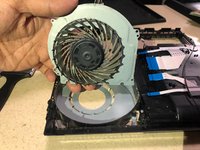
      • Use a Phillips #0 screwdriver to remove the two screws.

      • Clean the fan by using a brush and a compressed air can.

      Ask FixBot

      Add Comment

Conclusion

To reassemble your device, follow these instructions in reverse order.

Cancel: I did not complete this guide.

143 other people completed this guide.

Muhammad Saif Khan

Member since: 07/07/20

2,406 Reputation

1 Guide authored

16 Guide Comments

Hey, can I use this for a original β€œfat” ps4?

thanks

notle159 - Reply Share

the original fat ps4 uses a different design than the slim one

alden dufresne - Reply Share
Any advice on a good way to clean the fan blades? Thanks for all the other tips!

Nicholas Pratt III - Reply Share

Use a brush at the same time with a vacuum cleaner to remove the dust, then, a slightly damp cloth to clean the blades.

Raul Alberto Chavez Romero - Reply Share

Thanks for the instructions, they helped me a lot!!! If there's one thing Sony didn't save on this console, it was screws πŸ˜‚πŸ˜‚πŸ˜‚

Ferrera_Gabs - Reply Share

Add Comment

View Statistics:

Past 24 Hours: 115

Past 7 Days: 828

Past 30 Days: 3,875

All Time: 202,418