Free Shipping on Domestic Orders $75+

PlayStation 3 Slim Blu-ray Disc Drive Replacement

What you need

    1. PlayStation 3 Slim Blu-ray Disc Drive Replacement, Top Cover: step 1, image 1 of 1
      • Turn the PS3 over and lay it on its backside.

      • Carefully peel the warranty sticker up off the lower case to reveal a hidden screw cover.

      • To avoid activating the VOID that may come up, heat the sticker carefully to remove and replace it cleanly.

      Ask FixBot

      Add Comment

    2. PlayStation 3 Slim Blu-ray Disc Drive Replacement: step 2, image 1 of 2 PlayStation 3 Slim Blu-ray Disc Drive Replacement: step 2, image 2 of 2
      • Use the flat end of a metal spudger to pry up the seven screw covers around the edge of the lower case.

      Ask FixBot

      Add Comment

    3. PlayStation 3 Slim Blu-ray Disc Drive Replacement: step 3, image 1 of 1
      • Remove the seven 37 mm Phillips screws securing the top cover to the lower case.

      Ask FixBot

      Add Comment

    4. PlayStation 3 Slim Blu-ray Disc Drive Replacement: step 4, image 1 of 1
      • Remove the four 13.3 mm T8 security Torx screws beneath the Blu-ray drive opening. (Some models may only have three screws)

      Ask FixBot

      Add Comment

    5. PlayStation 3 Slim Blu-ray Disc Drive Replacement: step 5, image 1 of 2 PlayStation 3 Slim Blu-ray Disc Drive Replacement: step 5, image 2 of 2
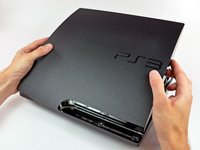
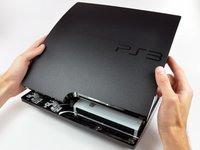
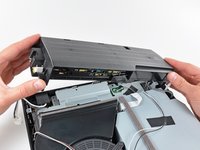
      • Lift the top cover from its rear edge and rotate it toward the front of the PS3.

      • Lift the top cover off the PS3.

      Ask FixBot

      Add Comment

    1. PlayStation 3 Slim Blu-ray Disc Drive Replacement, Power Supply: step 6, image 1 of 2 PlayStation 3 Slim Blu-ray Disc Drive Replacement, Power Supply: step 6, image 2 of 2
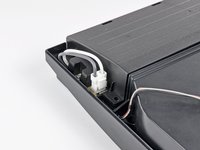
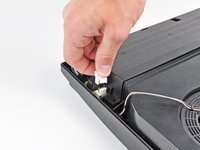
      • Squeeze the AC inlet connector's locking mechanism and pull straight up to disconnect it from the power supply.

      Ask FixBot

      Add Comment

    2. PlayStation 3 Slim Blu-ray Disc Drive Replacement: step 7, image 1 of 1
      • Pull the DC-Out cables straight up to lift their connector up and out of its socket on the power supply.

      Ask FixBot

      Add Comment

    3. PlayStation 3 Slim Blu-ray Disc Drive Replacement: step 8, image 1 of 1
      • Remove the two 7.6 mm Phillips screws securing the power supply to the lower case.

      Ask FixBot

      Add Comment

    4. PlayStation 3 Slim Blu-ray Disc Drive Replacement: step 9, image 1 of 1
      • Lift the power supply upward from its left edge as viewed from the front of the PS3.

      Ask FixBot

      Add Comment

    5. PlayStation 3 Slim Blu-ray Disc Drive Replacement: step 10, image 1 of 2 PlayStation 3 Slim Blu-ray Disc Drive Replacement: step 10, image 2 of 2
      • Continue to lift the left edge of the power supply until it lifts off the two metal posts shown in the second picture.

      • Remove the power supply from the PS3, minding any cables that may get caught.

      Ask FixBot

      Add Comment

    1. PlayStation 3 Slim Blu-ray Disc Drive Replacement, Blu-ray Disc Drive: step 11, image 1 of 2 PlayStation 3 Slim Blu-ray Disc Drive Replacement, Blu-ray Disc Drive: step 11, image 2 of 2
      • If present, remove the pieces of tape securing the cables to the body of the Blu-ray drive.

      Ask FixBot

      Add Comment

    2. PlayStation 3 Slim Blu-ray Disc Drive Replacement: step 12, image 1 of 1
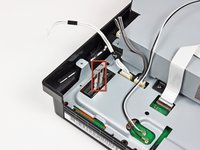
      • Use the flat end of a spudger or your fingernail to flip up the retaining flap on the Blu-ray ribbon cable socket.

      • Be sure you are prying up on the movable retaining flap, not the socket itself.

      Ask FixBot

      Add Comment

    3. PlayStation 3 Slim Blu-ray Disc Drive Replacement: step 13, image 1 of 1
      • Pull the Blu-ray ribbon cable straight up and out of its socket.

      Ask FixBot

      Add Comment

    4. PlayStation 3 Slim Blu-ray Disc Drive Replacement: step 14, image 1 of 1
      • Pull the Blu-ray power cable straight up to lift its connector out of the socket on the Blu-ray drive.

      Ask FixBot

      Add Comment

    5. PlayStation 3 Slim Blu-ray Disc Drive Replacement: step 15, image 1 of 1
      • Remove the single 9.5 mm Phillips screw securing the Blu-ray drive to the lower case.

      Ask FixBot

      Add Comment

    6. PlayStation 3 Slim Blu-ray Disc Drive Replacement: step 16, image 1 of 2 PlayStation 3 Slim Blu-ray Disc Drive Replacement: step 16, image 2 of 2
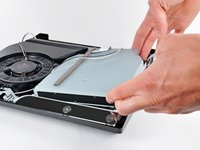
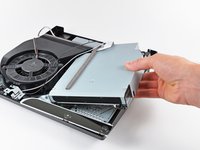
      • Lift the Blu-ray drive slightly by its right edge to dislodge the control board from its housing.

      • Remove the Blu-ray drive from the PS3.

      • After you reinstall the Blu-ray drive, be sure the control board is firmly seated in the lower case before proceeding.

      • If replacing the Blu-ray drive with a new drive, swap the circuit board from your old drive into the new drive.

      Ask FixBot

      Add Comment

Conclusion

To reassemble your device, follow these instructions in reverse order.

Cancel: I did not complete this guide.

200 other people completed this guide.

23 Guide Comments

great work guys and ladies.......haha went without a snag!

Jesse Waterhouse - Reply Share

I have a question I have followed your guide properly and removed my drive and found that the laser and disc loader are both need replaced. My question is when I go online and look for the replacement it sometimes shows just the laser then others shows the driver. I want the entire component as seen in this guide above. Do these come intact with everything in it when I buy it online. Can you please help.

Thank you,

Thomas Martinez

Tomlvgmartinez@yahoo.com

Thomas Martinez - Reply Share

On eBay you can find it

Anthony Milliner - Reply Share

Ive been able to remove the drive and I think it's fixed. To get it back together how do you get that ribbon underneath to go back into the slot? Is there a trick? I can get it lined up, but it won't go in.

Thanks for the help

ken - Reply Share

Add Comment

View Statistics:

Past 24 Hours: 40

Past 7 Days: 251

Past 30 Days: 1,382

All Time: 333,529