
Plastic Tooth Zipper Slider Replacement

Brittany McCrigler and 13 other contributors
Last updated on Aug 6, 2026
Views: 820K
View statistics:
- Past 24 Hours:
- 98
- Past 7 Days:
- 614
- Past 30 Days:
- 2,310
- All Time:
- 819,557
Comments: 26
3 comments on steps, 23 guide comments.
Go to guide commentsCompleted: 64 65
64 people have marked this guide "completed." Will you be next?
65 people have marked this guide "completed." Including you — great job!
Favorites: 23 24
23 people have favorited (and subscribed to) this guide. Will you be next?
24 people have favorited (and subscribed to) this guide — including you!
Featured Guide
This guide has been found to be exceptionally cool by the iFixit staff.
Patagonia
Patagonia and iFixit are celebrating the stories we wear by collaborating to provide guides for Patagonia's most popular apparel repairs.
Introduction
Go to step 1 ↓A zipper slider is responsible for joining the two sides of the zipper and ensuring the teeth secure properly. When a slider is damaged or missing, the zipper will not stay closed and the slider needs to be replaced.
This guide will demonstrate how to replace the slider on a plastic tooth (Vislon®) zipper.
IMPORTANT! Before proceeding:
- Ensure that the zipper separates at the top and bottom (e.g. a center front jacket zipper) and the top and bottom are not sewn together (e.g. a pocket zipper)
- Identify the type of zipper to obtain the correct replacement part
- Ensure that the issue can be fixed with a slider replacement and doesn't require a full zipper line replacement
Read through the entire guide before starting the repair, and gather the necessary tools and materials. While Patagonia-specific materials are ideal, they are not required. Patagonia replacement parts can be obtained by calling or messaging Patagonia Customer Service.
Alternatively, Patagonia products can be taken to a local retail store for repair evaluation or sent in to Patagonia through their mail-in repair service.
Let's get fixing!
WARNING! Small Parts. Patagonia does not recommend conducting these repairs on garments intended for children age 3 or under. Instead, we recommend return of the product for professional repair services.
The 3 Stages of Patagonia Zipper Repair
- Identify the zipper type
- Diagnose the issue
- Repair the zipper
- Coil Zipper Slider Replacement
- Plastic Tooth Zipper Slider Replacement
- Advanced No-Sew Zipper Repair Techniques
What you need
Tools
-
-
-
Safety Glasses4.9


-
-
-
Gather tools and the two pieces required for a plastic tooth slider replacement:
-
A replacement slider that is the right size and style
-
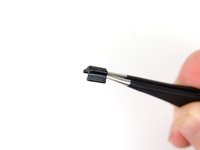
A top stop
 Ask FixBot
-
-
-
Unzip the zipper.
-
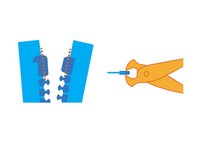
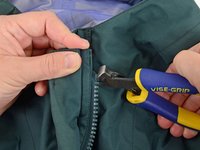
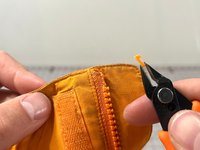
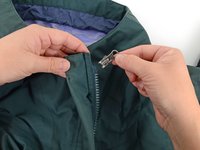
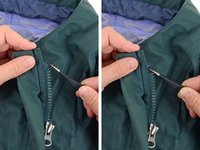
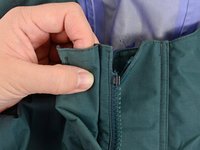
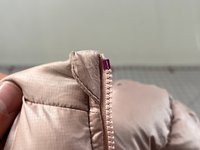
Locate the top stop at the top of the zipper on the side with the slider.
-
-
-
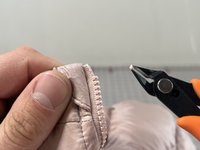
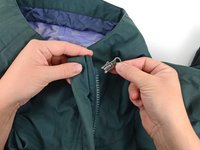
Peel away the rest of the top stop from the zipper tape.
-
Use a lighter to lightly singe any fraying zipper tape.
-
-
-
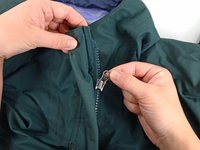
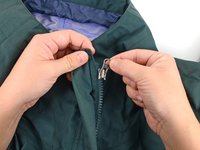
Slide the damaged zipper slider up and off the zipper tape.
-
Discard the zipper slider responsibly.
-
-
-
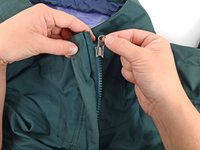
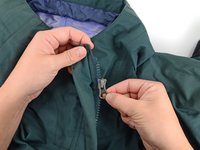
Making sure the new slider is oriented correctly, slide it onto the zipper tape.
-
Once the slider is on the zipper, test zipping up the jacket to make sure it's the right slider type and that the issue is fixed.
-
-
-
-
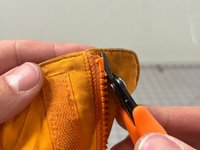
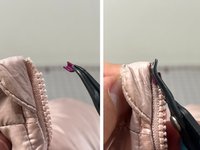
Grab a replacement top stop and position it around the edge of the zipper tape directly above the top teeth, where the old stop was located.
-
-
-
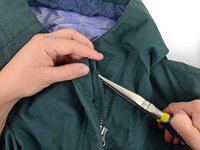
Use pliers to crimp the top stop into place.
-
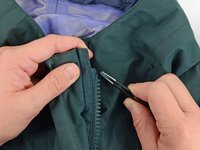
Check that the new stop effectively prevents the new slider from coming off the zipper.
-
-












Cancel: I did not complete this guide.
64 other people completed this guide.

23 Guide Comments
Off of another zipper
Amazon has replacement parts, but I found you can get almost any zipper parts from a sailing supply company called sailrite.com.
Perfect...thank you! I had seen about 10 other videos on how to do this repair but yours was the one that showed me exactly how to do it and it worked perfectly the first time. Much appreciated!
Thank you! This was great - I ordered the knippers and replacement parts for a jacket of mine that I broke, as I know my children will be breaking there's sooner or later. It cost me $10 instead of $40+ to replace a jacket.
