Free Shipping on Domestic Orders $75+

Picture Frame Matting Replacement

Views: 983

View statistics:

Past 24 Hours:
13
Past 7 Days:
32
Past 30 Days:
103
All Time:
983
Comments: 0

No one has left comments on this guide. Will you be first?

Go to guide comments
Completed: 0

No one has marked this guide "completed." Will you be the first?

Favorites: 0

No one has favorited (and subscribed to) this guide. Will you be the first?

Time Required: 30 minutes
Difficulty: Easy
Picture Frame Matting Replacement

Introduction

Go to step 1 ↓

Replacing warped, damaged, or discolored matting in a picture frame is a relatively simple process that most people can accomplish at home with just a couple tools. This quick project can be completed in just under half an hour. Work carefully, as fixing matting involves handling glass.


What you need

Tools

    1. Picture Frame Matting Replacement, Picture Frame Matting: step 1, image 1 of 1
      • Place the picture frame face down on a clean surface.

      Ask FixBot

      Add Comment

    2. Picture Frame Matting Replacement: step 2, image 1 of 1
      • Use a spudger to rotate all of the frame’s backing clips away from the frame.

      Ask FixBot

      Add Comment

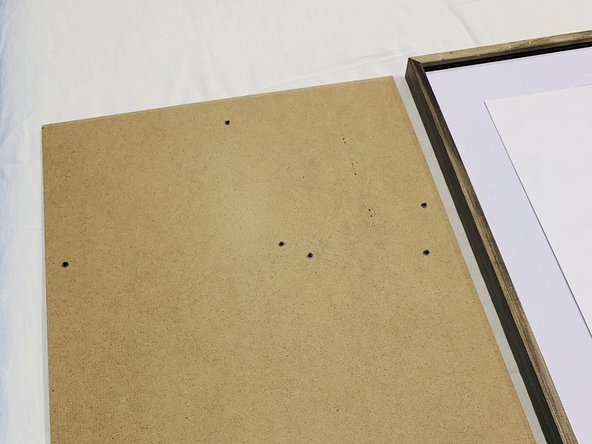
    3. Picture Frame Matting Replacement: step 3, image 1 of 2 Picture Frame Matting Replacement: step 3, image 2 of 2
      • Remove the backing by lifting it up and away using a spudger.

      Ask FixBot

      Add Comment

    4. Picture Frame Matting Replacement: step 4, image 1 of 1
      • Carefully remove the picture and old matting from the frame.

      • You can leave the glass in the frame.

      Ask FixBot

      Add Comment

    5. Picture Frame Matting Replacement: step 5, image 1 of 1
      • Place the new matting into the frame and directly onto the glass.

      • Be careful while working around the glass to avoid self-injury or damaging the item.

      Ask FixBot

      Add Comment

    6. Picture Frame Matting Replacement: step 6, image 1 of 2 Picture Frame Matting Replacement: step 6, image 2 of 2
      • Position the picture properly and place it on the new matting.

      • Make sure there are no gaps between the edge of the picture and the matting.

      • Carefully place a couple of small pieces of clear tape on the picture and the new matting to hold it in place.

      Ask FixBot

      Add Comment

    7. Picture Frame Matting Replacement: step 7, image 1 of 1
      • Place the backing on top of the matting in the frame.

      Ask FixBot

      Add Comment

    8. Picture Frame Matting Replacement: step 8, image 1 of 2 Picture Frame Matting Replacement: step 8, image 2 of 2
      • Rotate the backing clips under the frame to secure it.

      Ask FixBot

      Add Comment

Finish Line

Cancel: I did not complete this guide.

Leah

Member since: 01/20/23

160 Reputation

1 Guide authored

0 Guide Comments

Add Comment

View Statistics:

Past 24 Hours: 13

Past 7 Days: 32

Past 30 Days: 103

All Time: 983