
Free Shipping on Domestic Orders $75+

Petcube Play 2 Speaker Replacement

What you need

  1. Petcube Play 2 Speaker Replacement, Motherboard: step 1, image 1 of 3 Petcube Play 2 Speaker Replacement, Motherboard: step 1, image 2 of 3 Petcube Play 2 Speaker Replacement, Motherboard: step 1, image 3 of 3
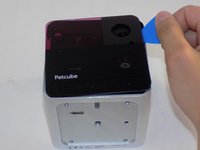
    • Flip over the Petcube so the rubber bottom faces you.

    • Pull up the rubber layer with an iFixit opening pick to expose the screws underneath.

  2. Petcube Play 2 Speaker Replacement: step 2, image 1 of 2 Petcube Play 2 Speaker Replacement: step 2, image 2 of 2
    • Remove the four 3.5mm screws from under the rubber cover using a Phillips #1 screwdriver.

    • The glue may cause slight resistance, but the screws should come out with minimal effort.

  3. Petcube Play 2 Speaker Replacement: step 3, image 1 of 2 Petcube Play 2 Speaker Replacement: step 3, image 2 of 2
    • Carefully pry off the glass front panel using an opening pick or a spudger.

    • Do not force the front panel off, as it may crack and break.

  4. Petcube Play 2 Speaker Replacement: step 4, image 1 of 3 Petcube Play 2 Speaker Replacement: step 4, image 2 of 3 Petcube Play 2 Speaker Replacement: step 4, image 3 of 3
    • Slide off the two covers, starting with the top plastic cover.

    • Slide out the internal assembly from the aluminum casing.

  5. Petcube Play 2 Speaker Replacement: step 5, image 1 of 3 Petcube Play 2 Speaker Replacement: step 5, image 2 of 3 Petcube Play 2 Speaker Replacement: step 5, image 3 of 3
    • Once the internal assembly is removed, a brass cylinder in one corner of the cube's front face will be visible. A screw will be attached to it.

    • Remove the screw with a Phillips #1 screwdriver.

  6. Petcube Play 2 Speaker Replacement: step 6, image 1 of 3 Petcube Play 2 Speaker Replacement: step 6, image 2 of 3 Petcube Play 2 Speaker Replacement: step 6, image 3 of 3
    • Flip the cube onto its side to locate the pull tabs.

    • Using an opening tool, lift each of the five tabs to separate the two halves of the Petcube 2.

  7. Petcube Play 2 Speaker Replacement: step 7, image 1 of 3 Petcube Play 2 Speaker Replacement: step 7, image 2 of 3 Petcube Play 2 Speaker Replacement: step 7, image 3 of 3
    • Gently disconnect the cable connectors to separate the two halves of the device.

    • Avoid pulling on the wires to prevent damage to the connectors.

  8. Petcube Play 2 Speaker Replacement: step 8, image 1 of 3 Petcube Play 2 Speaker Replacement: step 8, image 2 of 3 Petcube Play 2 Speaker Replacement: step 8, image 3 of 3
    • Use a Phillips #1 screwdriver to remove the two 1mm screws.

    • Carefully release each of the tabs on the sides of the cube and remove the motherboard.

    • Be gentle with the tabs. They will break under too much pressure.

  9. Petcube Play 2 Speaker Replacement, Speaker: step 9, image 1 of 3 Petcube Play 2 Speaker Replacement, Speaker: step 9, image 2 of 3 Petcube Play 2 Speaker Replacement, Speaker: step 9, image 3 of 3
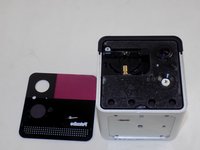
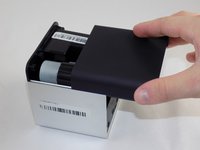
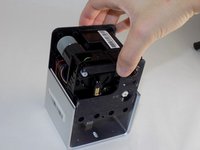
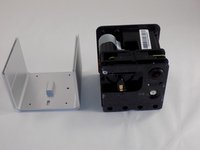
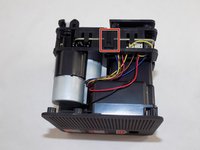
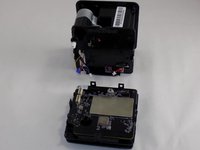
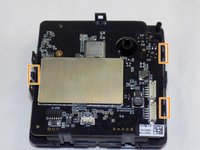
    • Take the half of the device that doesn't contain the motherboard and place it down so that the top screws are visible.

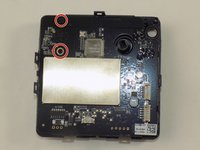
    • Use a Phillips #1 screwdriver to remove the seven screws.

  10. Petcube Play 2 Speaker Replacement: step 10, image 1 of 1
    • Use tweezers to remove the wire connector attaching the two halves together.

    • Make sure to avoid pulling on the wires to prevent breaking them or the connectors.

    • Separate the two halves and isolate the one containing the speaker.

  11. Petcube Play 2 Speaker Replacement: step 11, image 1 of 2 Petcube Play 2 Speaker Replacement: step 11, image 2 of 2
    • On the other half of the cube, remove the four screws using a Phillips #1 screwdriver.

  12. Petcube Play 2 Speaker Replacement: step 12, image 1 of 2 Petcube Play 2 Speaker Replacement: step 12, image 2 of 2
    • Grip the flat bottom and the cover of the speaker and gently pull them apart to separate to expose the speaker.

    • Be careful when pulling the two apart to avoid damaging the other internal parts as they are connected by the speaker cable.

  13. Petcube Play 2 Speaker Replacement: step 13, image 1 of 3 Petcube Play 2 Speaker Replacement: step 13, image 2 of 3 Petcube Play 2 Speaker Replacement: step 13, image 3 of 3
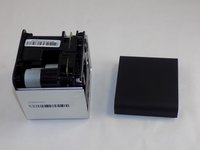
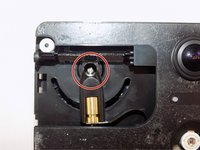
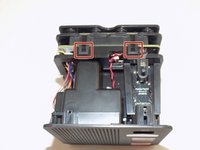
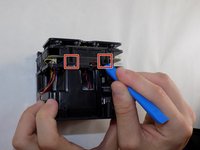
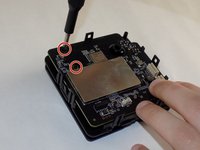
    • Use a Phillips #1 screwdriver to remove the two screws securing the speaker.

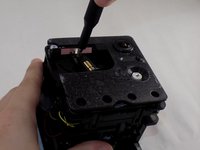
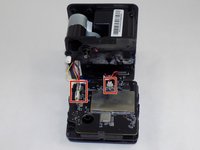
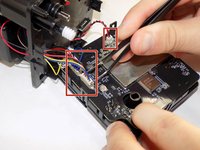
    • Use a soldering iron to desolder the wires connecting the speaker to the device.

    • Make sure to follow safety protocols with soldering and take your time as to prevent injury.

Conclusion

To reassemble your device, follow these instructions in reverse order. Take your e-waste to an R2 or e-Stewards certified recycler.

Jim Clifton

Member since: 03/18/24

121 Reputation

1 Guide authored

Team

0 Guide Comments

Add Comment

View Statistics:

Past 24 Hours: 0

Past 7 Days: 5

Past 30 Days: 18

All Time: 240