Free Shipping on Domestic Orders $75+

Petcube Play 2 Laser Replacement

Views: 492

View statistics:

Past 24 Hours:
1
Past 7 Days:
14
Past 30 Days:
51
All Time:
492
Comments: 0

No one has left comments on this guide. Will you be first?

Go to guide comments
Completed: 0

No one has marked this guide "completed." Will you be the first?

Favorites: 0

No one has favorited (and subscribed to) this guide. Will you be the first?

Time Required: 25 - 55 minutes
Difficulty: Moderate
Petcube Play 2 Laser Replacement

Introduction

Go to step 1 ↓

If the laser toy of your Petcube Play 2 (identified by model number PP2OUS) is malfunctioning, use this guide to replace it.

The Petcube Play 2 comes with a controllable laser toy usable from the Petcube app. Repeated use or a defective laser might lead to the laser malfunctioning or not turning on.

Before using this guide, ensure that there are no connection issues between the Petcube, your Wi-Fi router, and your phone. The Troubleshooting Page covers connection related issues and how to address them.

Ensure the Petcube Play 2 is turned off before beginning the replacement process.

What you need

Tools

    1. Petcube Play 2 Laser Replacement, Motherboard: step 1, image 1 of 3 Petcube Play 2 Laser Replacement, Motherboard: step 1, image 2 of 3 Petcube Play 2 Laser Replacement, Motherboard: step 1, image 3 of 3
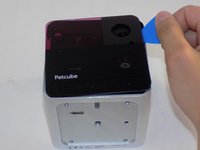
      • Flip over the Petcube so the rubber bottom faces you.

      • Pull up the rubber layer with an iFixit opening pick to expose the screws underneath.

      Ask FixBot

      Add Comment

    2. Petcube Play 2 Laser Replacement: step 2, image 1 of 2 Petcube Play 2 Laser Replacement: step 2, image 2 of 2
      • Remove the four 3.5mm screws from under the rubber cover using a Phillips #1 screwdriver.

      • The glue may cause slight resistance, but the screws should come out with minimal effort.

      Ask FixBot

      Add Comment

    3. Petcube Play 2 Laser Replacement: step 3, image 1 of 2 Petcube Play 2 Laser Replacement: step 3, image 2 of 2
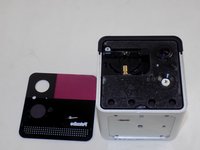
      • Carefully pry off the glass front panel using an opening pick or a spudger.

      • Do not force the front panel off, as it may crack and break.

      Ask FixBot

      Add Comment

    4. Petcube Play 2 Laser Replacement: step 4, image 1 of 3 Petcube Play 2 Laser Replacement: step 4, image 2 of 3 Petcube Play 2 Laser Replacement: step 4, image 3 of 3
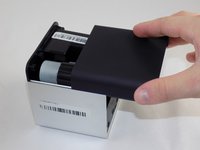
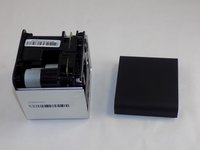
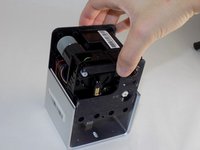
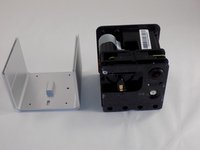
      • Slide off the two covers, starting with the top plastic cover.

      • Slide out the internal assembly from the aluminum casing.

      Ask FixBot

      Add Comment

    5. Petcube Play 2 Laser Replacement: step 5, image 1 of 3 Petcube Play 2 Laser Replacement: step 5, image 2 of 3 Petcube Play 2 Laser Replacement: step 5, image 3 of 3
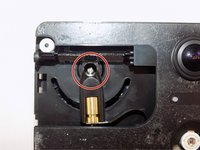
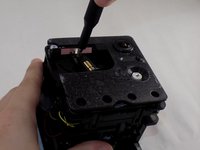
      • Once the internal assembly is removed, a brass cylinder in one corner of the cube's front face will be visible. A screw will be attached to it.

      • Remove the screw with a Phillips #1 screwdriver.

      Ask FixBot

      Add Comment

    6. Petcube Play 2 Laser Replacement: step 6, image 1 of 3 Petcube Play 2 Laser Replacement: step 6, image 2 of 3 Petcube Play 2 Laser Replacement: step 6, image 3 of 3
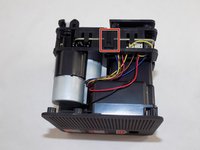
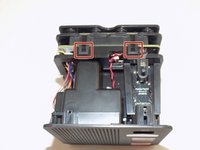
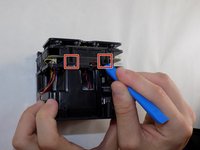
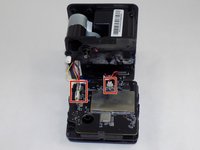
      • Flip the cube onto its side to locate the pull tabs.

      • Using an opening tool, lift each of the five tabs to separate the two halves of the Petcube 2.

      Ask FixBot

      Add Comment

    7. Petcube Play 2 Laser Replacement: step 7, image 1 of 3 Petcube Play 2 Laser Replacement: step 7, image 2 of 3 Petcube Play 2 Laser Replacement: step 7, image 3 of 3
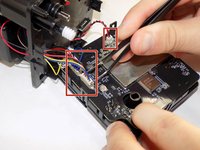
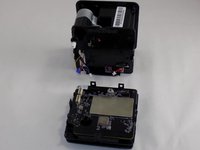
      • Gently disconnect the cable connectors to separate the two halves of the device.

      • Avoid pulling on the wires to prevent damage to the connectors.

      Ask FixBot

      Add Comment

    8. Petcube Play 2 Laser Replacement: step 8, image 1 of 3 Petcube Play 2 Laser Replacement: step 8, image 2 of 3 Petcube Play 2 Laser Replacement: step 8, image 3 of 3
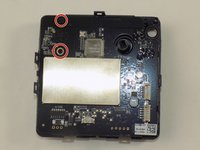
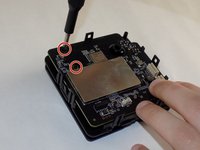
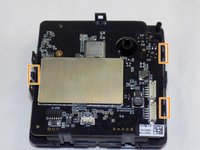
      • Use a Phillips #1 screwdriver to remove the two 1mm screws.

      • Carefully release each of the tabs on the sides of the cube and remove the motherboard.

      • Be gentle with the tabs. They will break under too much pressure.

      Ask FixBot

      Add Comment

    1. Petcube Play 2 Laser Replacement, Laser: step 9, image 1 of 3 Petcube Play 2 Laser Replacement, Laser: step 9, image 2 of 3 Petcube Play 2 Laser Replacement, Laser: step 9, image 3 of 3
      • Use a Phillips #1 screwdriver to remove the seven screws from the part of the cube where the motherboard was removed.

      • Remove the plastic front to expose the board with the laser.

      Ask FixBot

      Add Comment

    2. Petcube Play 2 Laser Replacement: step 10, image 1 of 2 Petcube Play 2 Laser Replacement: step 10, image 2 of 2
      • Once the motherboard is off and the plastic is removed, the internal circuit board is visible.

      • Remove the board from the plastic and locate the lasers ribbon connector.

      Ask FixBot

      Add Comment

    3. Petcube Play 2 Laser Replacement: step 11, image 1 of 2 Petcube Play 2 Laser Replacement: step 11, image 2 of 2
      • Use a spudger, or a clean fingernail to flip up the locking flap—this is the unlocked position.

      • Use the widest tool possible to avoid damaging the delicate hinge pins.

      • Use tweezers or your fingers to gently pull the cable out of its socket and remove the laser assembly from the board.

      • Be gentle and patient as the ribbon cable is delicate and can break easily.

      • To reconnect, make sure the locking flap is flipped up and gently reinsert the cable. Then, flip the locking flap down to secure the cable. The cable should slide into the socket with little to no force. If you're having trouble, remove it, check that the flap is fully unlocked, and try again.

      Ask FixBot

      Add Comment

Conclusion

To reassemble your device, follow these instructions in reverse order. Take your e-waste to an R2 or e-Stewards certified recycler.

Cancel: I did not complete this guide.

Christopher Pereira

Member since: 03/18/24

181 Reputation

2 Guides authored

Team

0 Guide Comments

Add Comment

View Statistics:

Past 24 Hours: 1

Past 7 Days: 14

Past 30 Days: 51

All Time: 492