
Free Shipping on Domestic Orders $75+

Pentax Spotmatic Light Seals Replacement

What you need

  1. Pentax Spotmatic Light Seals Replacement, Light Seals: step 1, image 1 of 2 Pentax Spotmatic Light Seals Replacement, Light Seals: step 1, image 2 of 2
    • Ensure you are looking at the back of the camera.

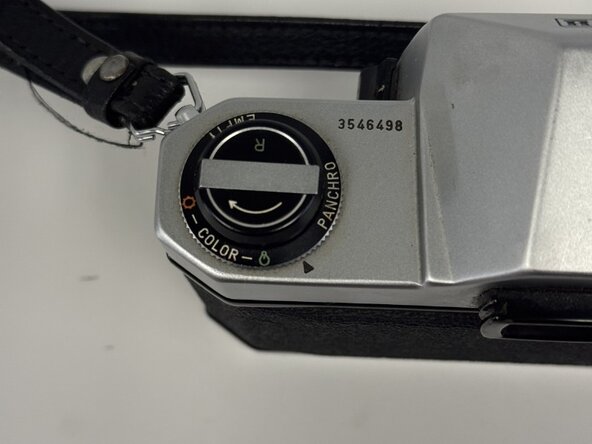
    • Move to the top of the camera that has the dials.

    Ask FixBot

    Add Comment

  2. Pentax Spotmatic Light Seals Replacement: step 2, image 1 of 3 Pentax Spotmatic Light Seals Replacement: step 2, image 2 of 3 Pentax Spotmatic Light Seals Replacement: step 2, image 3 of 3
    • Pull up the film rewind crank.

    • If the piece doesn't go up, you are most likely pulling up on the wrong side. Try flipping the other side.

    • The lever on the dial should be fully flipped.

    Ask FixBot

    Add Comment

  3. Pentax Spotmatic Light Seals Replacement: step 3, image 1 of 3 Pentax Spotmatic Light Seals Replacement: step 3, image 2 of 3 Pentax Spotmatic Light Seals Replacement: step 3, image 3 of 3
    • Holding onto the film rewind crank, pull up while holding down on the back part of the camera.

    • Let go then the back of the camera should open up.

    • Some resistance will be felt; pull until a click is heard.

    Ask FixBot

    Add Comment

  4. Pentax Spotmatic Light Seals Replacement: step 4, image 1 of 3 Pentax Spotmatic Light Seals Replacement: step 4, image 2 of 3 Pentax Spotmatic Light Seals Replacement: step 4, image 3 of 3
    • Fully open the back section of the camera.

    • Lay the camera down.

    • Using any available paper, cut it to a size that will cover the area in the center.

    • This is done to prevent debris from landing on one of the camera's major parts.

    • Lay the paper over the midsection, ensuring the screen-like part is covered.

    Ask FixBot

    Add Comment

  5. Pentax Spotmatic Light Seals Replacement: step 5, image 1 of 3 Pentax Spotmatic Light Seals Replacement: step 5, image 2 of 3 Pentax Spotmatic Light Seals Replacement: step 5, image 3 of 3
    • Grab a toothpick and move to the lower part of the camera. This lower part contains the space where the old light seal is stored.

    • Hold the paper down with one hand. With the other hand, place a toothpick into the lower crevice and, while applying light force with the toothpick, move it to the opposite end, which will result in the breaking down and removal of the old light seal.

    • If one swipe of the toothpick does not remove all the light seal waste, repeat the light seal removal process until it is removed.

    • In the top portion, a small hole is present; make sure to avoid getting any debris in it.

    Ask FixBot

    Add Comment

  6. Pentax Spotmatic Light Seals Replacement: step 6, image 1 of 3 Pentax Spotmatic Light Seals Replacement: step 6, image 2 of 3 Pentax Spotmatic Light Seals Replacement: step 6, image 3 of 3
    • Use toothpick or measuring device to get a good estimate of the crevice length.

    • Use that measurement and replicate it onto the light seal sheet by placing that measurement over the sheet.

    • In this case, my toothpick was around the same length as the crevice; however, in your case, it may not be, and a measuring tool may be needed. Length is roughly 140mm and 1.5mm wide.

    • Once the measurement is placed onto the sheet, cut using a box cutter. The width of the sheet should stay around a quarter inch.

    • If the width is more, don't worry, since it is foam, it can be squished into place.

    Ask FixBot

    Add Comment

  7. Pentax Spotmatic Light Seals Replacement: step 7, image 1 of 3 Pentax Spotmatic Light Seals Replacement: step 7, image 2 of 3 Pentax Spotmatic Light Seals Replacement: step 7, image 3 of 3
    • The finished cut should look something like this.

    • Peel the back of the foam to expose the sticky side.

    • Place the sticky side over the entirety of the crevice.

    • Strip should be about 140mm long and 1.5mm wide.

    Ask FixBot

    Add Comment

  8. Pentax Spotmatic Light Seals Replacement: step 8, image 1 of 3 Pentax Spotmatic Light Seals Replacement: step 8, image 2 of 3 Pentax Spotmatic Light Seals Replacement: step 8, image 3 of 3
    • Using a toothpick, push the light seal into the crevice as deeply as possible.

    • Work your way from the start all the way to the end.

    Ask FixBot

    Add Comment

  9. Pentax Spotmatic Light Seals Replacement: step 9, image 1 of 3 Pentax Spotmatic Light Seals Replacement: step 9, image 2 of 3 Pentax Spotmatic Light Seals Replacement: step 9, image 3 of 3
    • Using the same toothpick, move to the upper part of the camera. This upper part contains the space where the old light seal is stored

    • Hold the paper down with one hand. With the other hand, place a toothpick into the upper crevice and, while applying light force with the toothpick, move it to the opposite end, which will result in the breaking down and removal of the old light seal.

    • If one swipe of the toothpick does not remove all the light seal waste, then repeat the light seal removal process until it is removed.

    • Isopropyl alcohol can make the removal process better for stubborn pieces of foam.

    Ask FixBot

    Add Comment

  10. Pentax Spotmatic Light Seals Replacement: step 10, image 1 of 3 Pentax Spotmatic Light Seals Replacement: step 10, image 2 of 3 Pentax Spotmatic Light Seals Replacement: step 10, image 3 of 3
    • Use the same cutting process in step 6 to get the dimensions for the crevice the light seal will be placed into.

    • Once the measurement is made and the sheet is cut, remove the back piece to expose the sticky side of the light seal.

    • Apply the light seal starting from one end all the way to the other end.

    Ask FixBot

    Add Comment

  11. Pentax Spotmatic Light Seals Replacement: step 11, image 1 of 3 Pentax Spotmatic Light Seals Replacement: step 11, image 2 of 3 Pentax Spotmatic Light Seals Replacement: step 11, image 3 of 3
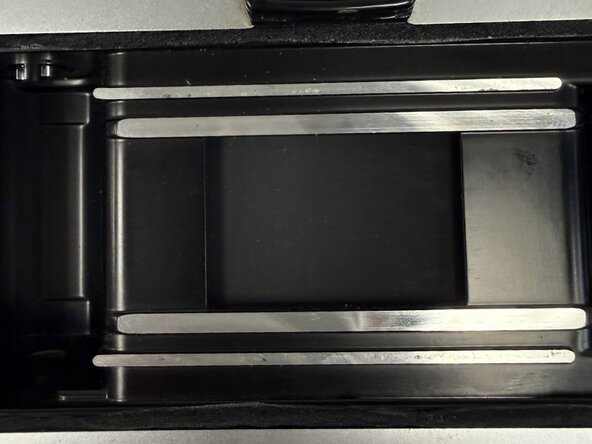
    • The finished result of the light seal should look like the image provided. It does not need to look perfect. The light seal just has to be covering the entire crevice.

    • If the light seal is sticking out of the crevice, feel free to cut it as you please; however, it is not needed as it is not obstructing any of the other camera parts.

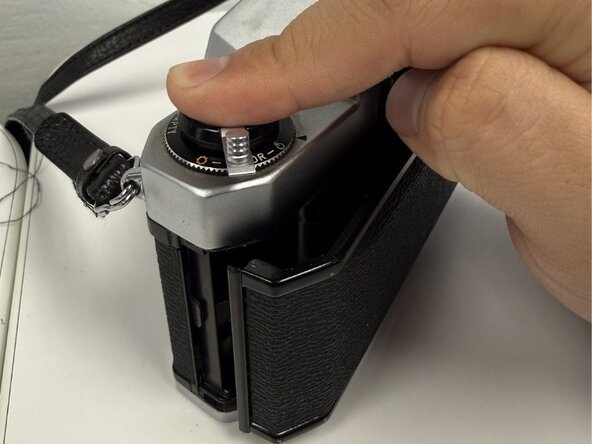
    • Prepare to close the camera. Move the back cover, so it is almost fully closed.

    • Place a finger on top of the dial.

    Ask FixBot

    Add Comment

  12. Pentax Spotmatic Light Seals Replacement: step 12, image 1 of 3 Pentax Spotmatic Light Seals Replacement: step 12, image 2 of 3 Pentax Spotmatic Light Seals Replacement: step 12, image 3 of 3
    • Press the dial down.

    • Close the film rewind crank.

    Ask FixBot

    Add Comment

  13. Pentax Spotmatic Light Seals Replacement: step 13, image 1 of 3 Pentax Spotmatic Light Seals Replacement: step 13, image 2 of 3 Pentax Spotmatic Light Seals Replacement: step 13, image 3 of 3
    • Place a finger on the slightly open back cover of the camera.

    • Press until cover is closed and you hear a click.

    • You will know the back piece has closed if it looks like the last image provided.

    Ask FixBot

    Add Comment

Finish Line

Cancel: I did not complete this guide.

Joseph

Member since: 02/26/26

217 Reputation

1 Guide authored

Team

0 Guide Comments

Add Comment

View Statistics:

Past 24 Hours: 4

Past 7 Days: 19

Past 30 Days: 88

All Time: 127