Free Shipping on Domestic Orders $75+

Pentax PZ-1p Front Housing Block Removal

What you need

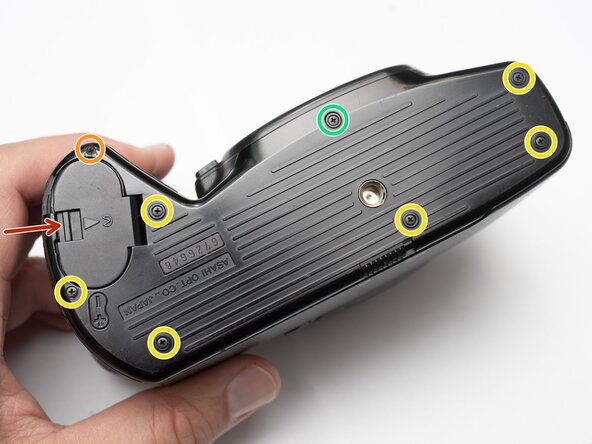
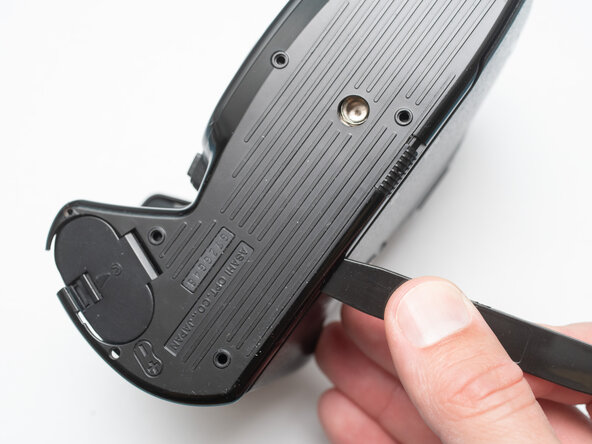
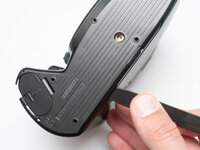
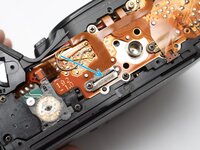
    1. Pentax PZ-1p Front Housing Block Removal, Remove bottom cover: step 1, image 1 of 3 Pentax PZ-1p Front Housing Block Removal, Remove bottom cover: step 1, image 2 of 3 Pentax PZ-1p Front Housing Block Removal, Remove bottom cover: step 1, image 3 of 3
      • Unlatch battery compartment door.

      • Remove one 1.7 x 4.0 mm screw.

      • Remove six 1.7 x 2.5 mm shoulder screws.

      • Remove one 1.7 x 2.5 mm long shoulder screw.

      • The bottom cover may be adhered with double sided tape in some locations. Use a spudger to gently work it loose.

      Ask FixBot

      Add Comment

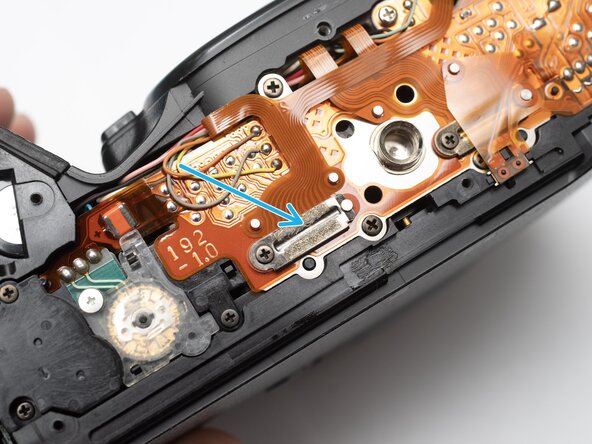
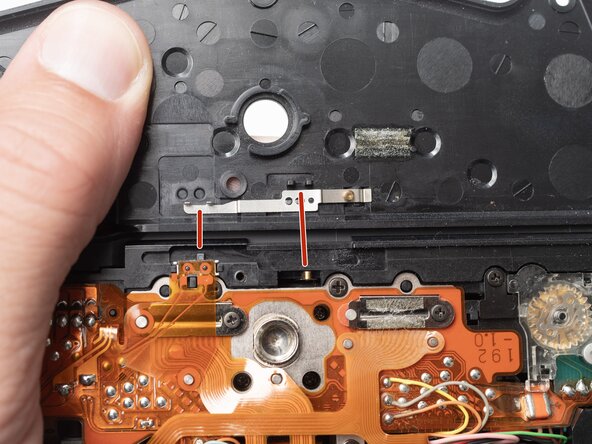
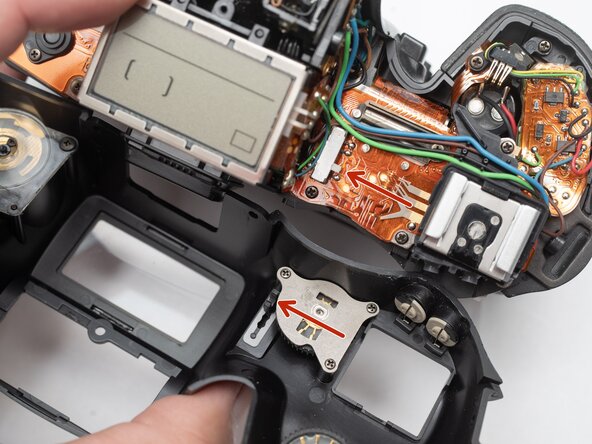
    2. Pentax PZ-1p Front Housing Block Removal, Installation Notes: Bottom cover: step 2, image 1 of 1
      • Check that the physical panorama switch on the bottom cover and the electrical switch mate properly.

      Ask FixBot

      Add Comment

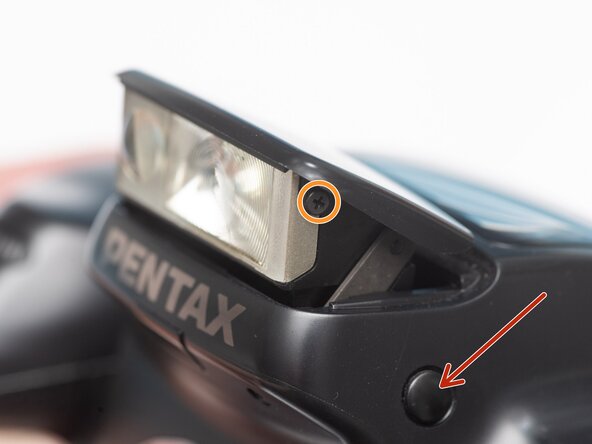
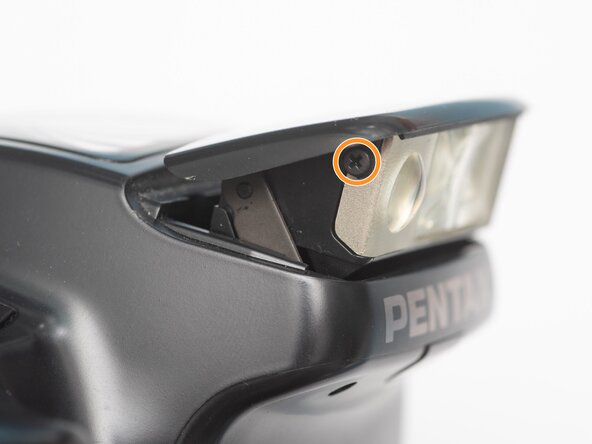
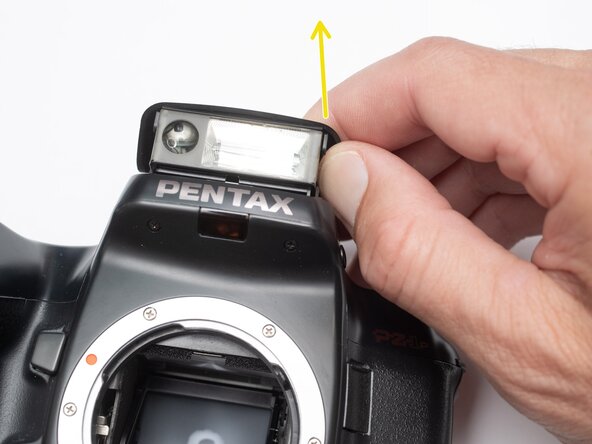
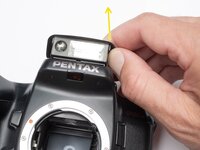
    1. Pentax PZ-1p Front Housing Block Removal, Remove flash cover: step 3, image 1 of 3 Pentax PZ-1p Front Housing Block Removal, Remove flash cover: step 3, image 2 of 3 Pentax PZ-1p Front Housing Block Removal, Remove flash cover: step 3, image 3 of 3
      • Push button to pop up the flash.

      • Remove two 1.7 x 2.5 mm screws.

      • Detach snaps by lifting the side of the flash cover, bending it up and away from the housing.

      • Push flash back down to the stored position.

      Ask FixBot

      Add Comment

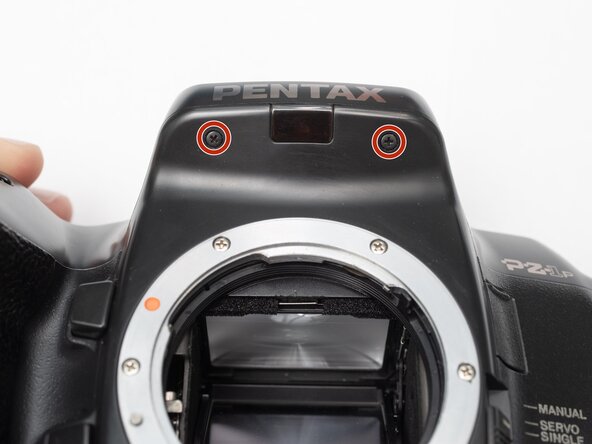
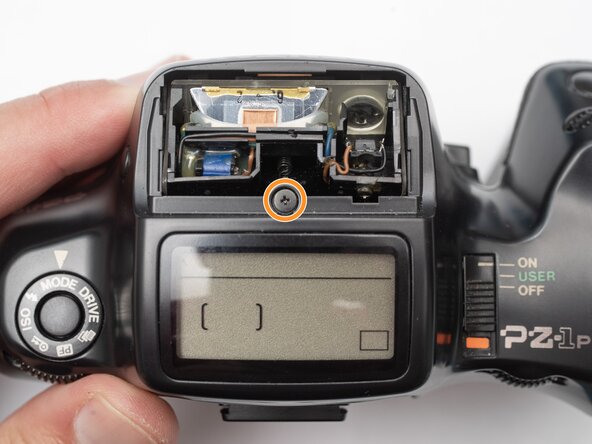
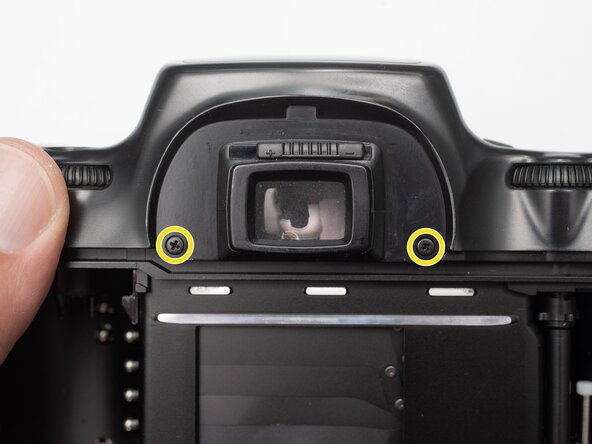
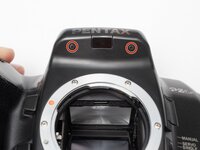
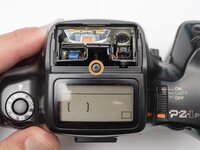
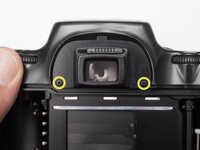
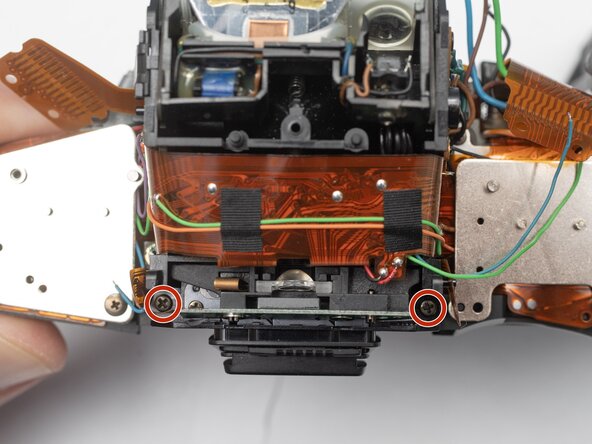
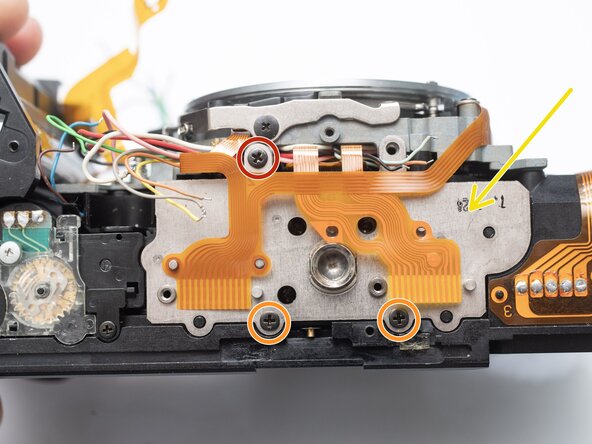
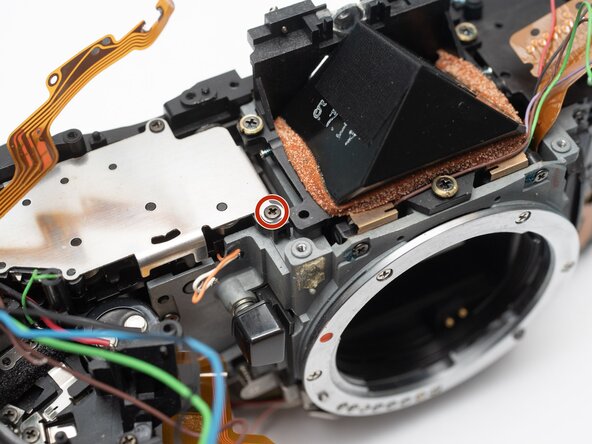
    2. Pentax PZ-1p Front Housing Block Removal, Remove top cover screws: step 4, image 1 of 3 Pentax PZ-1p Front Housing Block Removal, Remove top cover screws: step 4, image 2 of 3 Pentax PZ-1p Front Housing Block Removal, Remove top cover screws: step 4, image 3 of 3
      • Remove two 1.7 x 2.5 mm screws underneath the pop-up flash.

      • Remove one 1.7 x 2.5 mm panhead screw above the pop-up flash.

      • Remove two 1.7 x 2.5 mm shoulder screws near the eye piece.

      Ask FixBot

      Add Comment

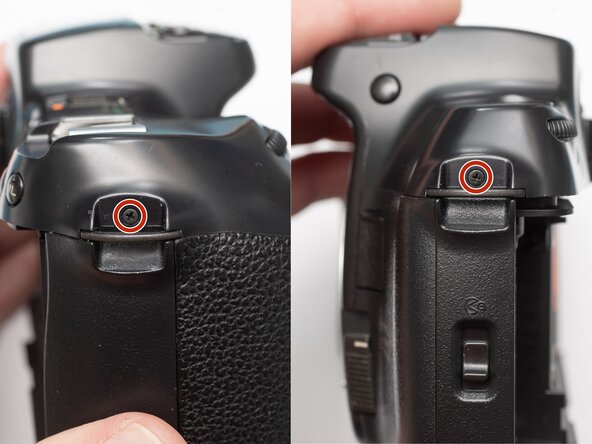
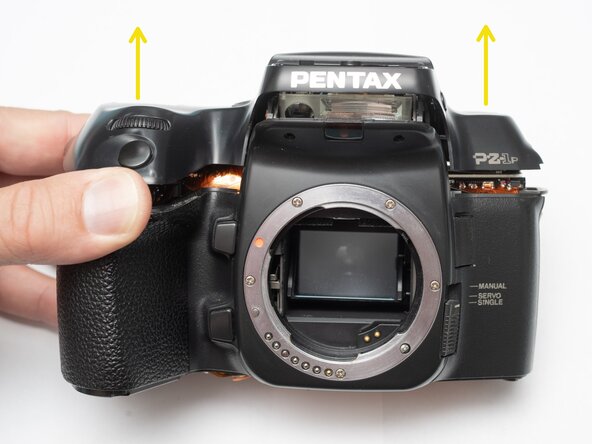
    3. Pentax PZ-1p Front Housing Block Removal, Remove top cover: step 5, image 1 of 3 Pentax PZ-1p Front Housing Block Removal, Remove top cover: step 5, image 2 of 3 Pentax PZ-1p Front Housing Block Removal, Remove top cover: step 5, image 3 of 3
      • Remove two 1.7 x 2.5 mm shoulder screws by the strap lugs.

      • Remove one 1.7 x 6.0 mm screw inside the battery compartment.

      • Lift off the top cover.

      Ask FixBot

      Add Comment

    4. Pentax PZ-1p Front Housing Block Removal, Installation Notes: Top cover: step 6, image 1 of 1
      • Check that the physical power switch and the electrical power switch are both in the same position before installation.

      Ask FixBot

      Add Comment

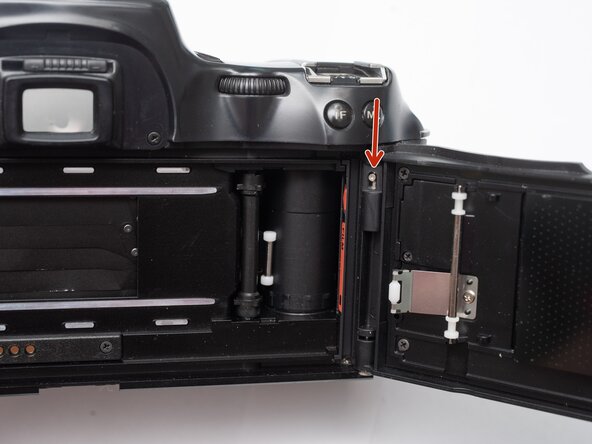
    1. Pentax PZ-1p Front Housing Block Removal, Remove film door: step 7, image 1 of 1
      • Push the release latch down to remove the film door.

      Ask FixBot

      Add Comment

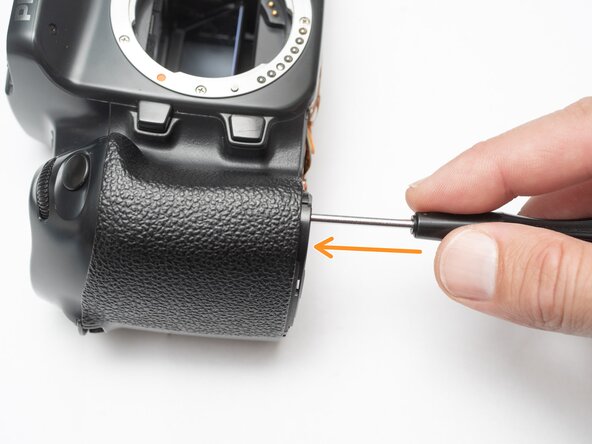
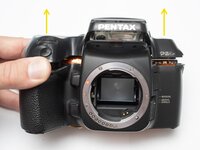
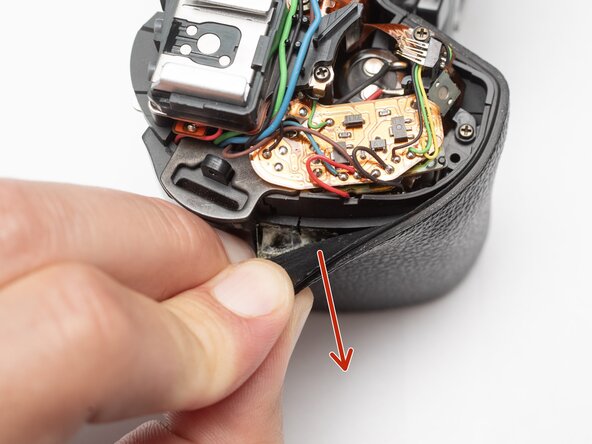
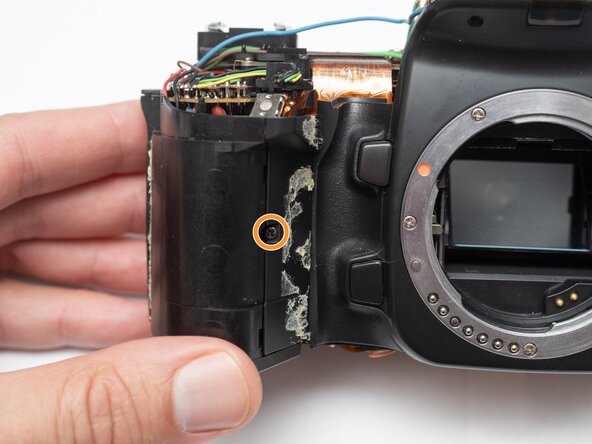
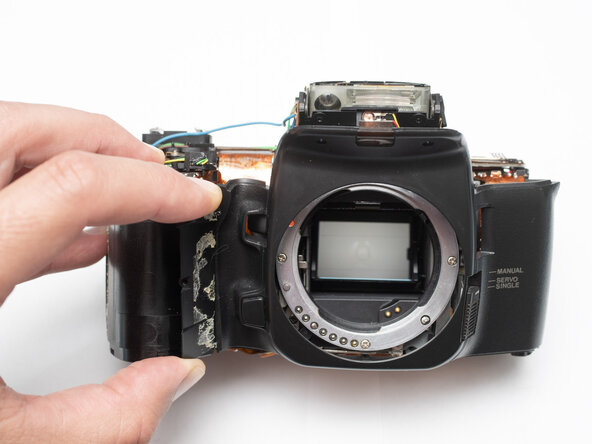
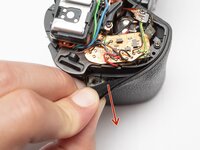
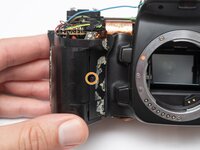
    2. Pentax PZ-1p Front Housing Block Removal, Remove front body panel: step 8, image 1 of 3 Pentax PZ-1p Front Housing Block Removal, Remove front body panel: step 8, image 2 of 3 Pentax PZ-1p Front Housing Block Removal, Remove front body panel: step 8, image 3 of 3
      • Peel off rubber covering from grip.

      • Remove one 1.7 x 5.0 mm screw.

      • Lift off the front body panel.

      Ask FixBot

      Add Comment

    1. Pentax PZ-1p Front Housing Block Removal, Discharge flash capacitor: step 9, image 1 of 1
      • Connect a 10 kOhm high power resistor across the terminals of the flash capacitor for several seconds.

      • Proceeding with the repair without discharging the flash capacitor could result in shock to the repairer or the camera components.

      Ask FixBot

      Add Comment

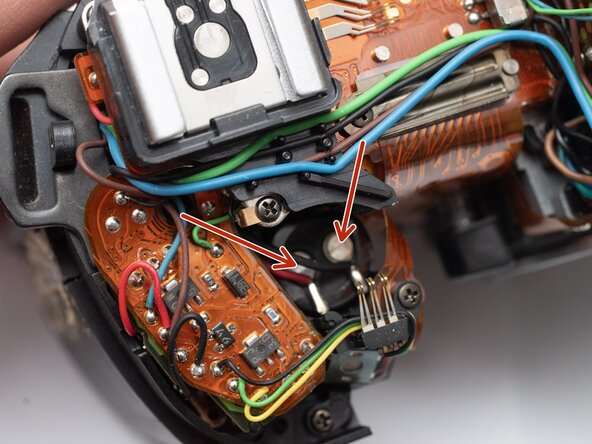
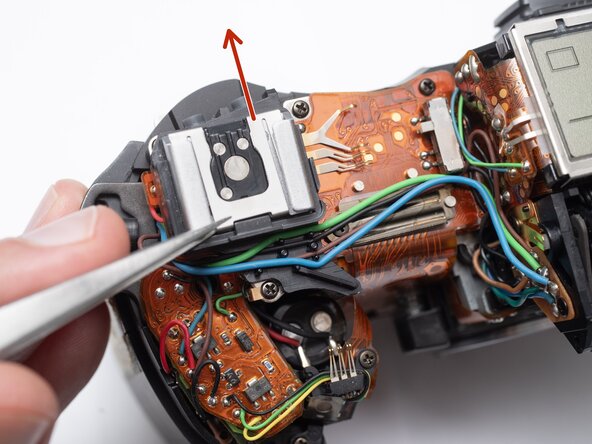
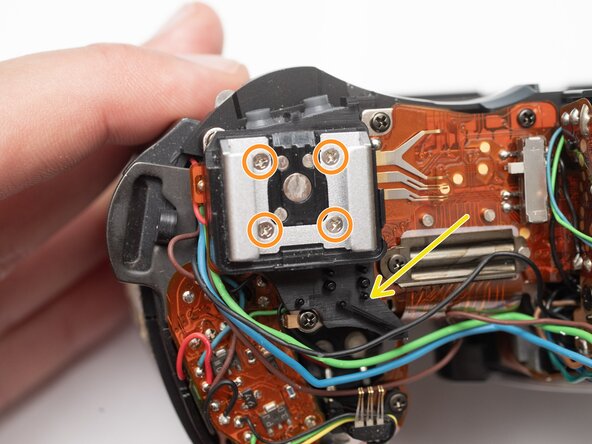
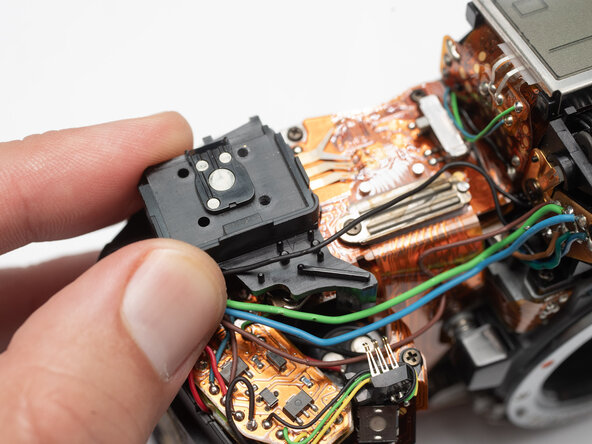
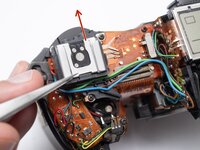
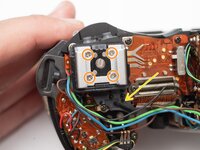
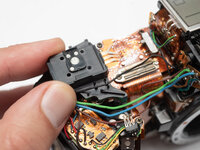
    2. Pentax PZ-1p Front Housing Block Removal, Remove hot shoe: step 10, image 1 of 3 Pentax PZ-1p Front Housing Block Removal, Remove hot shoe: step 10, image 2 of 3 Pentax PZ-1p Front Housing Block Removal, Remove hot shoe: step 10, image 3 of 3
      • Remove the hot shoe spring. Lift the front of the spring and slide it towards the back of the camera.

      • Remove four M1.7 x 6.5 mm screws from the hot shoe.

      • Remove black, brown, green, and blue wires from plastic guides.

      • Lift off the hot show mount.

      Ask FixBot

      Add Comment

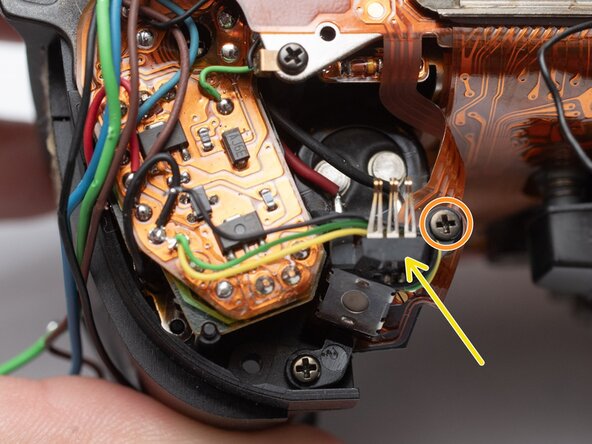
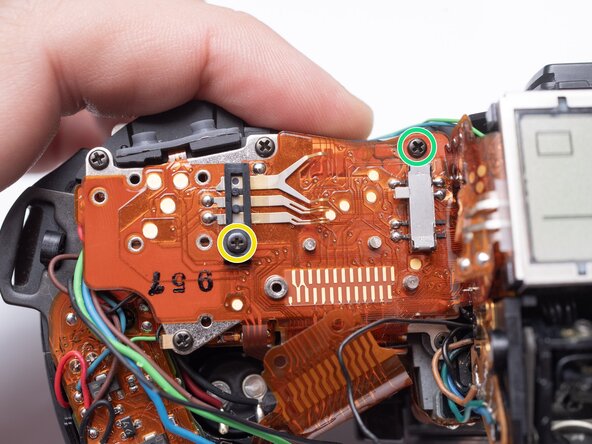
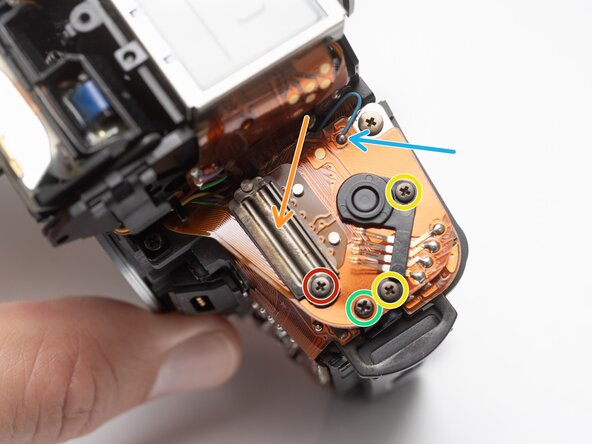
    3. Pentax PZ-1p Front Housing Block Removal, Remove command dial contact: step 11, image 1 of 2 Pentax PZ-1p Front Housing Block Removal, Remove command dial contact: step 11, image 2 of 2
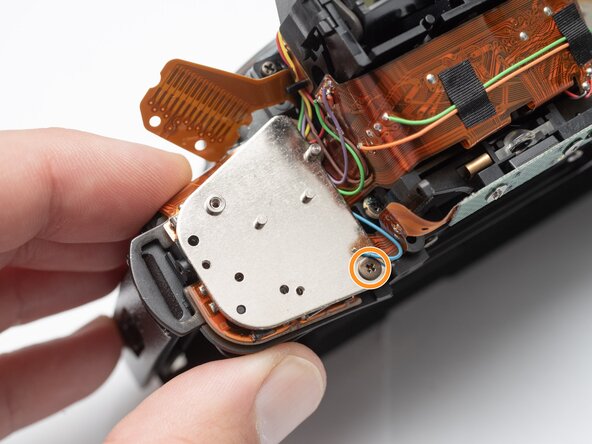
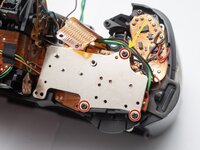
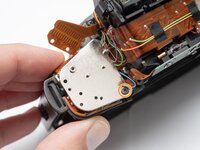
      • Unsolder the black, green and yellow wires for the command dial contacts.

      • Remove one 1.7 x 4.5 mm screw.

      • Lift off command dial contact.

      Ask FixBot

      Add Comment

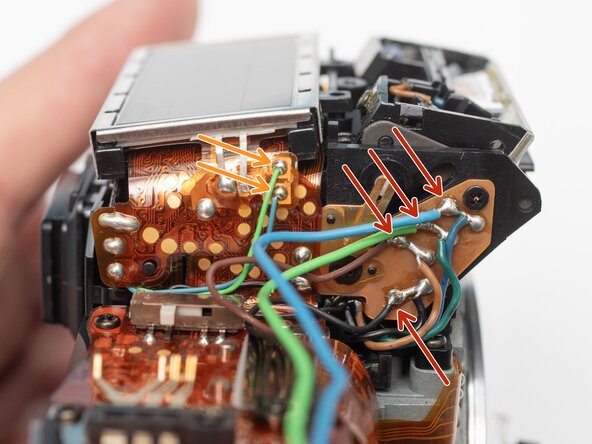
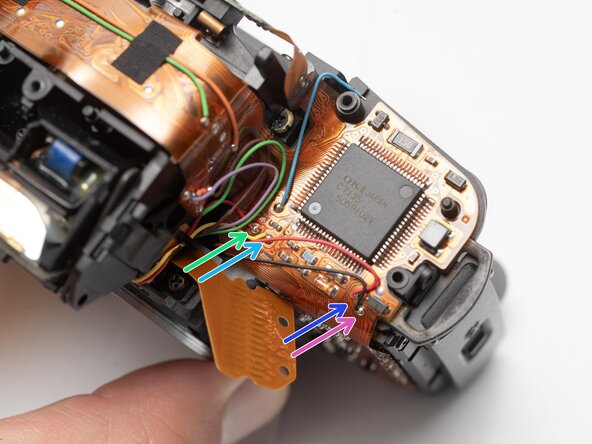
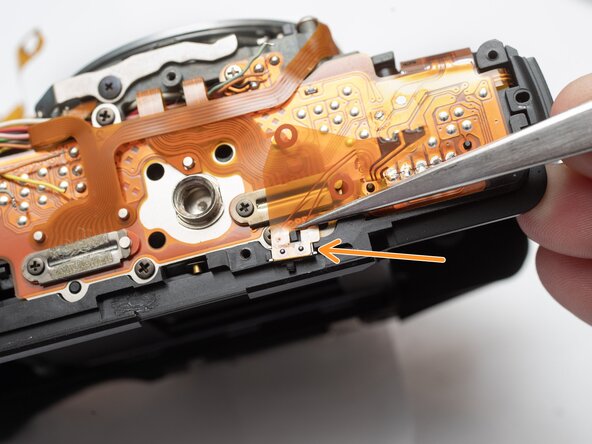
    4. Pentax PZ-1p Front Housing Block Removal, Unsolder flash relay PCB: step 12, image 1 of 1
      • Unsolder the blue and green wires.

      • Unsolder the blue, green, brown and black wires from the flash relay PCB.

      Ask FixBot

      Add Comment

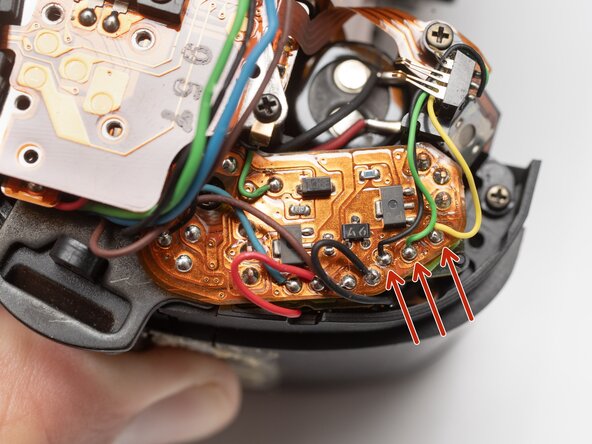
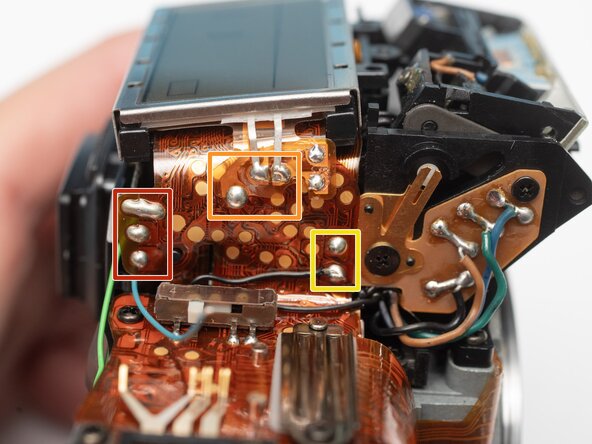
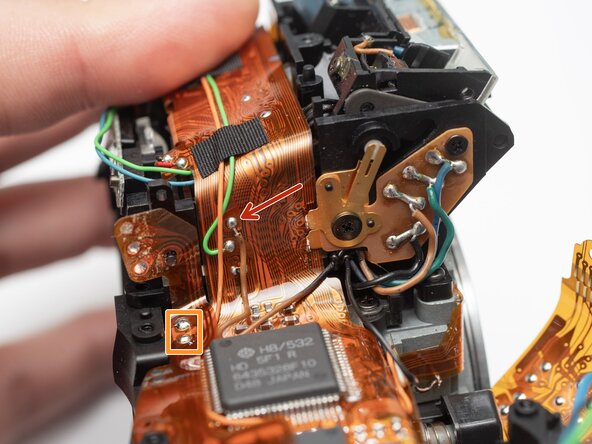
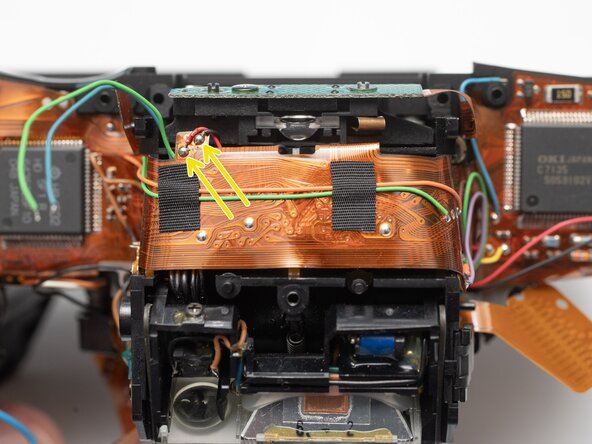
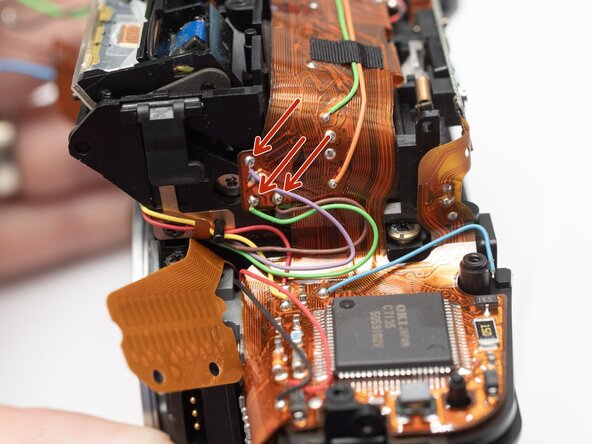
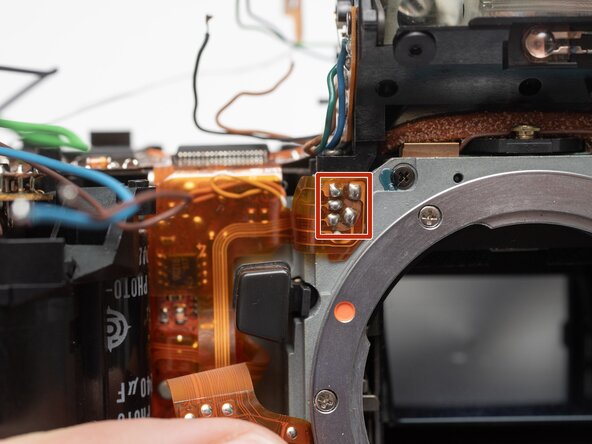
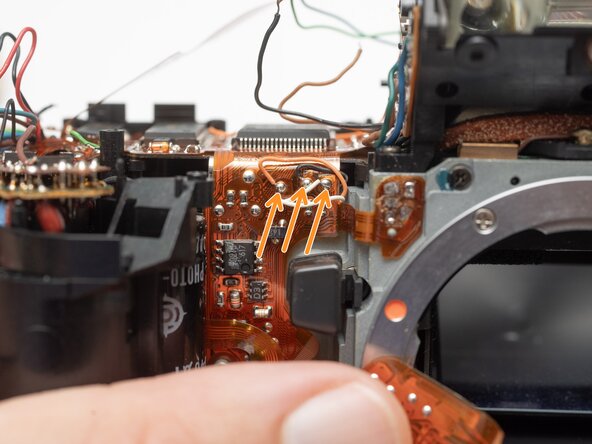
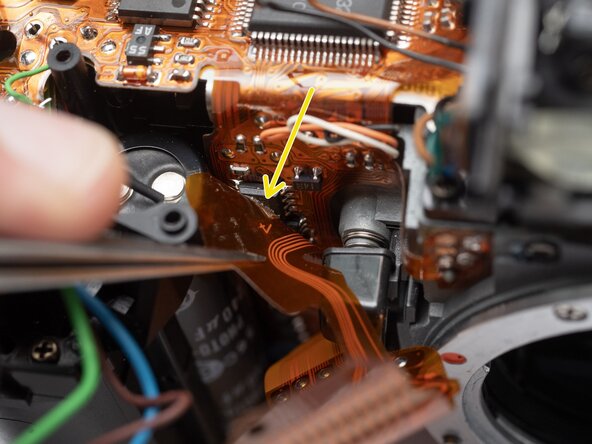
    5. Pentax PZ-1p Front Housing Block Removal, Unsolder flex PCB: step 13, image 1 of 1
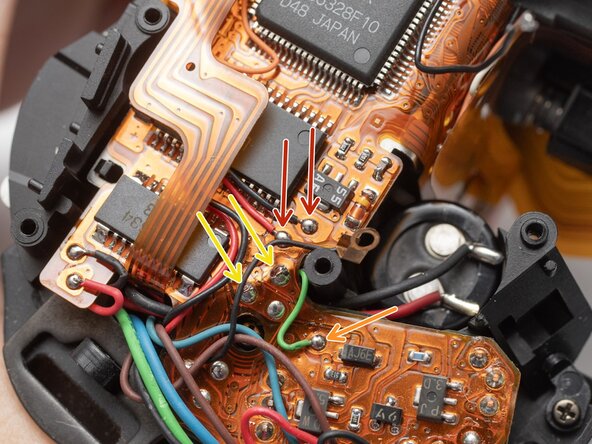
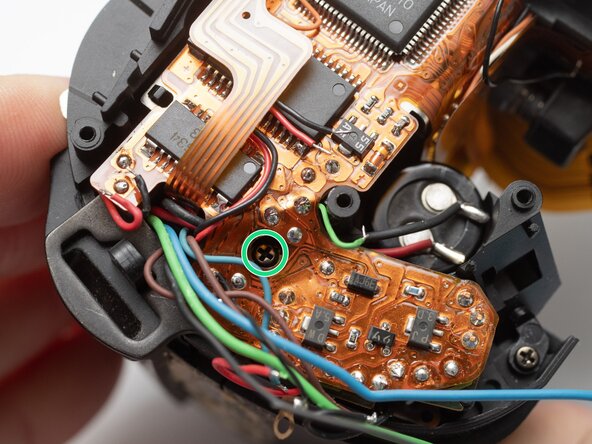
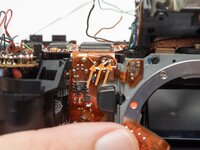
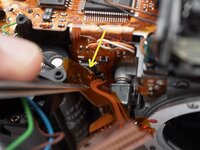
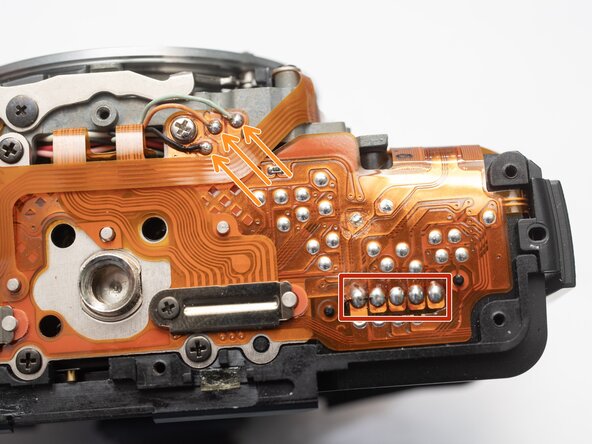
      • Unsolder three pads.

      • Unsolder three flex connections.

      • Unsolder two through-hole connections.

      Ask FixBot

      Add Comment

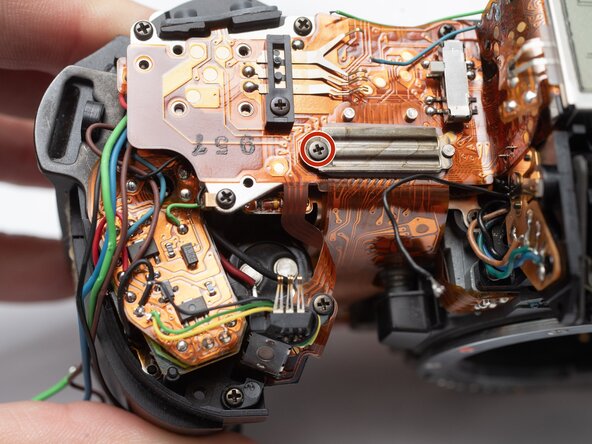
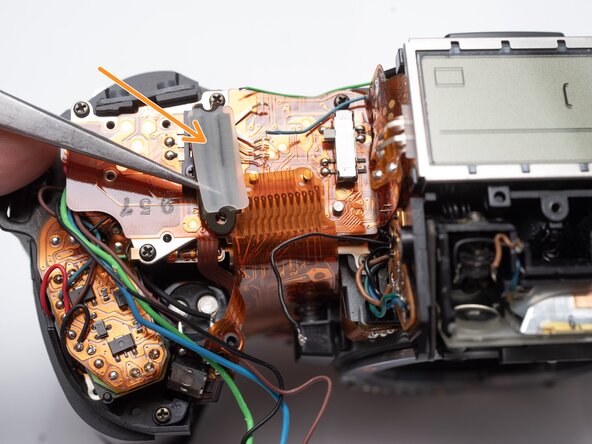
    6. Pentax PZ-1p Front Housing Block Removal, Remove retaining screws: step 14, image 1 of 3 Pentax PZ-1p Front Housing Block Removal, Remove retaining screws: step 14, image 2 of 3 Pentax PZ-1p Front Housing Block Removal, Remove retaining screws: step 14, image 3 of 3
      • Remove one M1.7 x 2.5 mm screw.

      • Remove flex clamp and rubber pad.

      • Remove one M1.7 x 3.5 mm screw.

      • Remove one 1.7 x 3.5 mm screw.

      Ask FixBot

      Add Comment

    7. Pentax PZ-1p Front Housing Block Removal, Remove retaining screws: step 15, image 1 of 1
      • Remove one M1.7 x 2.5 mm screw.

      • Remove flex clamp and rubber pad.

      • Remove two M1.7 x 2.5 mm screws.

      • Remove one 1.7 x 2.5 mm screw.

      • Unsolder one blue wire.

      Ask FixBot

      Add Comment

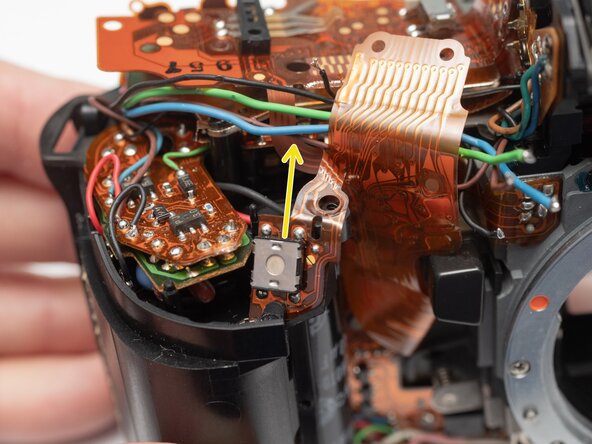
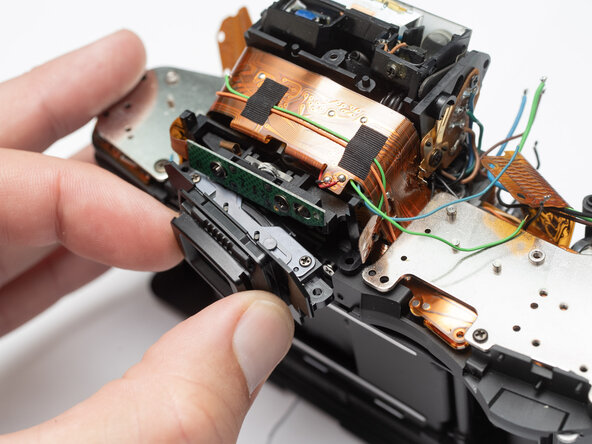
    8. Pentax PZ-1p Front Housing Block Removal, Remove LCD Flex PCB: step 16, image 1 of 3 Pentax PZ-1p Front Housing Block Removal, Remove LCD Flex PCB: step 16, image 2 of 3 Pentax PZ-1p Front Housing Block Removal, Remove LCD Flex PCB: step 16, image 3 of 3
      • Remove rubber dome pads for ME an IF buttons.

      • Detach button contacts from housing.

      • Push shutter release button up to free it from its retention post.

      • Detach snaps under the LCD frame.

      • Gently lift off LCD flex PCB.

      Ask FixBot

      Add Comment

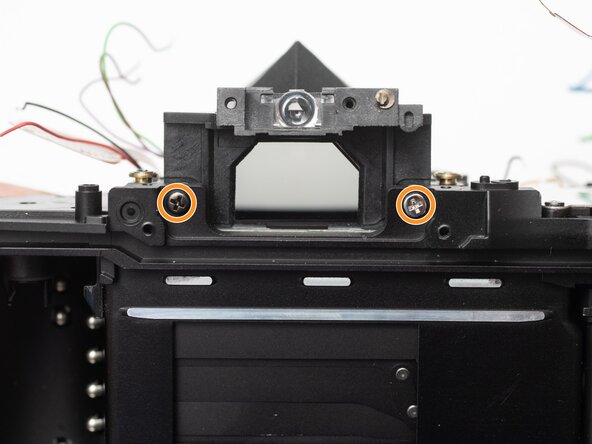
    1. Pentax PZ-1p Front Housing Block Removal, Remove eye piece: step 17, image 1 of 2 Pentax PZ-1p Front Housing Block Removal, Remove eye piece: step 17, image 2 of 2
      • Remove two 1.7 x 7.0 mm screws.

      • Remove the eye piece.

      Ask FixBot

      Add Comment

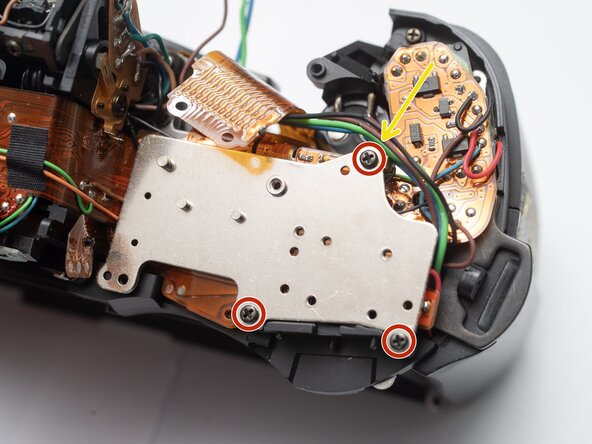
    2. Pentax PZ-1p Front Housing Block Removal, Remove base plates: step 18, image 1 of 2 Pentax PZ-1p Front Housing Block Removal, Remove base plates: step 18, image 2 of 2
      • Remove three 1.7 x 3.5 mm screws.

      • Remove one 1.7 x 3.5 mm screw.

      • Remove both base plates.

      • Installation Notes: Make sure to attach the ground wire at this location when installing the plate.

      Ask FixBot

      Add Comment

    3. Pentax PZ-1p Front Housing Block Removal, Unsolder main PCB wires: step 19, image 1 of 1
      • Unsolder the red and black wires to the battery contacts.

      • Unsolder the blue and brown wires.

      • Unsolder the red and black wires to the charging motor.

      Ask FixBot

      Add Comment

    4. Pentax PZ-1p Front Housing Block Removal, Unsolder main PCB wires: step 20, image 1 of 2 Pentax PZ-1p Front Housing Block Removal, Unsolder main PCB wires: step 20, image 2 of 2
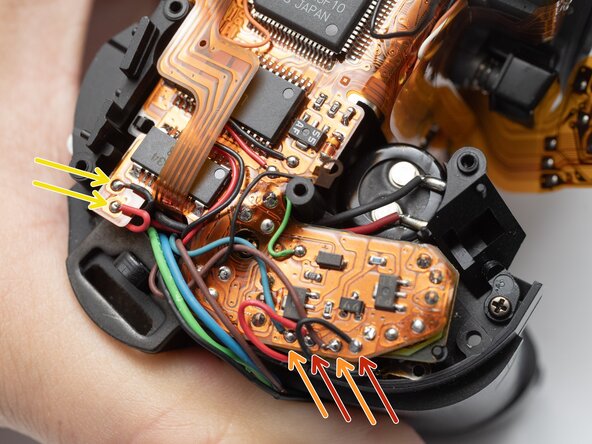
      • Unsolder the red and black wires for the film advance motor.

      • Unsolder one green wire.

      • Unsolder two through-hole connections for the charge block contact.

      • Remove one 1.7 x 3.0 mm screw.

      Ask FixBot

      Add Comment

    5. Pentax PZ-1p Front Housing Block Removal, Unsolder main PCB wires: step 21, image 1 of 2 Pentax PZ-1p Front Housing Block Removal, Unsolder main PCB wires: step 21, image 2 of 2
      • Unsolder one brown wire from the AF spot beam.

      • Unsolder two flex connections.

      • Unsolder the red and black wires for the buzzer.

      Ask FixBot

      Add Comment

    6. Pentax PZ-1p Front Housing Block Removal, Unsolder main PCB wires: step 22, image 1 of 2 Pentax PZ-1p Front Housing Block Removal, Unsolder main PCB wires: step 22, image 2 of 2
      • Unsolder the purple, green and brown wires for the aperture resistor.

      • Unsolder the red and yellow wires for the self-timer LED.

      • Unsolder the red and black wires for the TTL flash meter.

      Ask FixBot

      Add Comment

    7. Pentax PZ-1p Front Housing Block Removal, Unsolder shutter unit connections: step 23, image 1 of 3 Pentax PZ-1p Front Housing Block Removal, Unsolder shutter unit connections: step 23, image 2 of 3 Pentax PZ-1p Front Housing Block Removal, Unsolder shutter unit connections: step 23, image 3 of 3
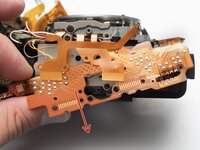
      • Unsolder five flex connections for the shutter unit flex cable.

      • Unsolder the white, black, and orange wires for aperture control unit.

      • Peal the shutter flex cable away from the main PCB. Apply isopropyl alcohol to loosen double-sided tape where necessary.

      Ask FixBot

      Add Comment

    8. Pentax PZ-1p Front Housing Block Removal, Unsolder DX reader connections: step 24, image 1 of 1
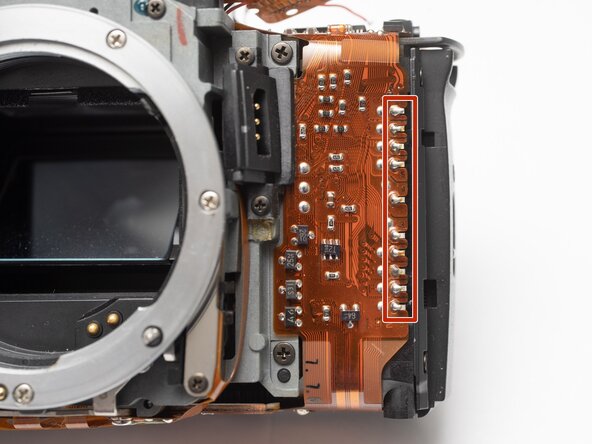
      • Unsolder all connections to the DX code reader pins.

      Ask FixBot

      Add Comment

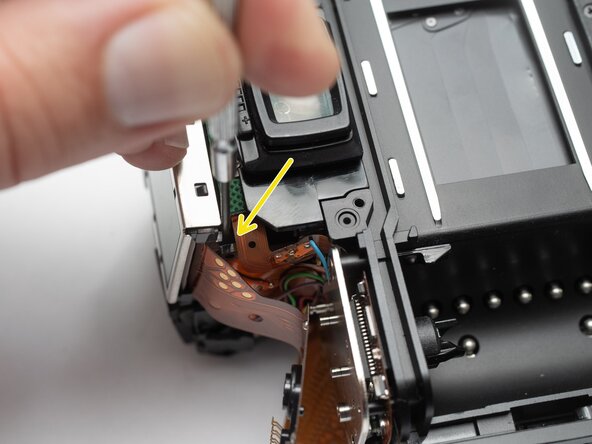
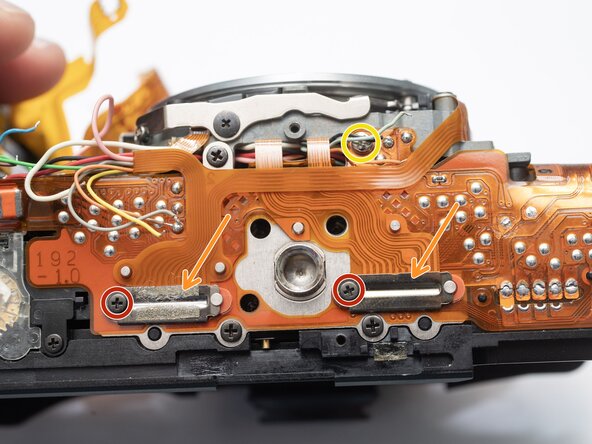
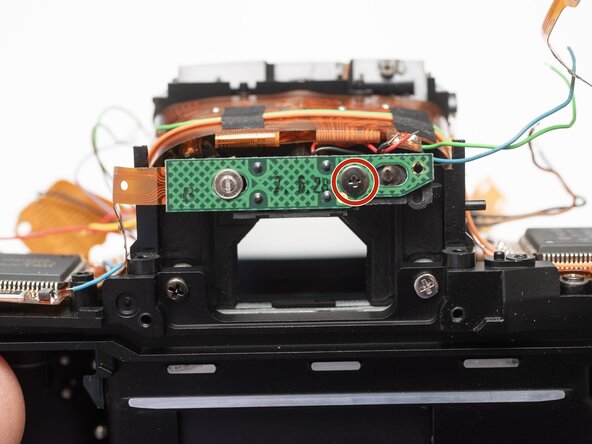
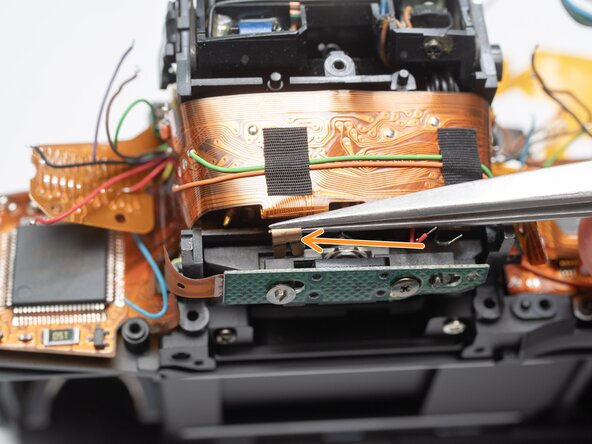
    9. Pentax PZ-1p Front Housing Block Removal, Remove panorama switch: step 25, image 1 of 2 Pentax PZ-1p Front Housing Block Removal, Remove panorama switch: step 25, image 2 of 2
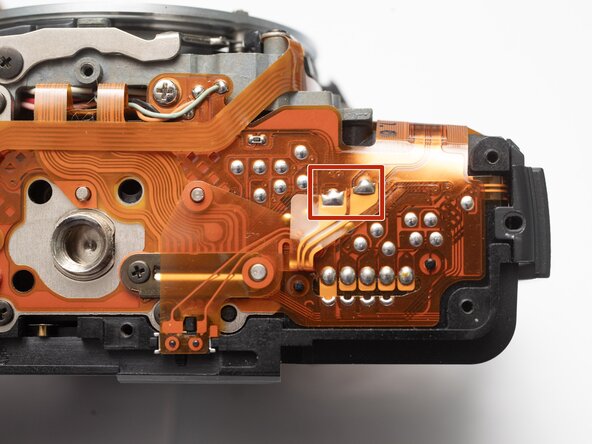
      • Unsolder two flex connections for the panorama switch.

      • Remove panorama switch.

      Ask FixBot

      Add Comment

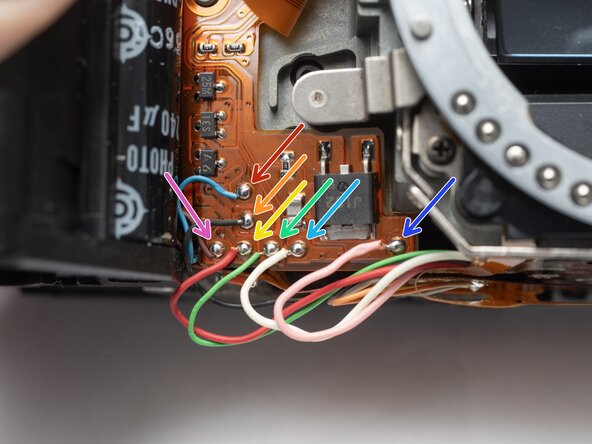
    10. Pentax PZ-1p Front Housing Block Removal, Unsolder main PCB wires: step 26, image 1 of 1
      • Unsolder the blue and brown wires to the aperture control solenoid.

      • Unsolder the red and black wires to the AF motor.

      • Unsolder the white, pink and green wires to the AF motor unit.

      Ask FixBot

      Add Comment

    11. Pentax PZ-1p Front Housing Block Removal, Unsolder main PCB wires: step 27, image 1 of 2 Pentax PZ-1p Front Housing Block Removal, Unsolder main PCB wires: step 27, image 2 of 2
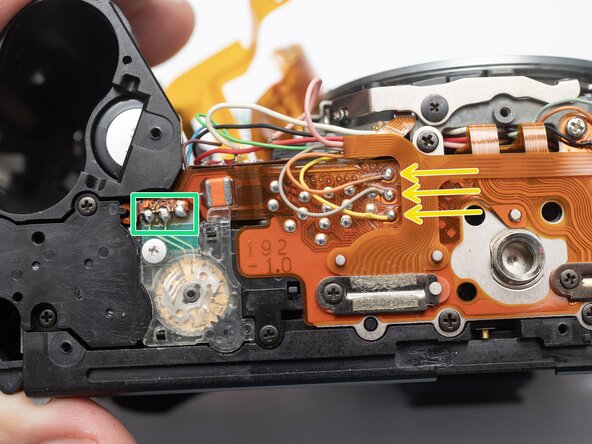
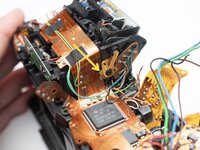
      • Unsolder five flex connections to the film door contacts.

      • Unsolder the black, orange, and gray wires for the AF motor unit.

      • Unsolder the orange, gray and yellow wires for the mirror release solenoid.

      • Unsolder three flex connections to the sprocket counter PCB.

      Ask FixBot

      Add Comment

    12. Pentax PZ-1p Front Housing Block Removal, Disconnect flex cables to main PCB: step 28, image 1 of 1
      • Remove two M1.7 x 2.5 mm screws.

      • Remove two flex cable clamps and rubber pads.

      • Remove one M2.0 x 4.0 mm screw.

      Ask FixBot

      Add Comment

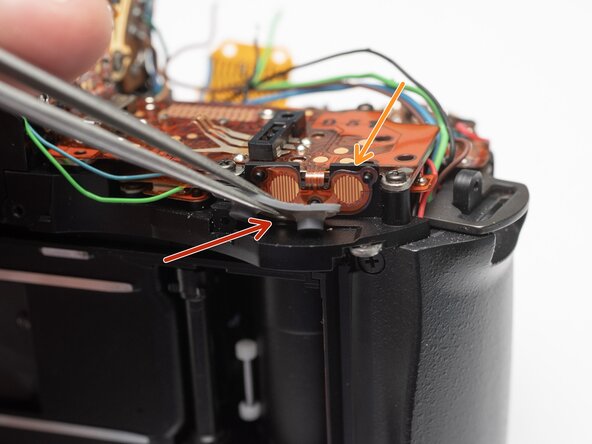
    13. Pentax PZ-1p Front Housing Block Removal, Detach metering cell PCB: step 29, image 1 of 2 Pentax PZ-1p Front Housing Block Removal, Detach metering cell PCB: step 29, image 2 of 2
      • Remove one F1.7 x 3.0 mm screw.

      • Use tweezers to pull off one brass clip from the end of the adjustment post.

      • Installation Notes: Consult page 32 of the Z1 service manual to adjust the precise position of the metering cell. This should be done before the LCD flex PCB is installed.

      Ask FixBot

      Add Comment

    14. Pentax PZ-1p Front Housing Block Removal, Remove main flex PCB: step 30, image 1 of 3 Pentax PZ-1p Front Housing Block Removal, Remove main flex PCB: step 30, image 2 of 3 Pentax PZ-1p Front Housing Block Removal, Remove main flex PCB: step 30, image 3 of 3
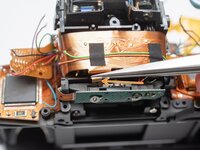
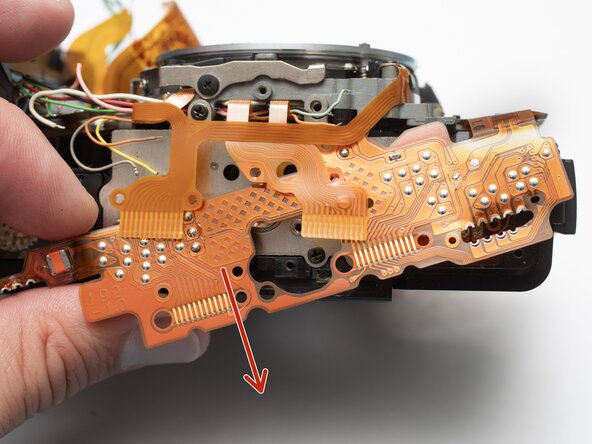
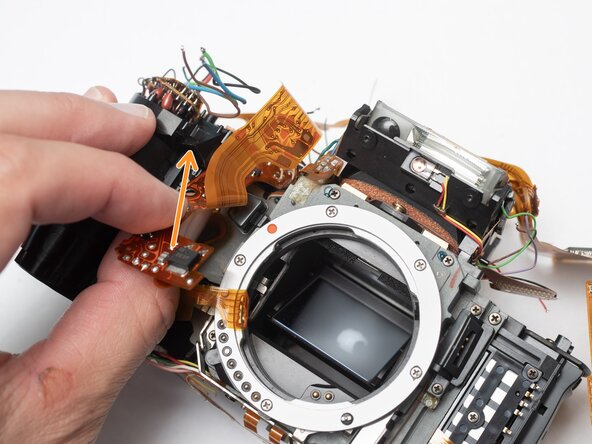
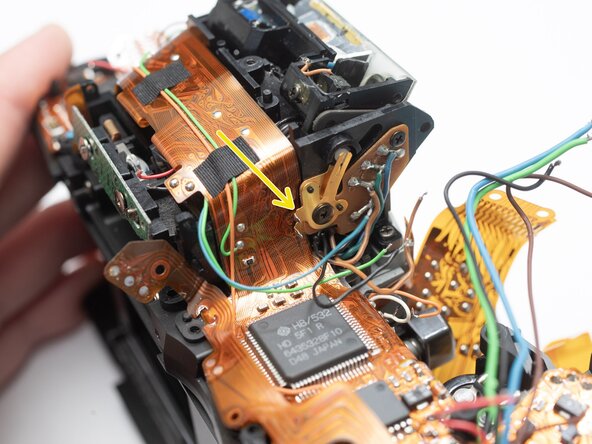
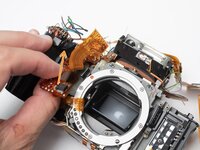
      • Begin by freeing the PCB from the bottom of the camera.

      • Work up and around the top.

      • Carefully work free the section between the grip and the lens mount.

      • Watch for areas where the flex may catch.

      • Slowly lift the entire PCB away from the camera looking for snags and wires that may still be connected.

      Ask FixBot

      Add Comment

    1. Pentax PZ-1p Front Housing Block Removal, Remove flash block: step 31, image 1 of 1
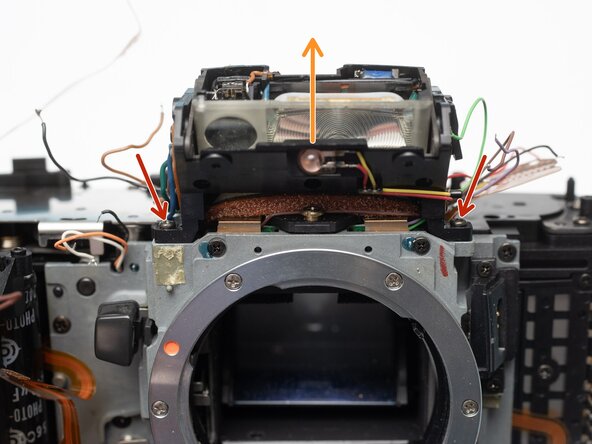
      • Remove two M1.7 x 4.0 mm screws.

      • Lift off flash block.

      Ask FixBot

      Add Comment

    2. Pentax PZ-1p Front Housing Block Removal, Remove rewind gearing plate: step 32, image 1 of 1
      • Remove one M2.0 screw.

      • Remove two E2.0 x 4.5 mm screws.

      • Remove rewind gearing plate.

      Ask FixBot

      Add Comment

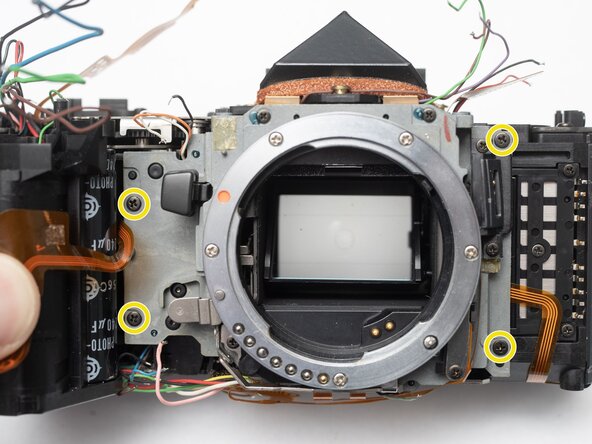
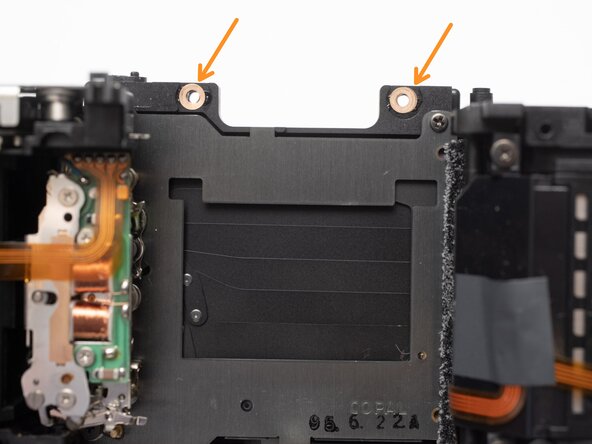
    3. Pentax PZ-1p Front Housing Block Removal, Unscrew front housing block: step 33, image 1 of 3 Pentax PZ-1p Front Housing Block Removal, Unscrew front housing block: step 33, image 2 of 3 Pentax PZ-1p Front Housing Block Removal, Unscrew front housing block: step 33, image 3 of 3
      • Remove one screw.

      • Remove two screws.

      • Remove four E2.0 x 4.0 mm screws.

      Ask FixBot

      Add Comment

    4. Pentax PZ-1p Front Housing Block Removal: step 34, image 1 of 2 Pentax PZ-1p Front Housing Block Removal: step 34, image 2 of 2
      • Gently pull the front housing block away from the main camera chassis.

      • Check for shim washers. Remove if loose and note their positions.

      Ask FixBot

      Add Comment

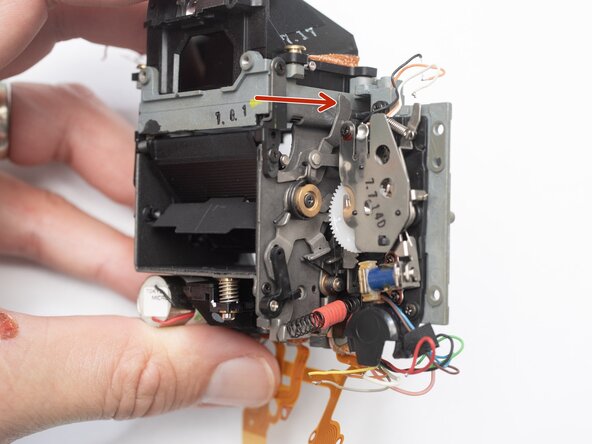
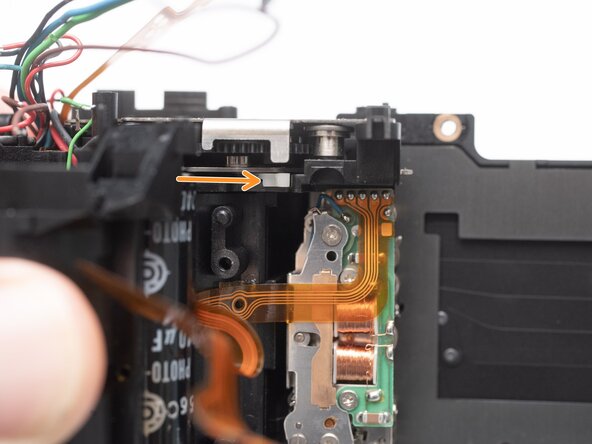
    5. Pentax PZ-1p Front Housing Block Removal, Installation Notes: Front Housing Block: step 35, image 1 of 2 Pentax PZ-1p Front Housing Block Removal, Installation Notes: Front Housing Block: step 35, image 2 of 2
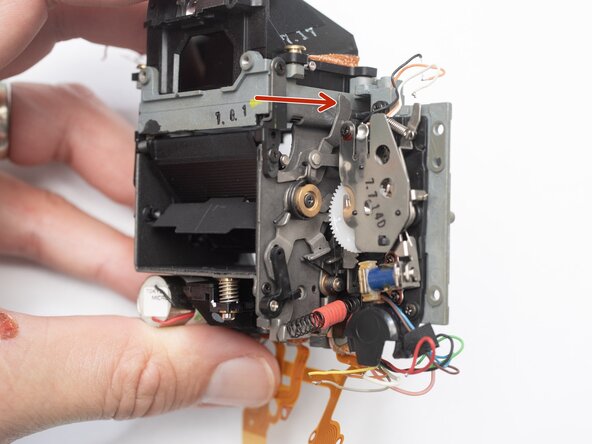
      • Charge the mirror box by pushing this lever forward until it catches. The mirror should be in the lower/viewing position.

      • Position the white aperture release lever to the right.

      Ask FixBot

      Add Comment

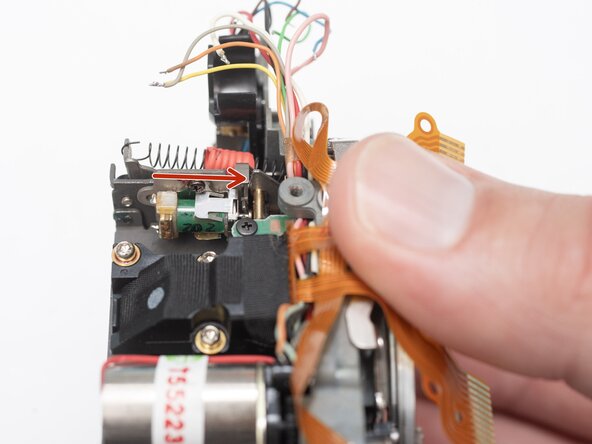
    6. Pentax PZ-1p Front Housing Block Removal, Mirror box operation: step 36, image 1 of 2 Pentax PZ-1p Front Housing Block Removal, Mirror box operation: step 36, image 2 of 2
      • Push this lever to the right to release the mirror. It should flip up into the taking position.

      • Push this lever forward to charge the mirror and return it to the lower/viewing position.

      Ask FixBot

      Add Comment

Conclusion

To reassemble your device, follow these instructions in reverse order.

Cancel: I did not complete this guide.

Sam Gustafson

Member since: 09/01/22

14,484 Reputation

78 Guides authored

0 Guide Comments

Add Comment

View Statistics:

Past 24 Hours: 1

Past 7 Days: 10

Past 30 Days: 20

All Time: 253