Introduction
This guide shows how to remove all of the components of the viewfinder for the Pentax MX. Dust and dirt cluttering up the image in the viewfinder can typically be resolved by simply removing the focusing screen and cleaning it. Further disassembly may be necessary to clean interior glass surfaces or to replace damaged parts.
Avoid using solvents to clean the focusing screen. Start with a simple air blower. Distilled water can be used to remove stuck on debris. An ultrasonic cleaner can even be used for very stubborn material, but only use distilled water as the cleaning fluid.
This guide shows the mirror box removed from the camera for the disassembly, but all steps can be performed with it still mounted to the chassis.
What you need
-
-
Remove the lever cap. The cap is reverse threaded.
-
Lift off the advance lever.
-
Remove the collar beneath the lever.
 Ask FixBot
-
-
-
Set the ISO to 100 and the shutter speed to 1000.
-
Remove one pin head screw.
-
Lift off shutter speed dial.
-
Remove the collar beneath the dial.
-
Installation Notes: Make sure that the tab on the shutter speed resistor mates properly with this slot on the shutter speed dial.
-
-
-
Place a tool in the fork of the rewind shaft. Turn the rewind knob counterclockwise to loosen it.
-
Remove the lock ring underneath the rewind knob.
-
Remove the cover plate.
-
-
-
Remove two M1.7 x 3.2 mm screws.
-
Remove two M1.7 x 2 mm countersunk screws.
-
Lift off top cover.
-
The release cable pin in the shutter button is loose and may fall out.
-
-
-
-
Unsolder one blue wire for the LED switch.
-
Unsolder one green wire for the motor drive.
-
Unsolder two yellow wires for the aperture resistor.
-
Unsolder two brown wires for the shutter speed resistor.
-
Unsolder one gray wire for flash sync.
-
-
-
Remove one M1.4 x 2.8 mm screw and washer.
-
Remove one M1.7 x 2.8 mm screw.
-
Pull the LED PCB out of the side of the mirror box.
-
-
-
Remove two screws.
-
Lift of flash sync connector.
-
Remove one screw.
-
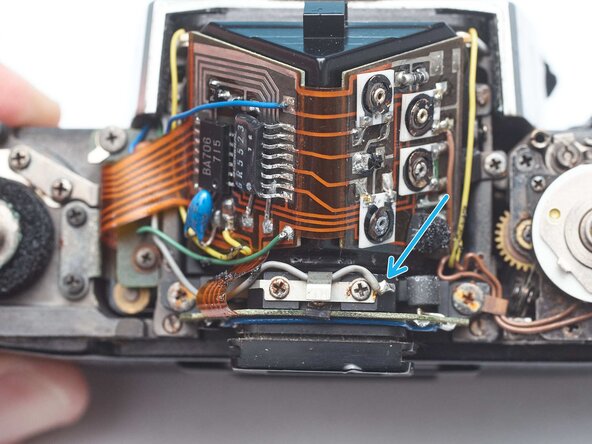
Remove light cell PCB clamp
-
Slide the light cell PCB up and off the eye piece.
-
-
-
Use isopropyl alcohol to loosen the adhesive attaching the PCB to the prism.
-
Use a soft, thin tool to separate the PCB.
-
Lift off the PCB once it is free from the adhesive.
-
-
-
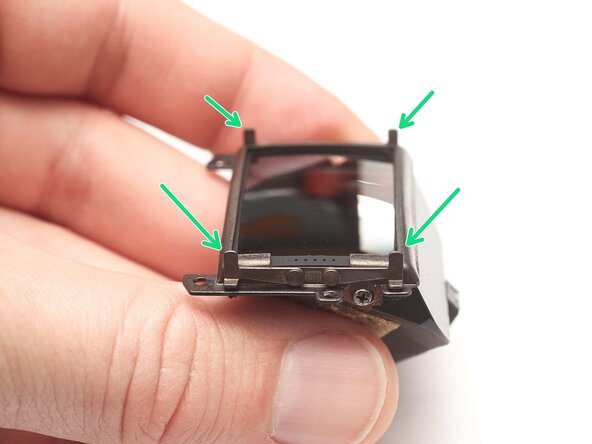
Pull the retention tab forward and let the focusing screen tray drop down.
-
Use the handling tab to remove the focusing screen.
-
-
-
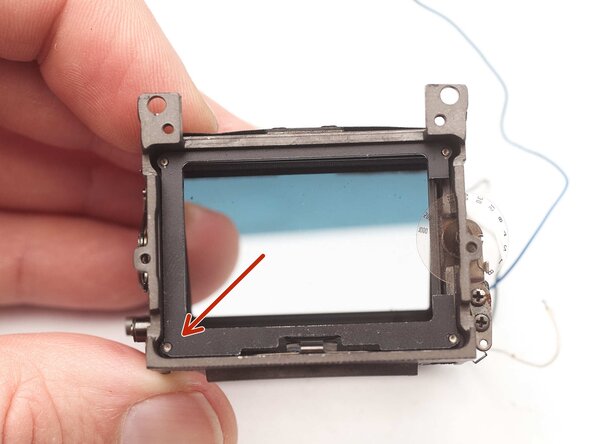
Remove two screws.
-
Remove two retaining clamps.
-
Lift off the prism.
-
Installation Notes: Position the stand-off posts so that they are all at the corners of the frame.
-


To reassemble your device, follow these instructions in reverse order.