Free Shipping on Domestic Orders $75+

Panasonic Toughbook CF-29 Back Cover Replacement

What you need

  1. Panasonic Toughbook CF-29 Back Cover Replacement, Battery: step 1, image 1 of 1
    • Locate the bay door for the battery on the left side of the laptop.

    Ask FixBot

    Add Comment

  2. Panasonic Toughbook CF-29 Back Cover Replacement: step 2, image 1 of 2 Panasonic Toughbook CF-29 Back Cover Replacement: step 2, image 2 of 2
    • Slide the latch to the right and then down to unlock it.

    • Pull out the battery.

    Ask FixBot

    Add Comment

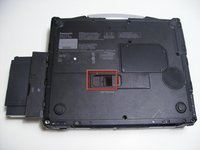
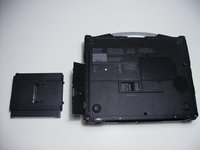
  3. Panasonic Toughbook CF-29 Back Cover Replacement, Optical Drive: step 3, image 1 of 1
    • Flip the device upside down with the handle facing away from you.

    • Open the optical drive bay by sliding its latch to the right.

    • Locate optical drive release mechanism on the bottom of the laptop.

    Ask FixBot

    Add Comment

  4. Panasonic Toughbook CF-29 Back Cover Replacement: step 4, image 1 of 1
    • Slide the latch cover to the right.

    Ask FixBot

    Add Comment

  5. Panasonic Toughbook CF-29 Back Cover Replacement: step 5, image 1 of 2 Panasonic Toughbook CF-29 Back Cover Replacement: step 5, image 2 of 2
    • Push the exposed switch to the left to eject the optical drive.

    Ask FixBot

    Add Comment

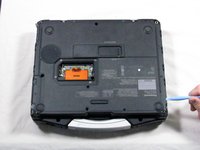
  6. Panasonic Toughbook CF-29 Back Cover Replacement, Back Cover: step 6, image 1 of 1
    • Begin by turning the laptop upside down with the handle towards you.

    • Use a Phillips size 0 screwdriver to remove the 4 screws holding down the ram cover.

    Ask FixBot

    Add Comment

  7. Panasonic Toughbook CF-29 Back Cover Replacement: step 7, image 1 of 1
    • Remove the panel and set it aside.

    • Use a Phillips size 0 screwdriver to remove these 8 small screws.

    Ask FixBot

    Add Comment

  8. Panasonic Toughbook CF-29 Back Cover Replacement: step 8, image 1 of 1
    • Use a Phillips size 1 screwdriver to remove the remaining 8 screws.

    Ask FixBot

    Add Comment

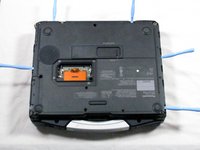
  9. Panasonic Toughbook CF-29 Back Cover Replacement: step 9, image 1 of 2 Panasonic Toughbook CF-29 Back Cover Replacement: step 9, image 2 of 2
    • Use a plastic opening tool to release, but NOT remove, the back cover because it is sealed with adhesive.

    Ask FixBot

    Add Comment

  10. Panasonic Toughbook CF-29 Back Cover Replacement: step 10, image 1 of 1
    • Be careful when lifting the cover as you may damage some connections.

    • Slowly lift the cover so that you can disconnect the red and white wires connecting the speaker to the sound card.

    Ask FixBot

    Add Comment

  11. Panasonic Toughbook CF-29 Back Cover Replacement: step 11, image 1 of 1
    • Now the back cover should be off and you can access the inside of the casing.

    Ask FixBot

    Add Comment

Conclusion

To reassemble your device, follow these instructions in reverse order.

Cancel: I did not complete this guide.

3 other people completed this guide.

Rohun Heesen

Member since: 04/13/10

426 Reputation

2 Guides authored

Team

Cal Poly, Team 27-93, Amido Spring 2010 Member of Cal Poly, Team 27-93, Amido Spring 2010

CPSU-AMIDO-S10S27G93

4 Members

26 Guides authored

1 Guide Comment

thanks for this crucial tuatorial >

Joe Gutierrez - Reply Share

Add Comment

View Statistics:

Past 24 Hours: 0

Past 7 Days: 8

Past 30 Days: 49

All Time: 10,818